Miniature Painting Challenge, Miniature Painting Tutorials, MPC #007
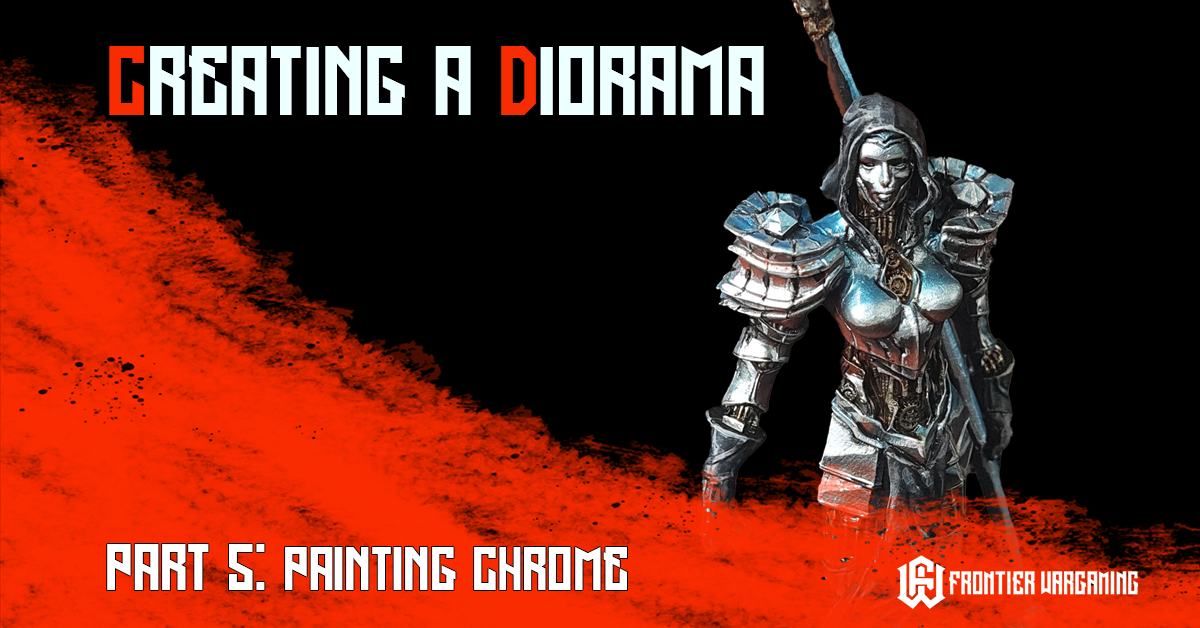
Creating a Diorama Pt. 5 – Painting Chrome
Mar
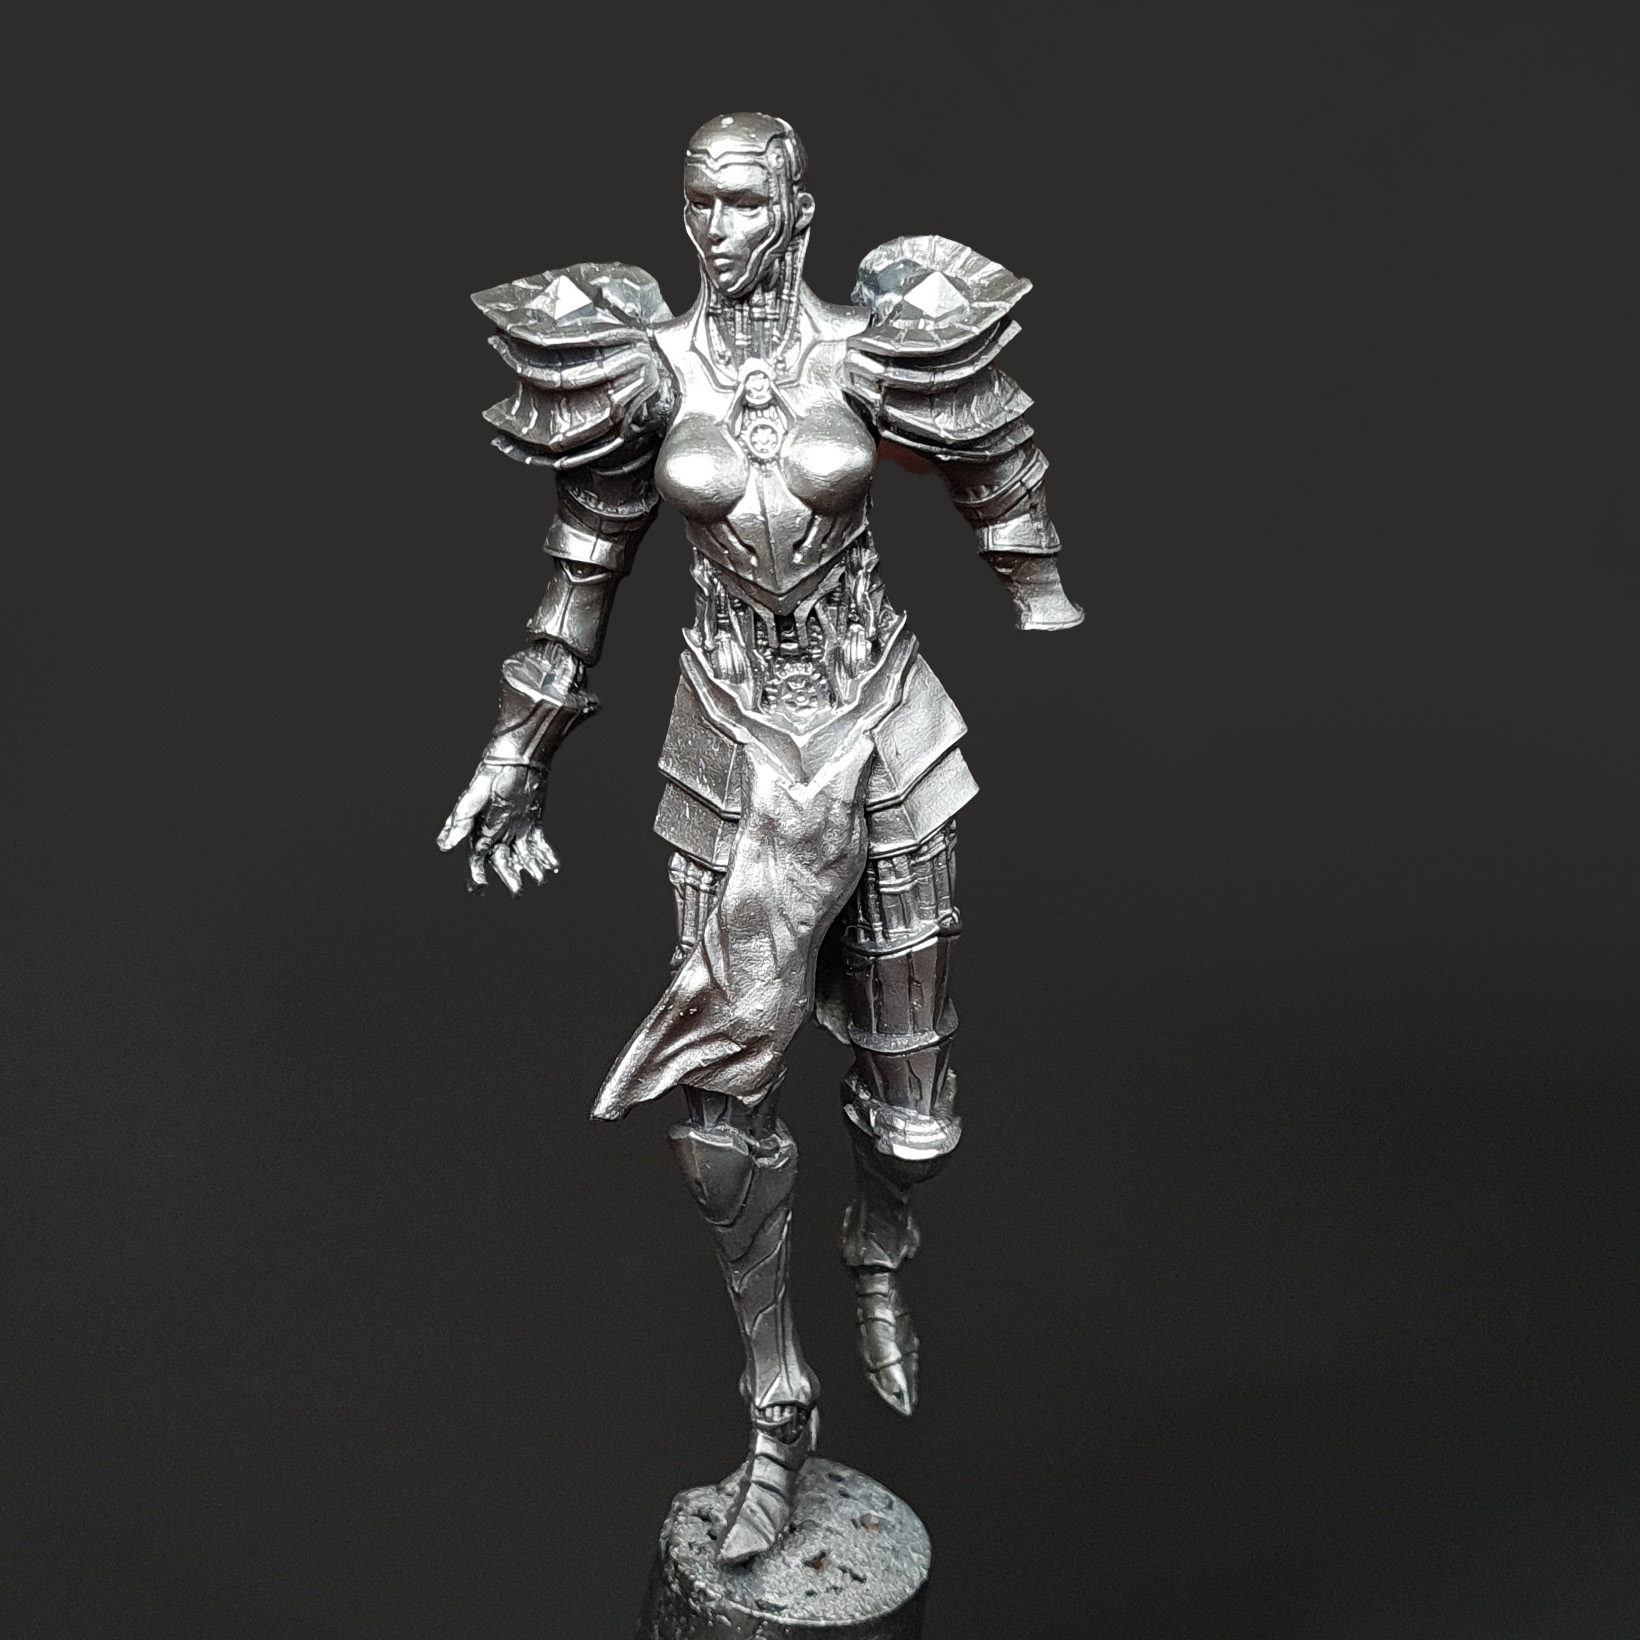
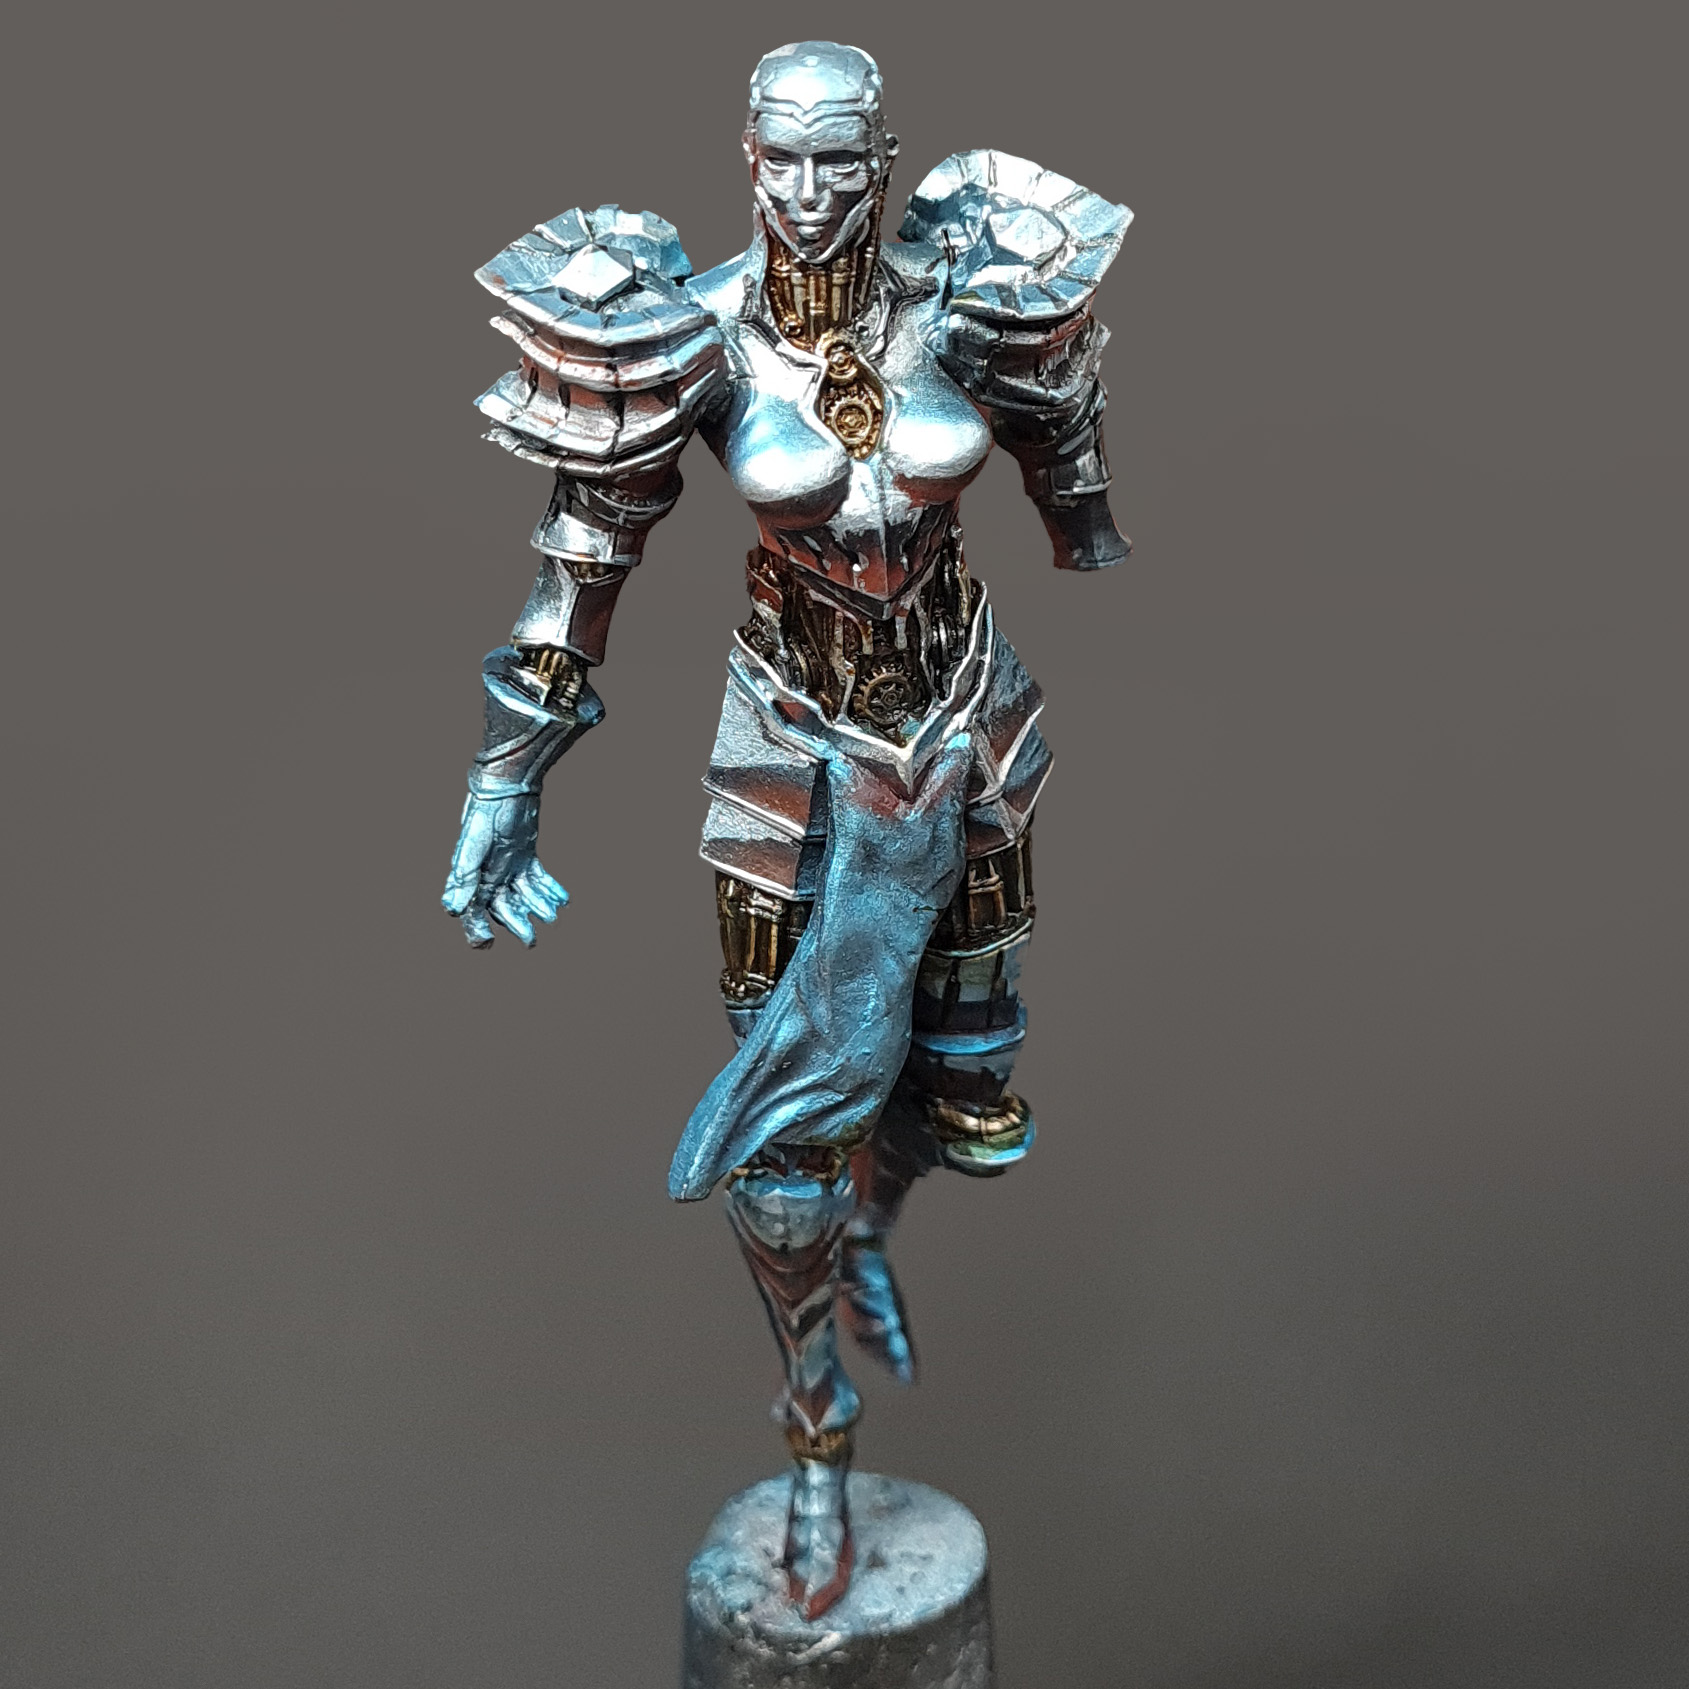
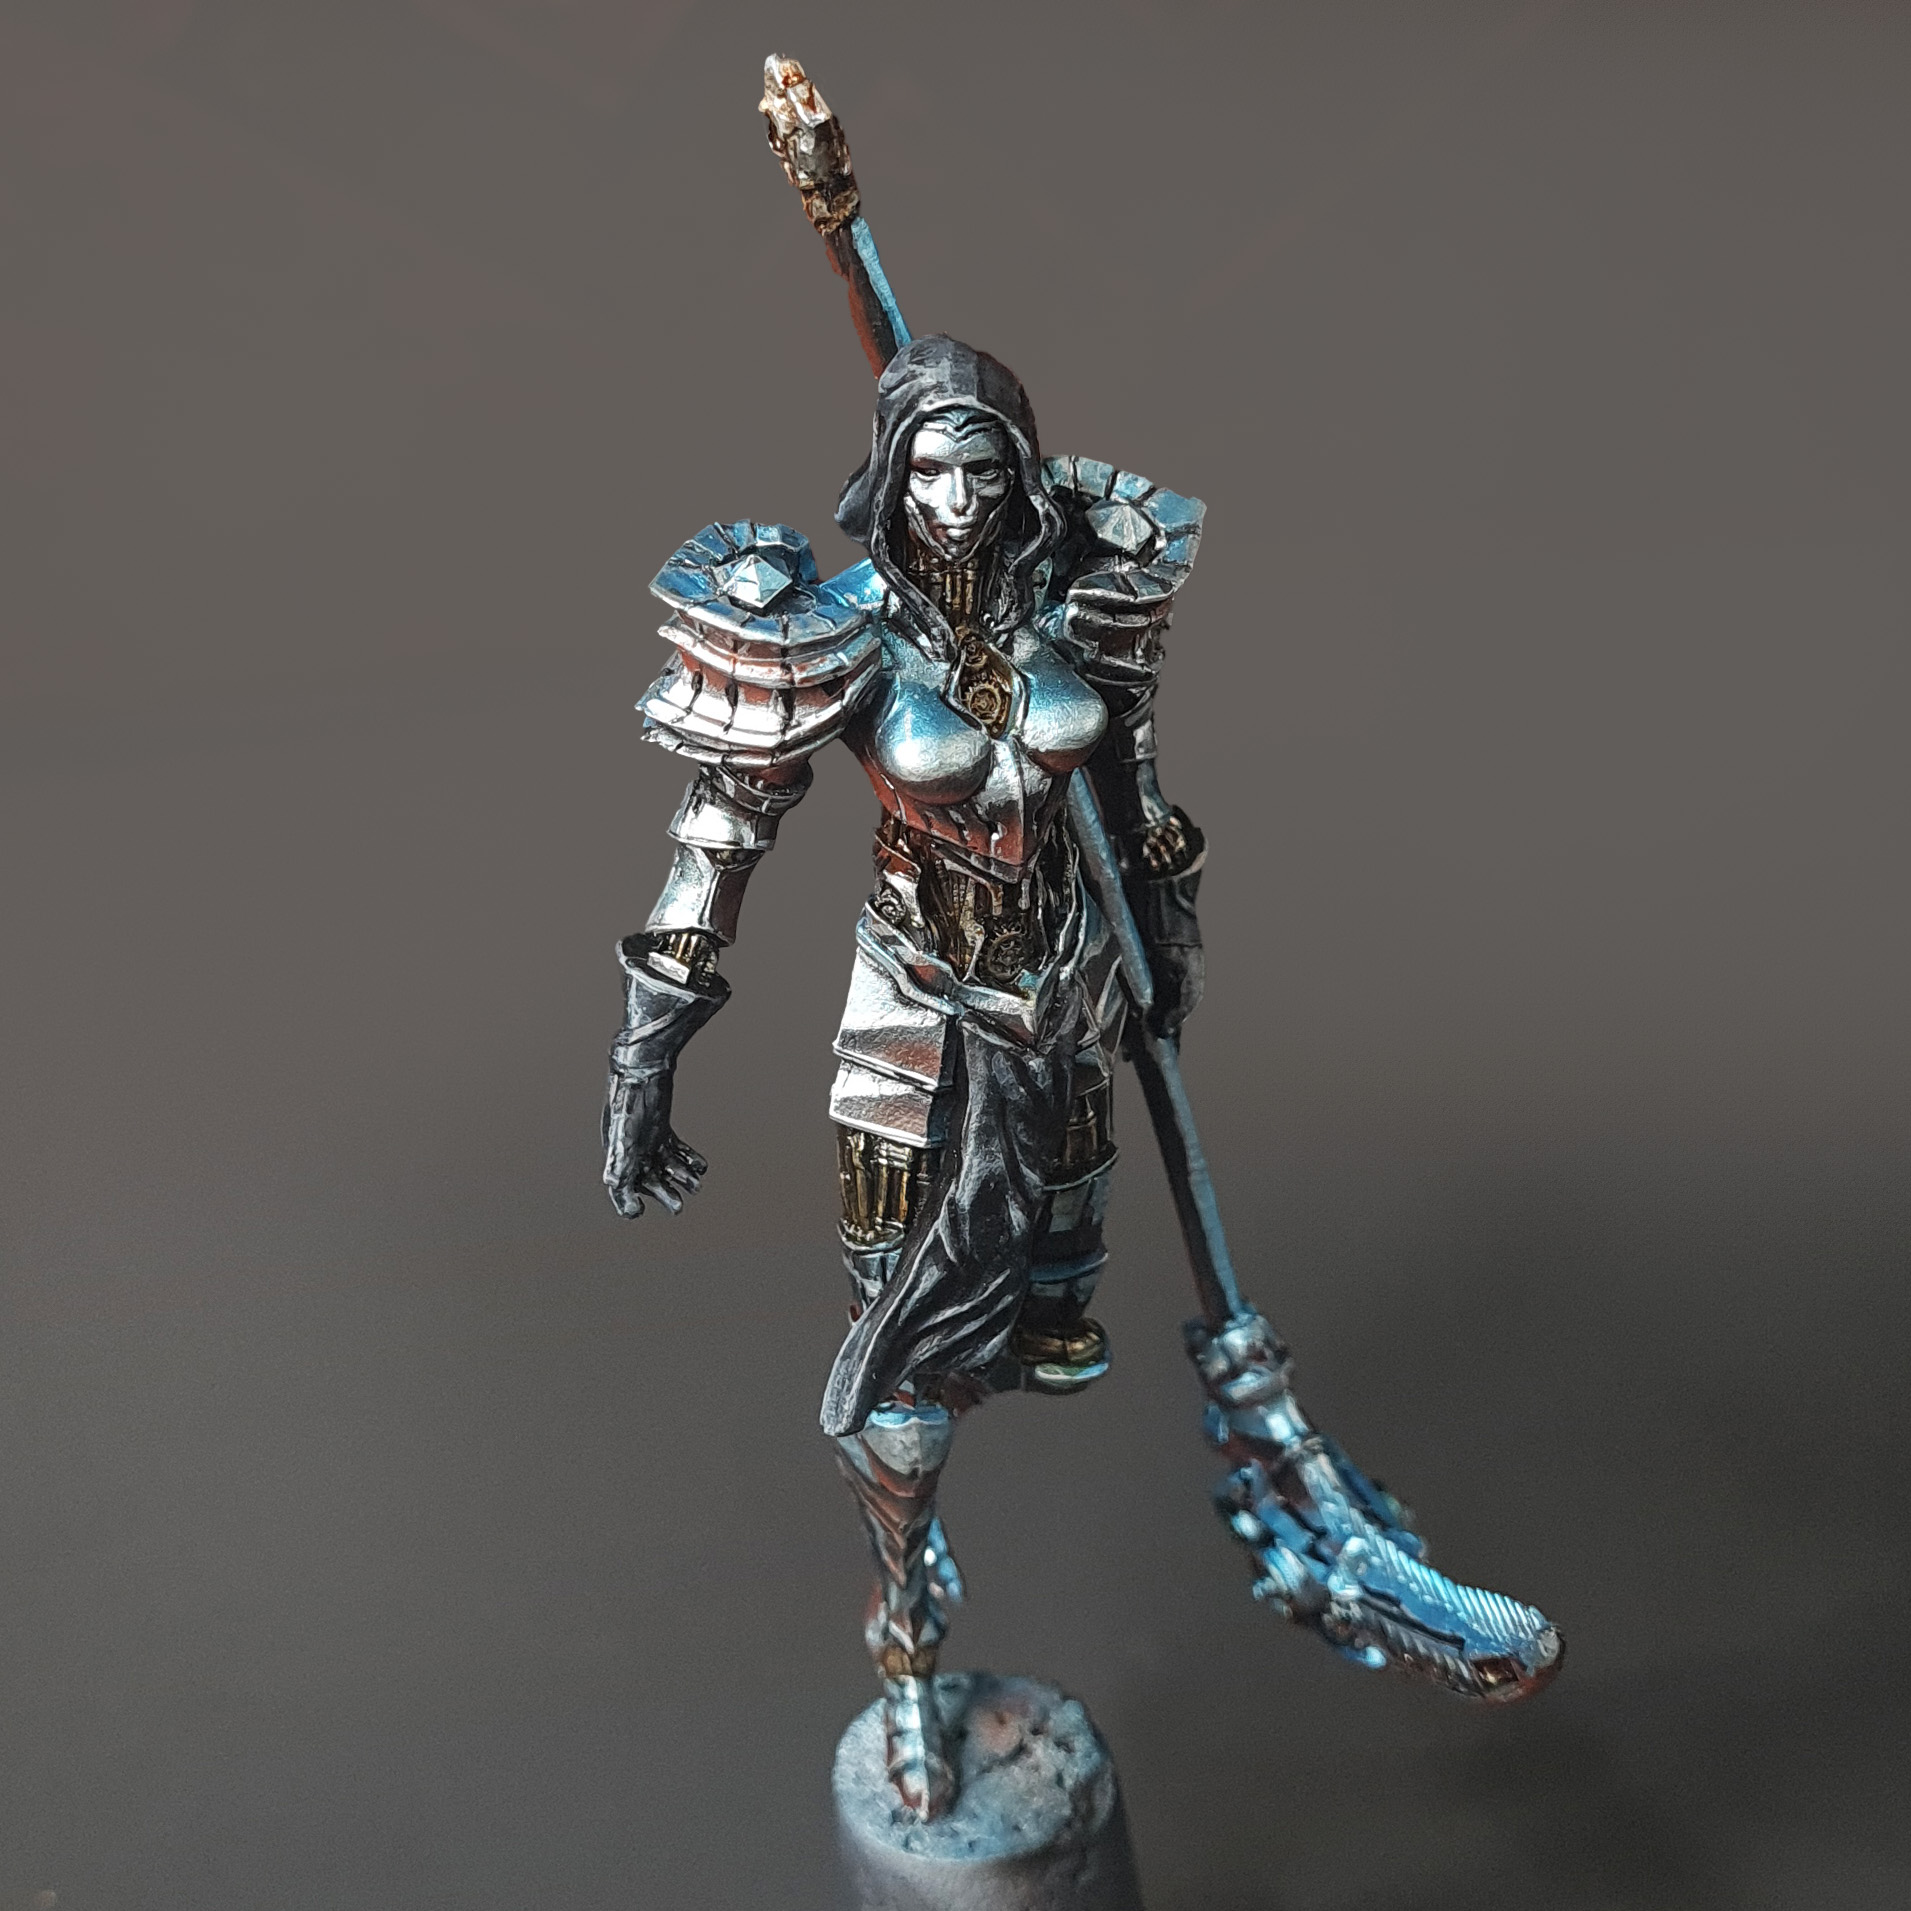
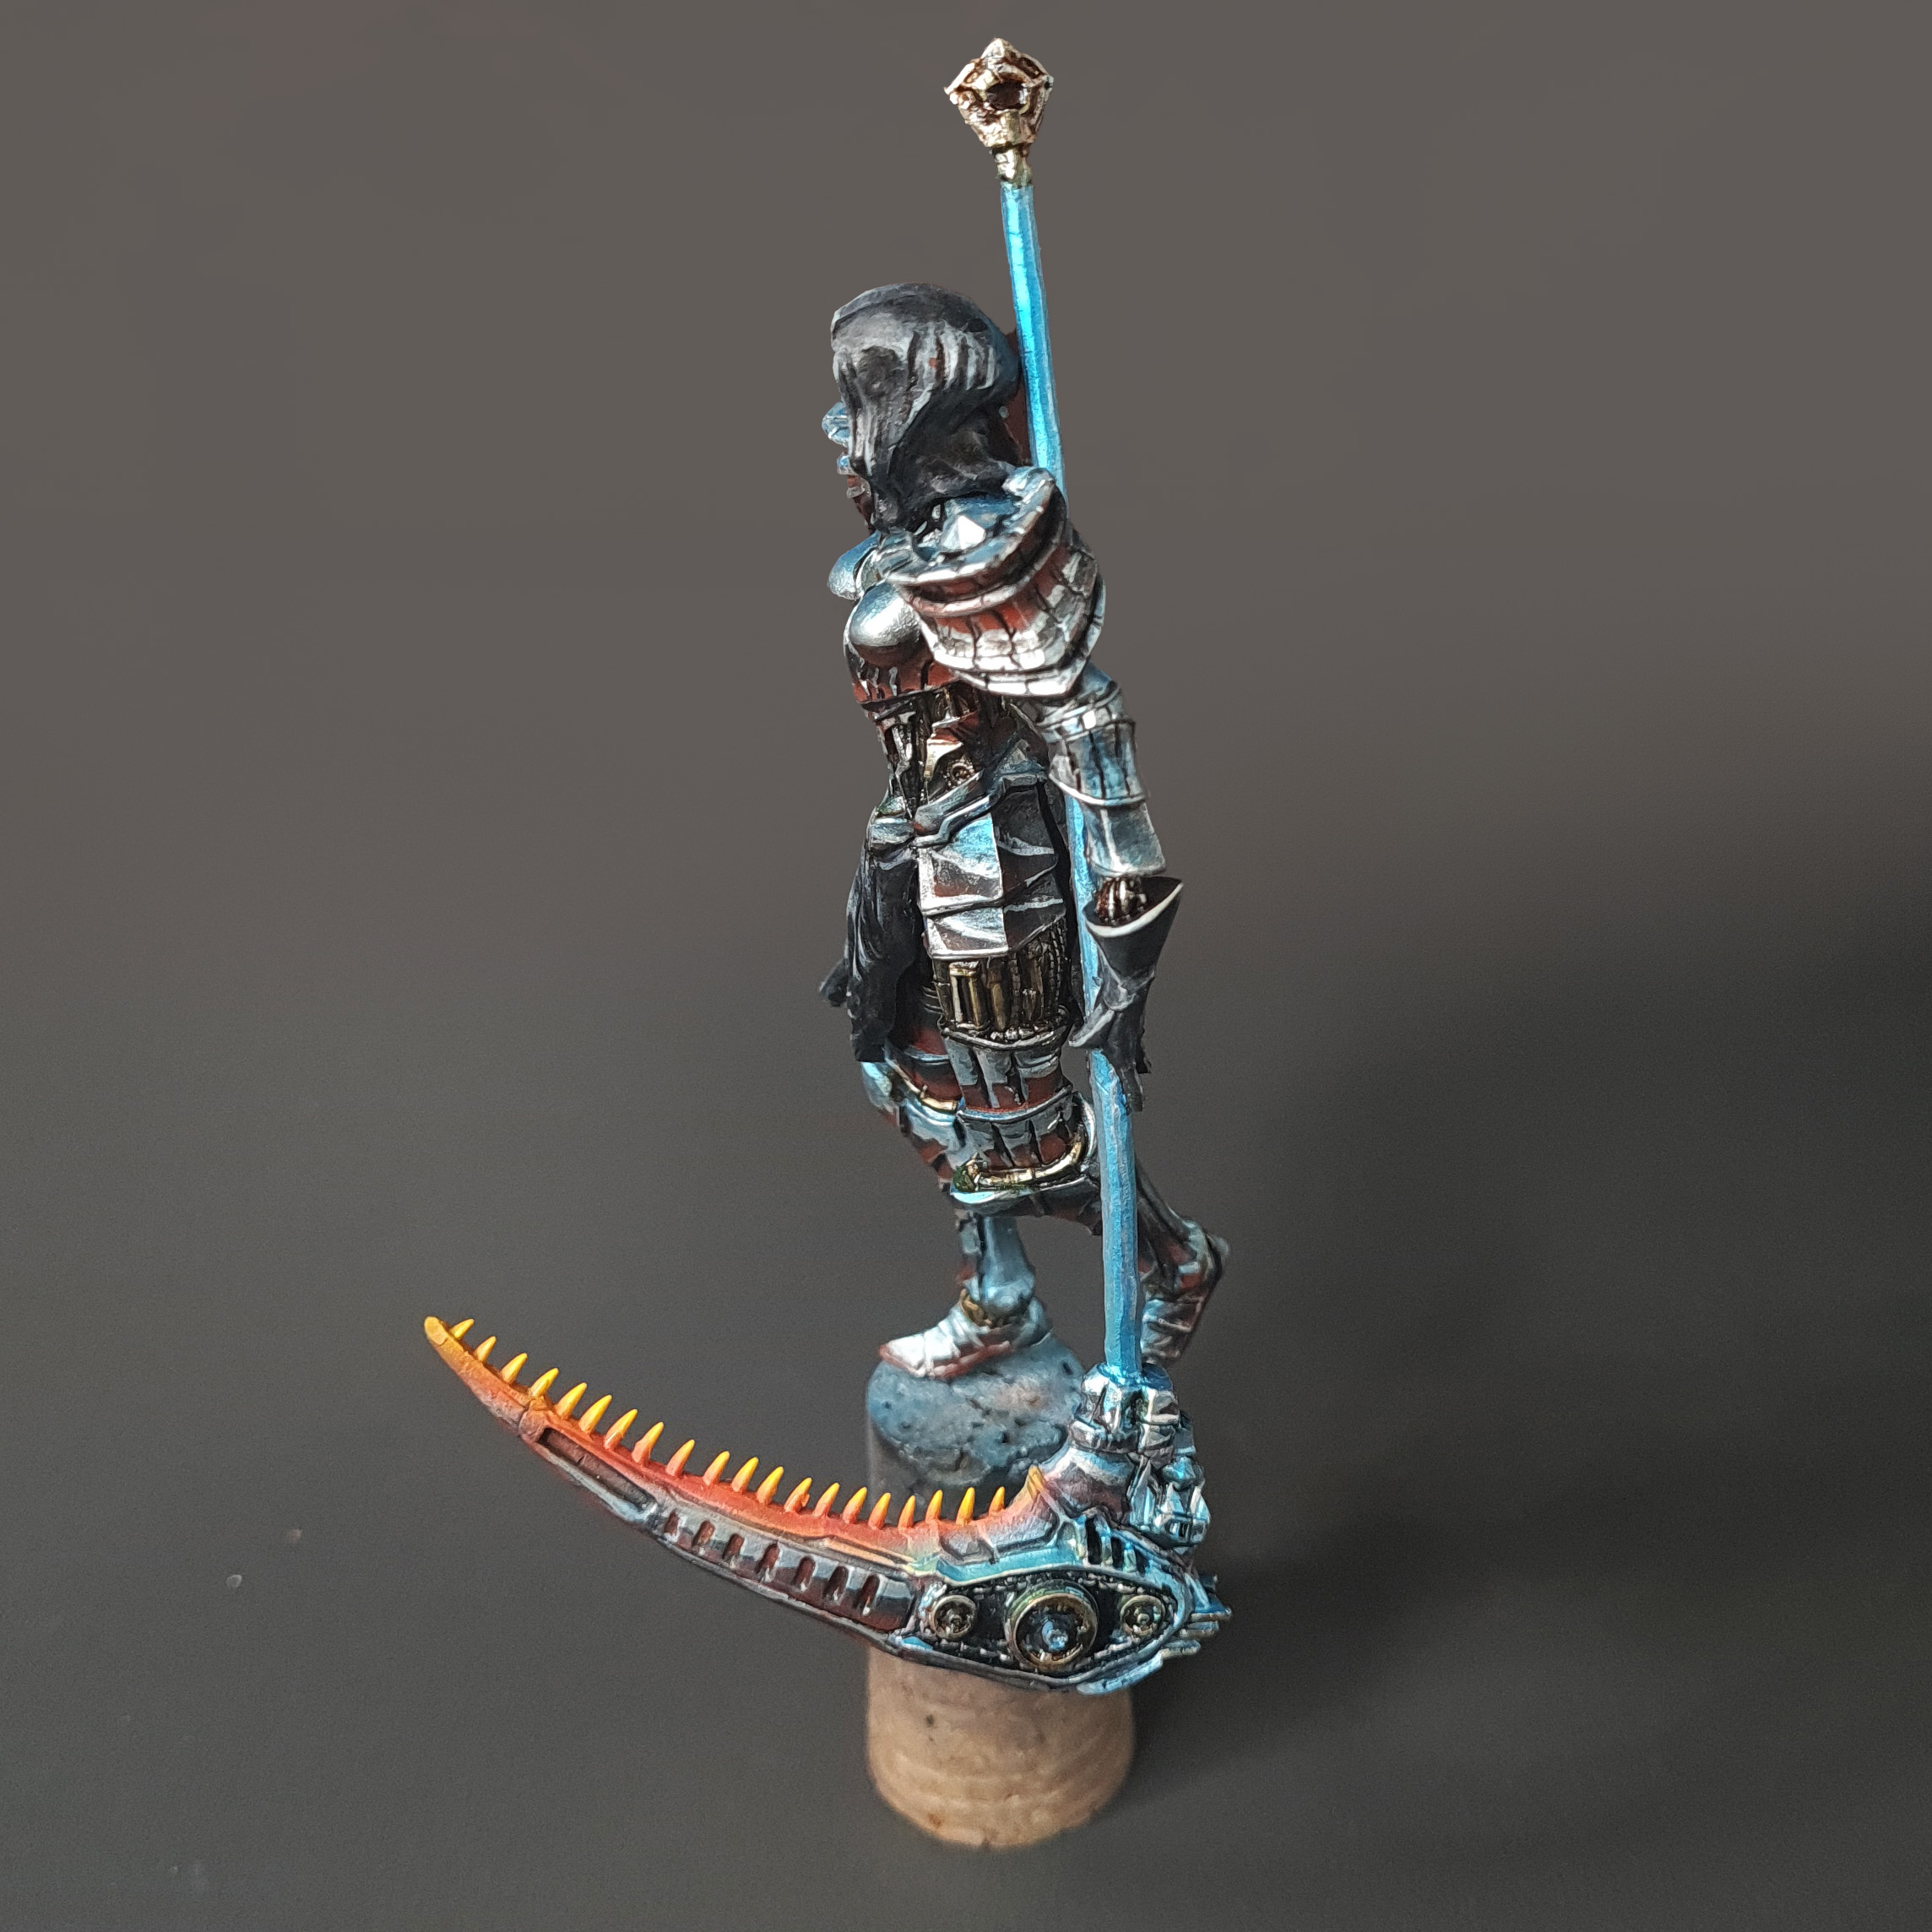
Hello, and welcome to the fifth installment of our “creating a diorama” series. In previous entries, we went over the creation of our diorama base and painted models that helped us set the scene. Now it’s time to give the spotlight to the central piece of our diorama- The Chrome Maiden.
Non Metallic or True Metallic Metal?
Figuring out how to paint the chrome effect was the first challenge. NMM is a great technique to use for it. But it only looks good from a certain angle and takes a lot of time and practice to pull off successfully. Not to mention the time constraints to finish this project. Metallics pose a different challenge since chrome paint doesn’t look like true chrome at this scale and won’t capture all the reflections correctly. Then again, why stick to just one technique?
With this thought, It was decided to combine the best parts of both methods. Use metallics for the upper part of the model, and paint all the reflections from the ground manually.
The Basics of Chrome

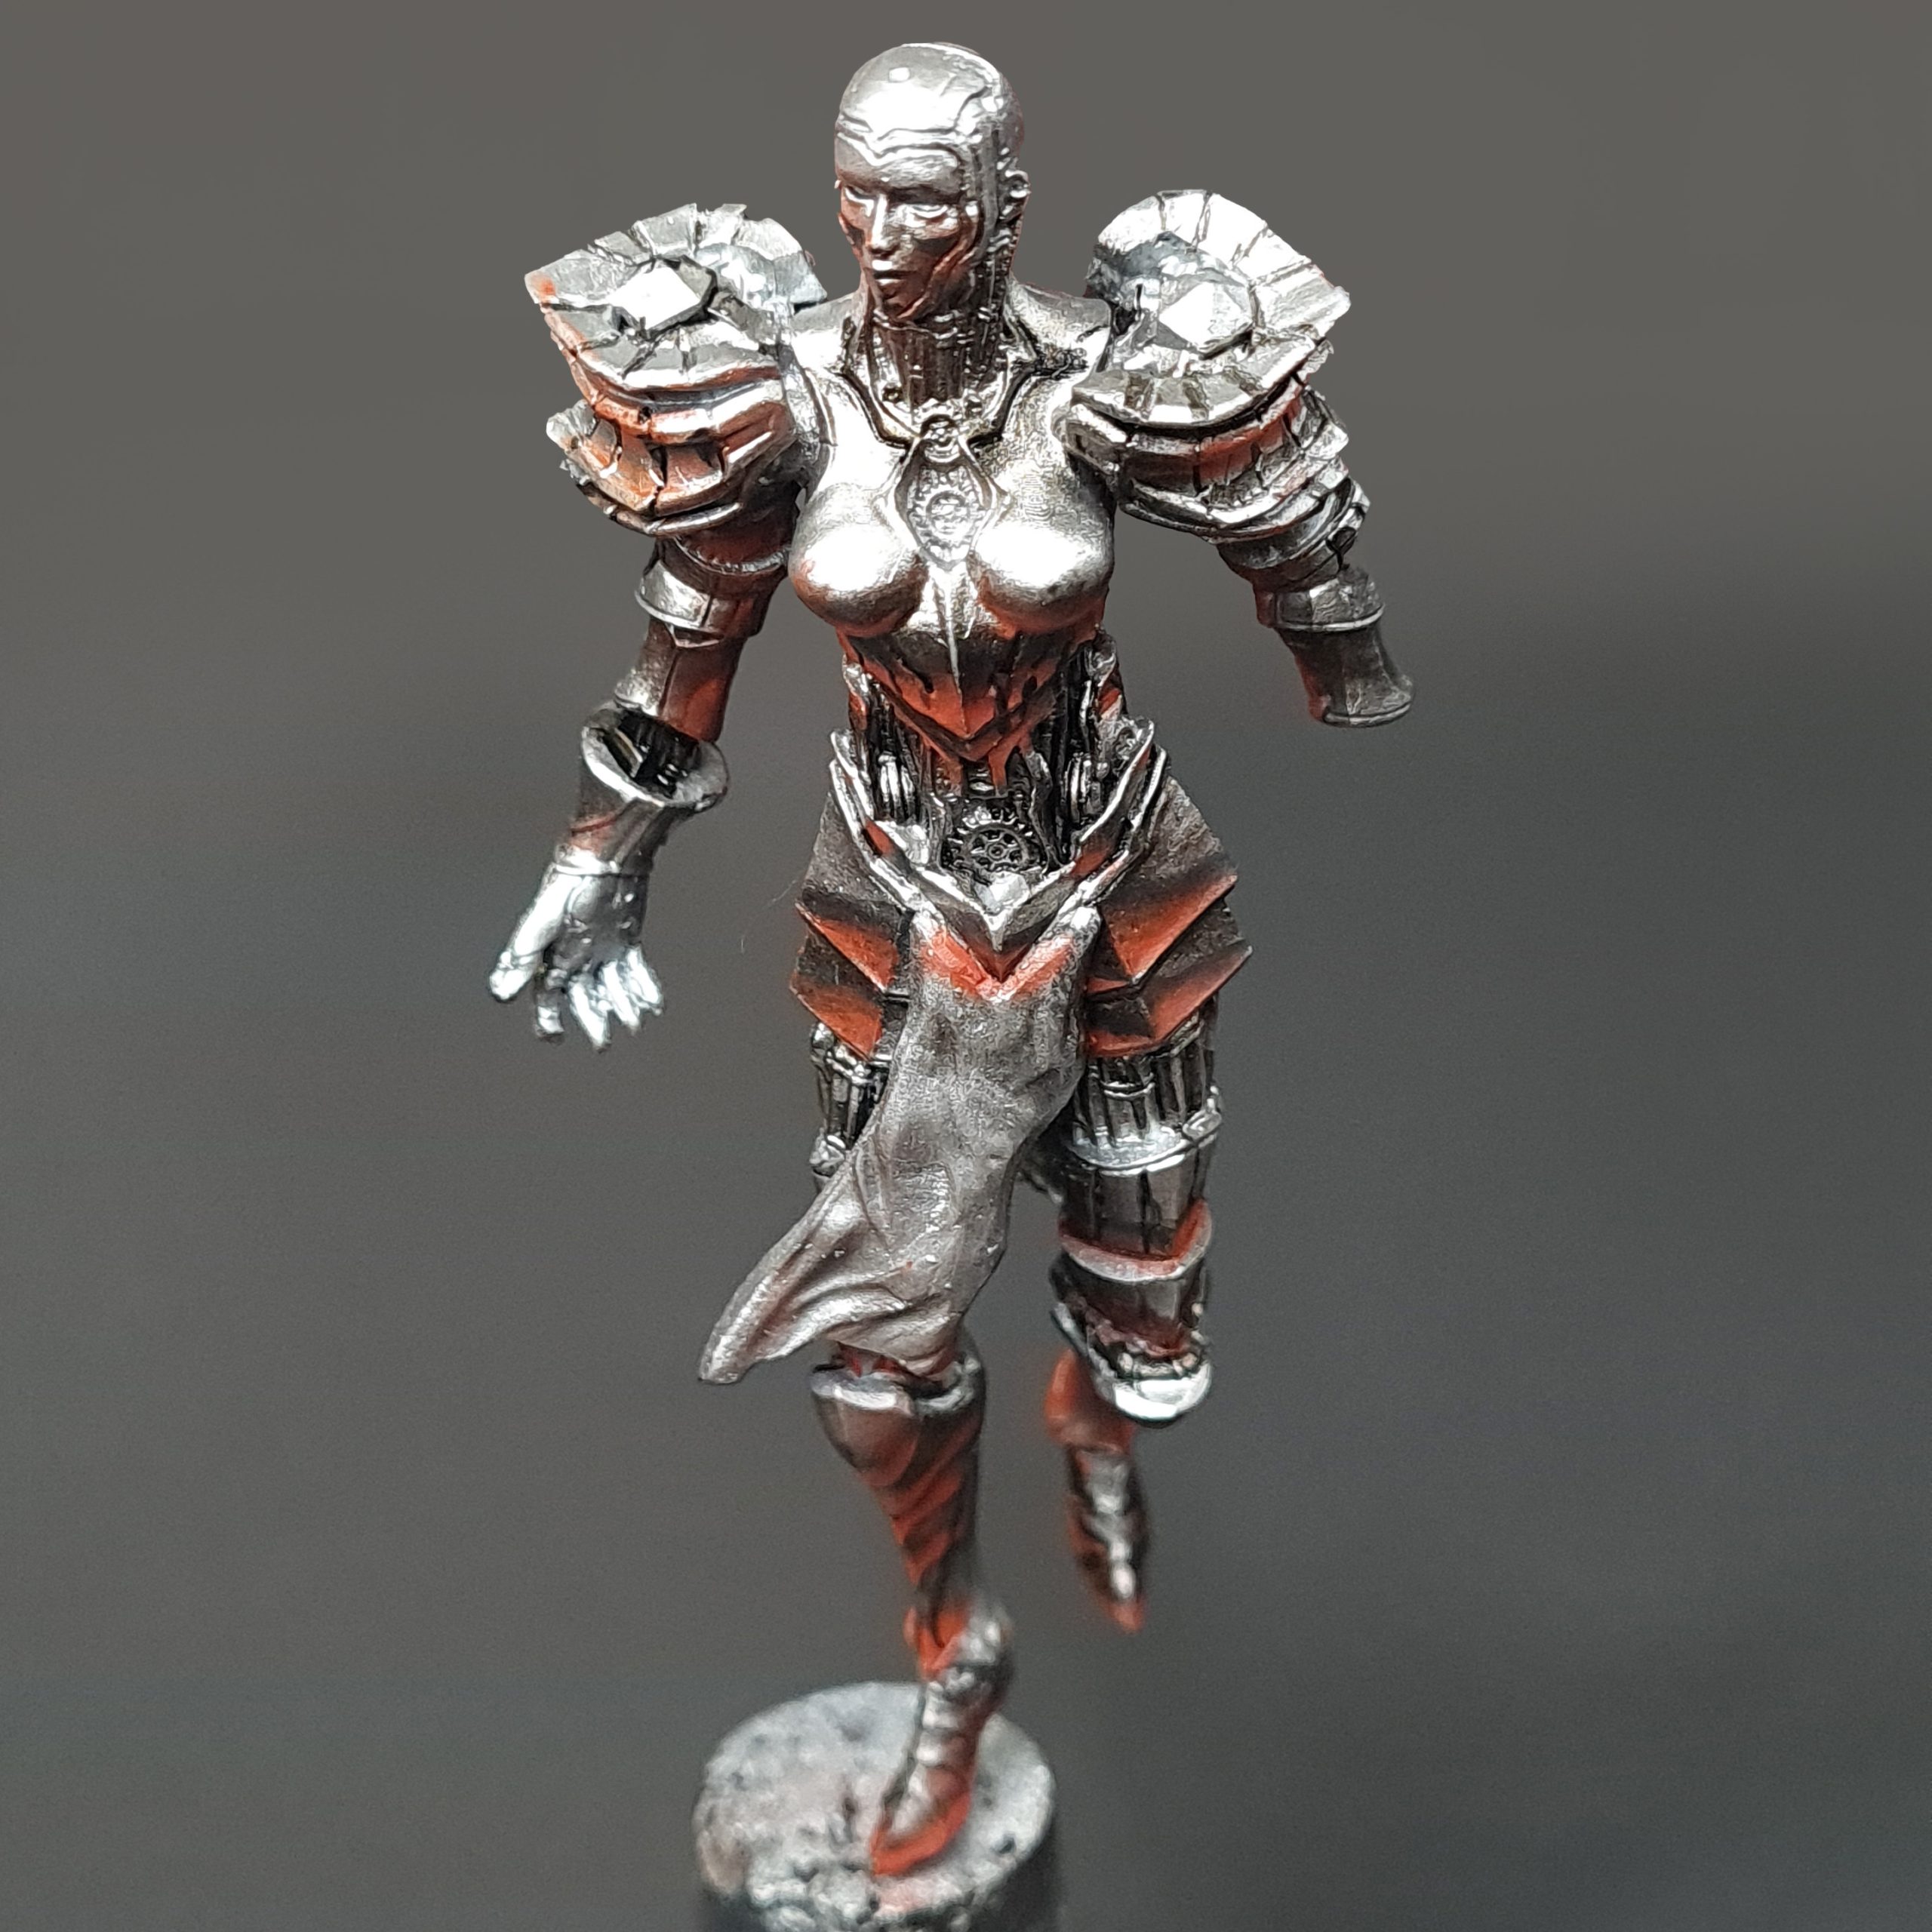
When painting chrome, it’s important to keep in mind that this surface is highly reflective, capable of mirroring its environment and distorting reflections according to its shape. This means that the chrome will reflect both the skyline and the ground, meeting at the horizon line. The skyline is visible as a gradient from blue to white towards the horizon, while the ground color will vary depending on the surrounding elements. In our scenario, the ground color will shift from black to brown as it moves away from the horizon line. The amount reflected is determined by the surface angle. A surface angled toward the ground will reflect more ground than the sky, while a surface angled upwards will reflect more sky than the ground. A lot of references were used for this when painting the reflections to help pull this off.
Painting Chrome
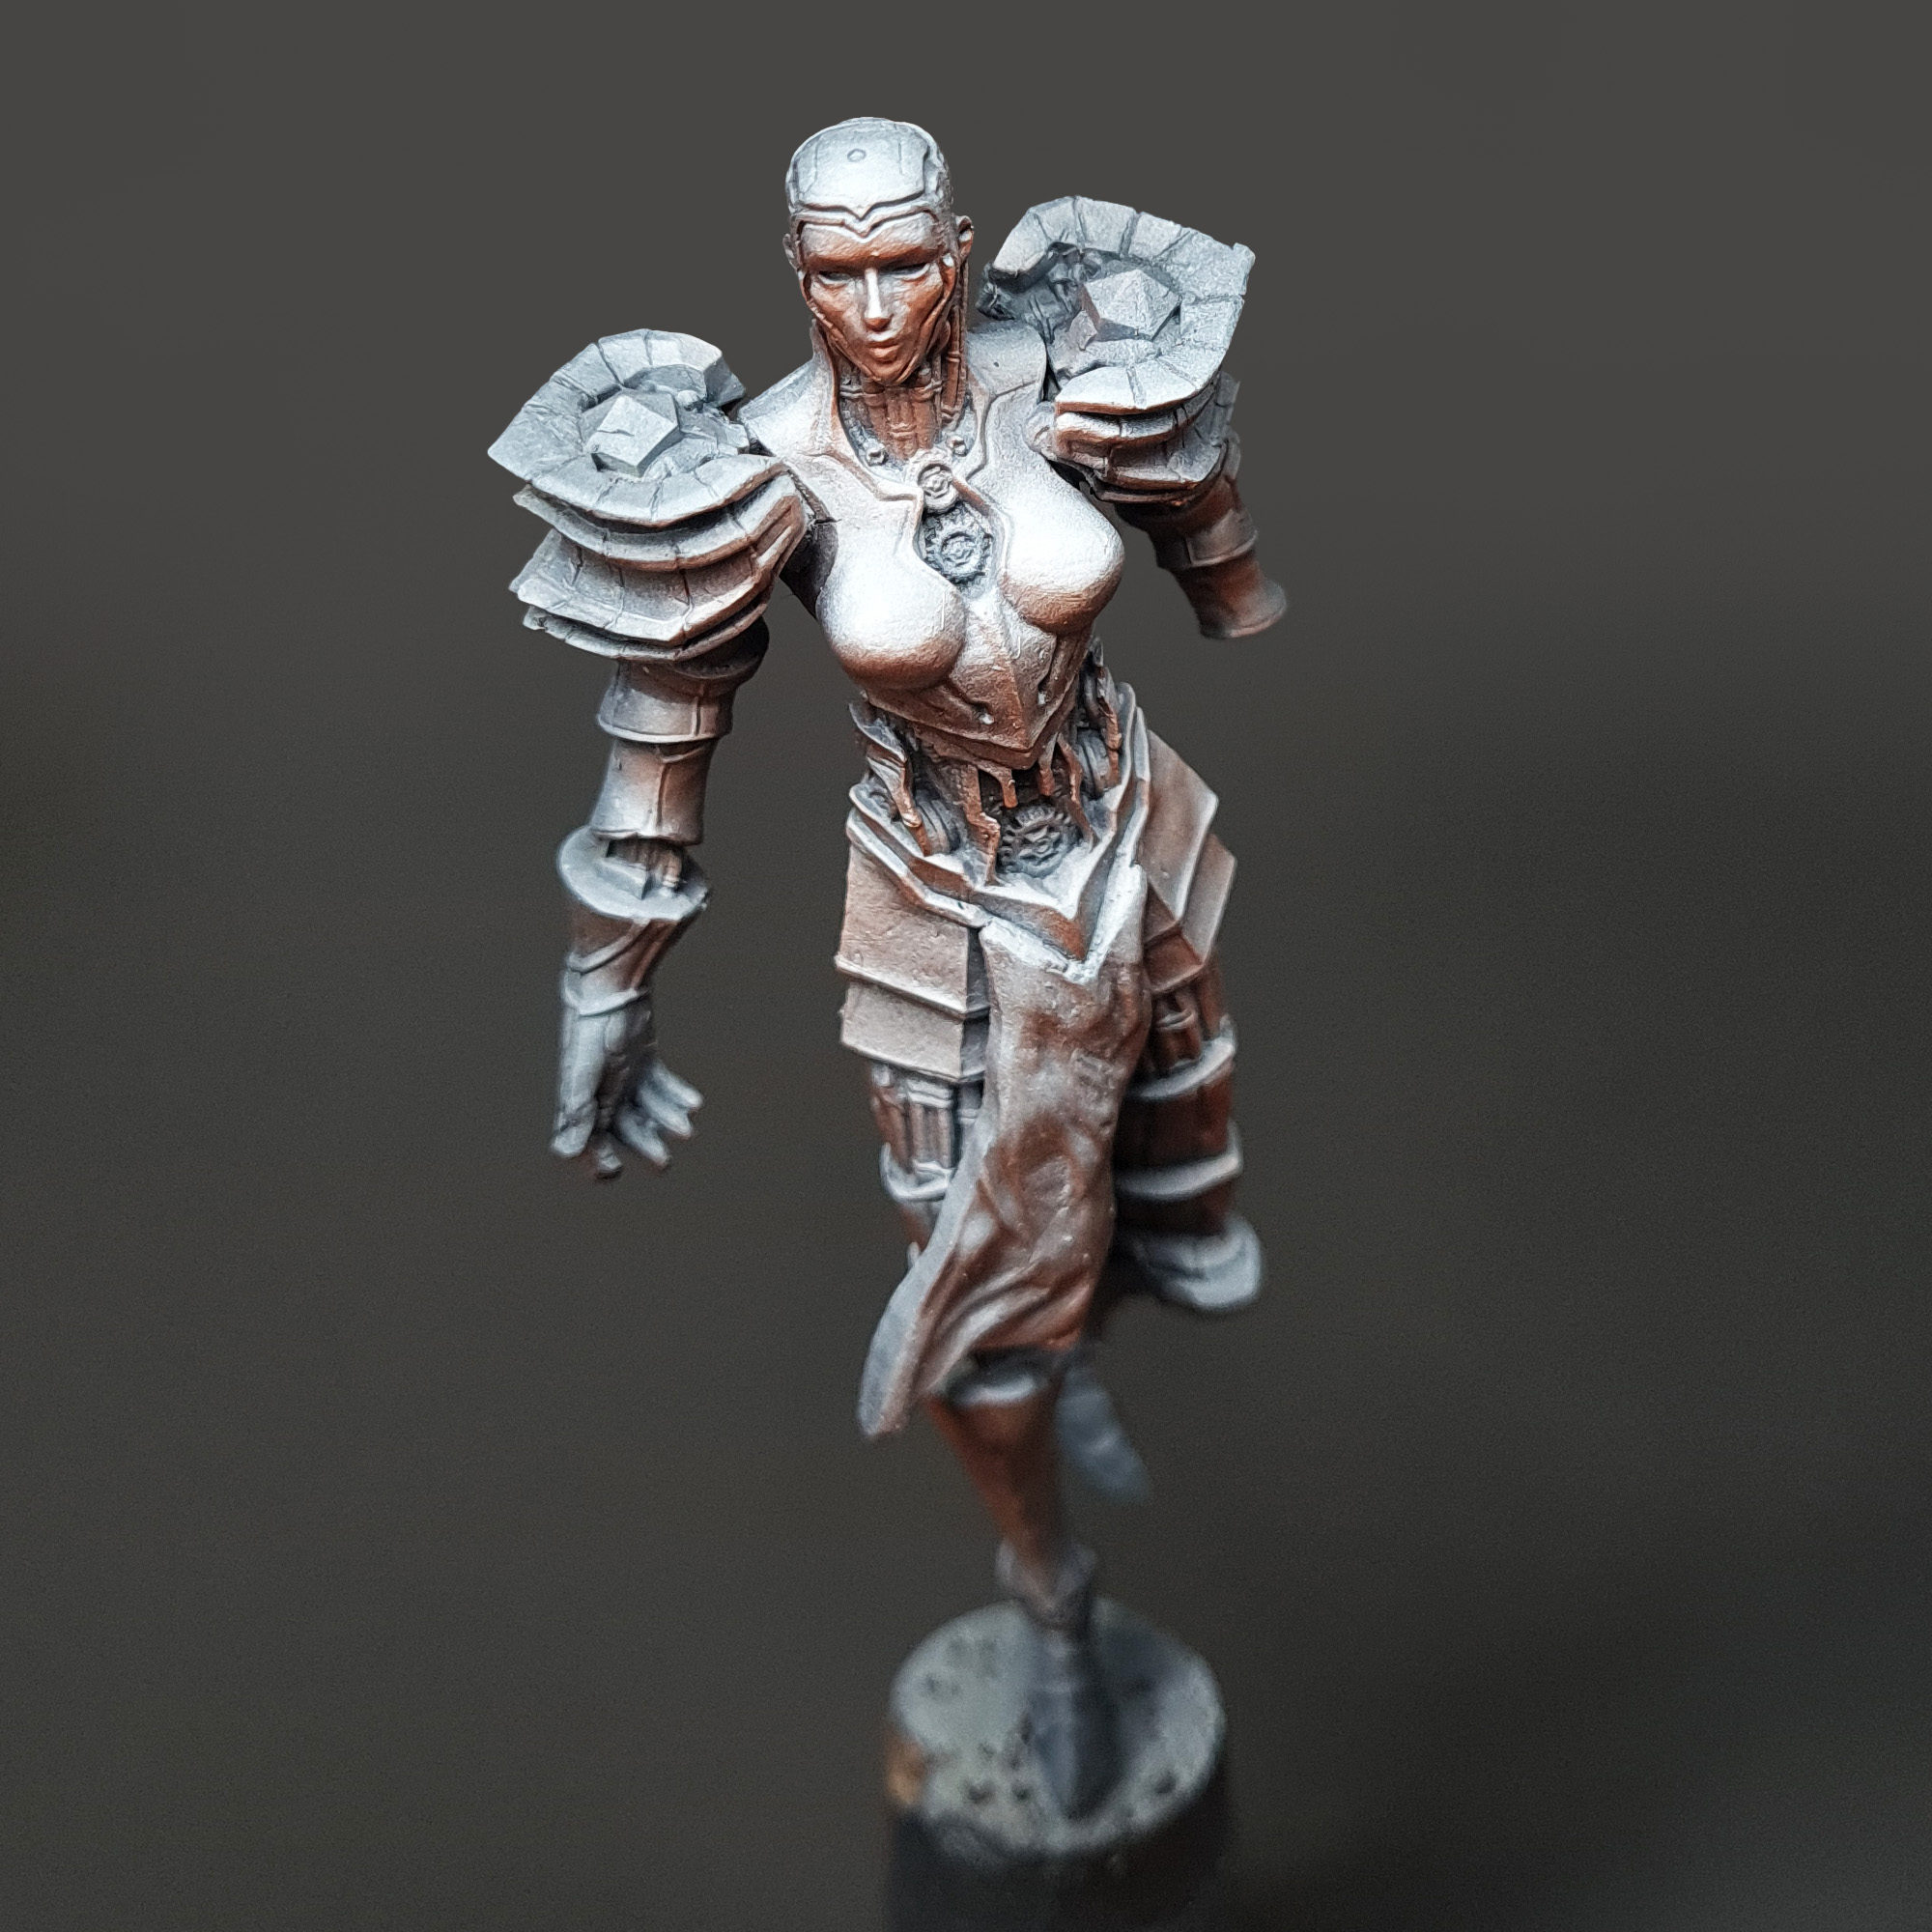
- The entire model was primed brown. White was airbrushed from a 45-degree angle to help understand where the reflections go.

- Vallejo Air Silver was sprayed at a 45-degree angle over the entire model.
- Any surface facing the ground was split roughly in half. Vallejo Black and Brown paints have been wet blended to create the ground reflection gradient.
- Tallasar Blue Contrast was airbrushed directly from above to create the skyline reflection.
- Vallejo Air Chrome was used to paint edge highlights and refine some of the skylines.

Final Touches
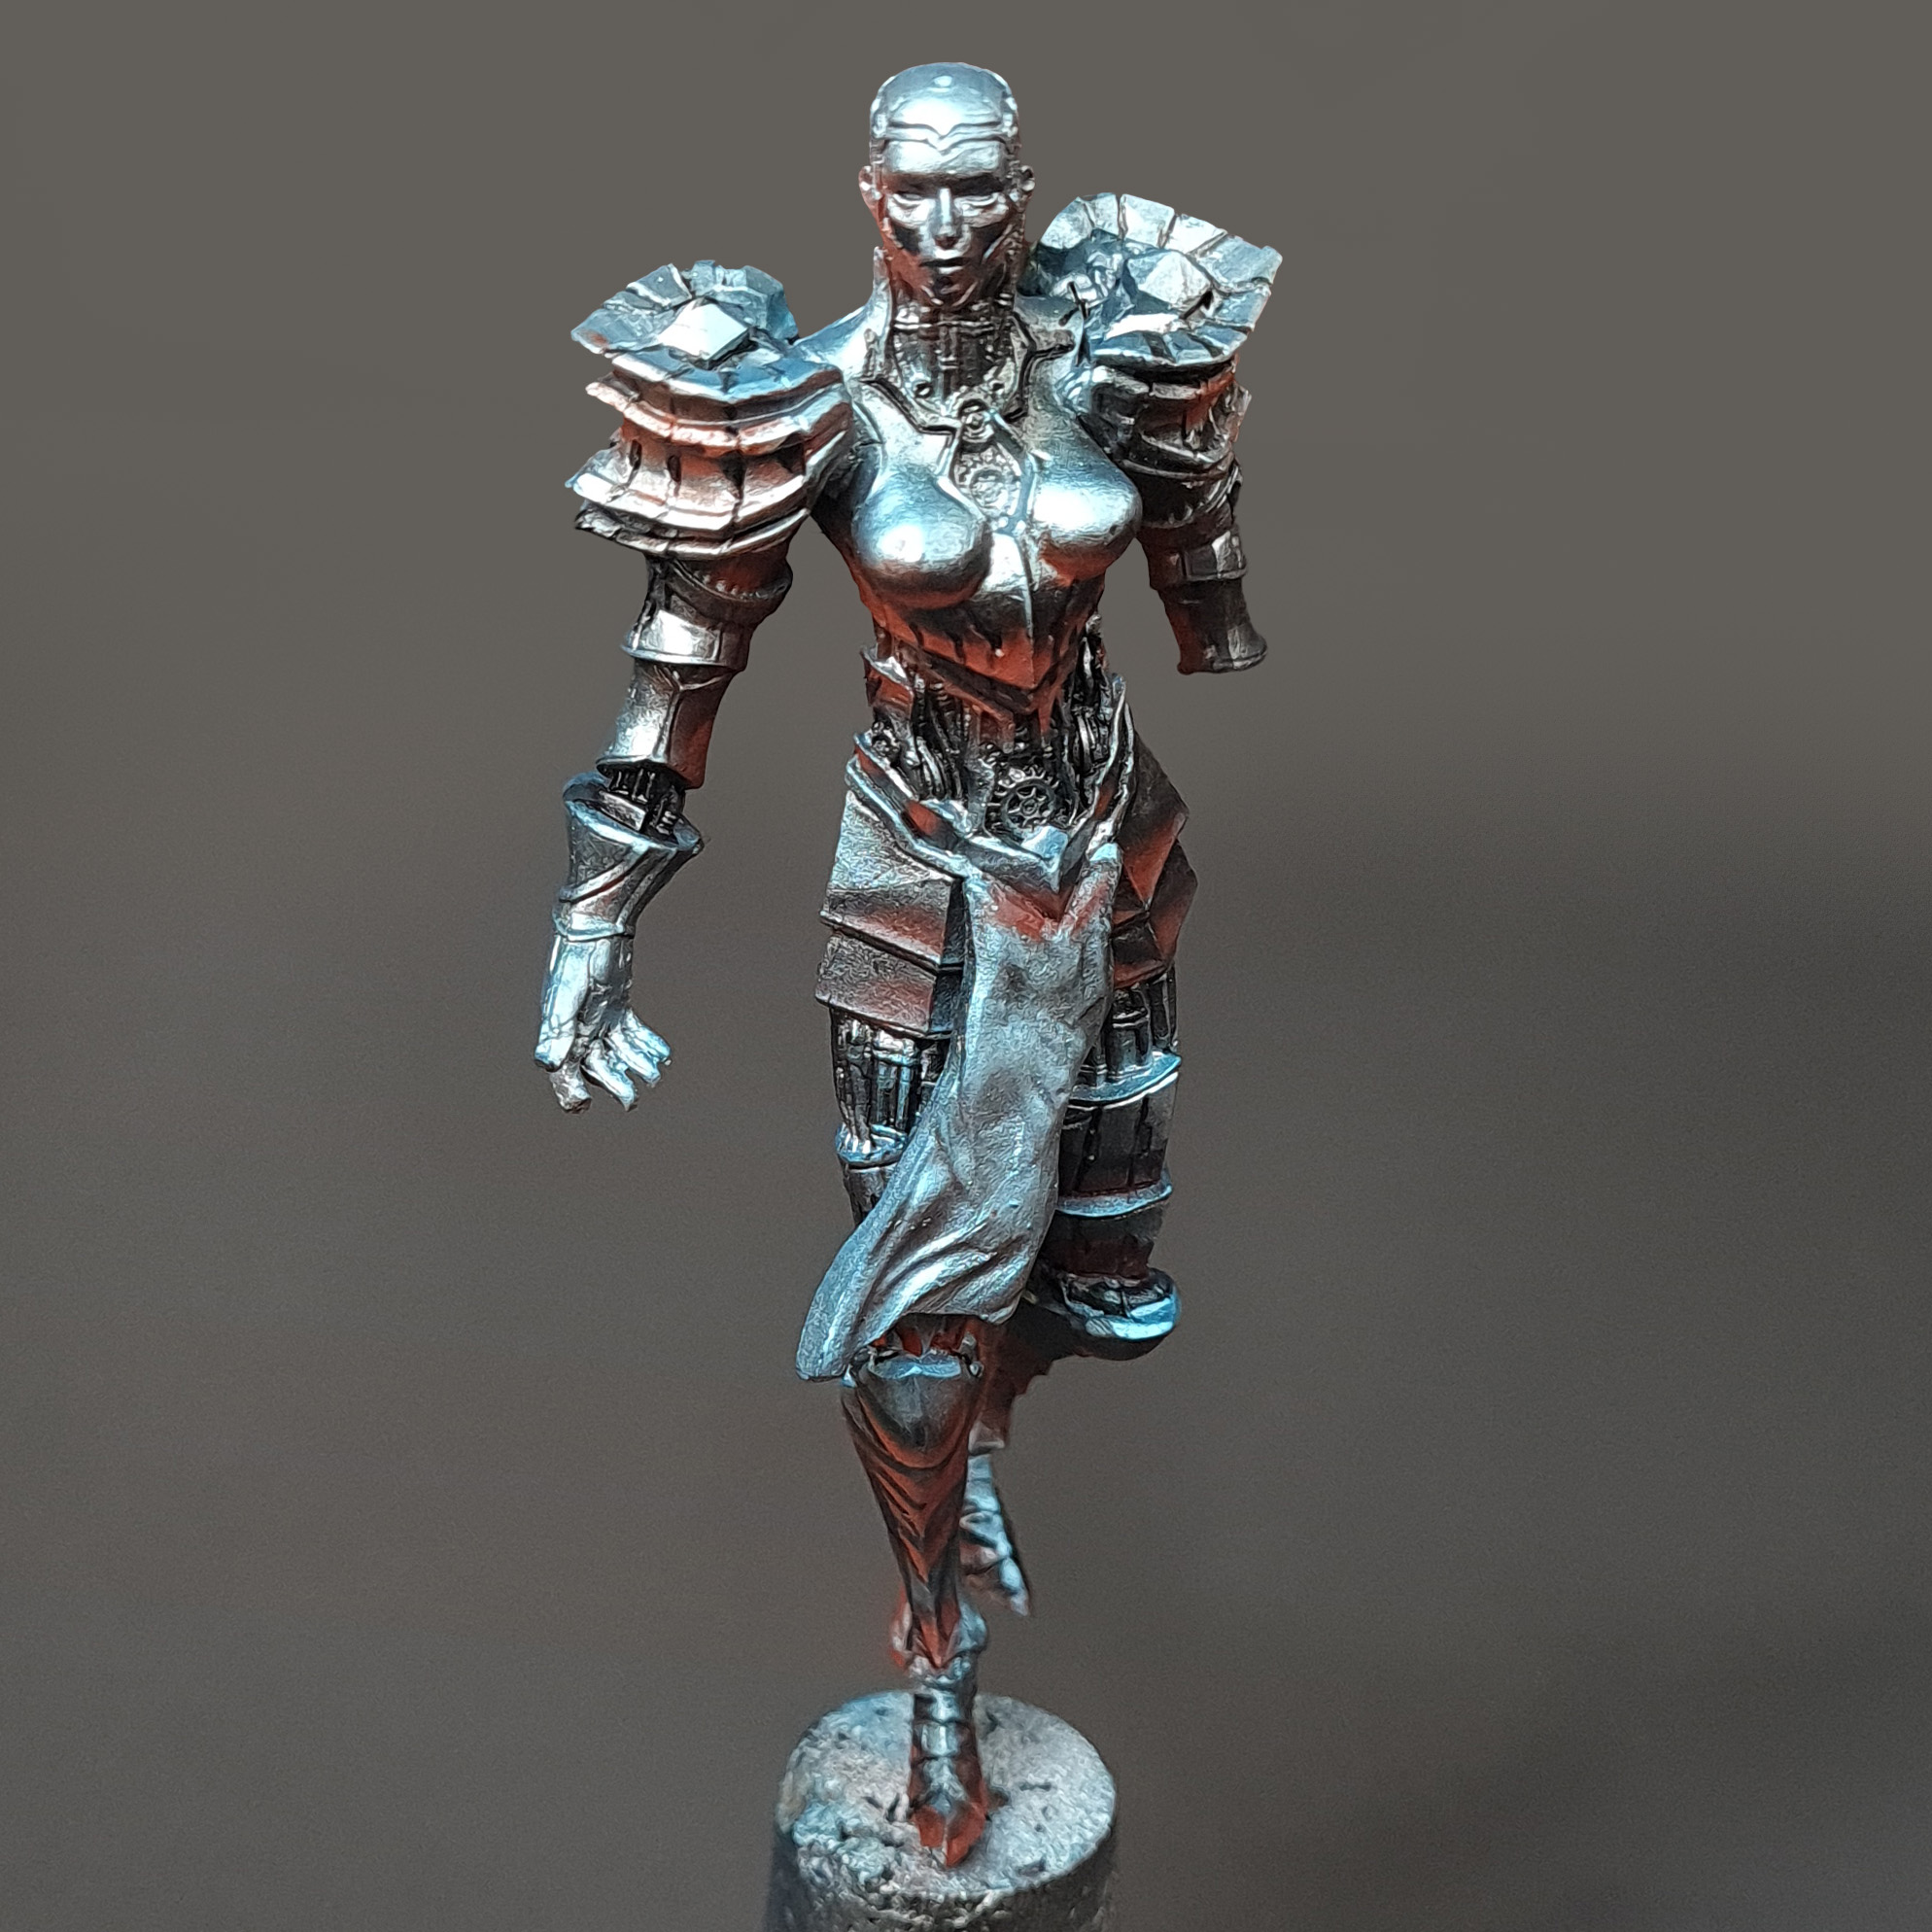
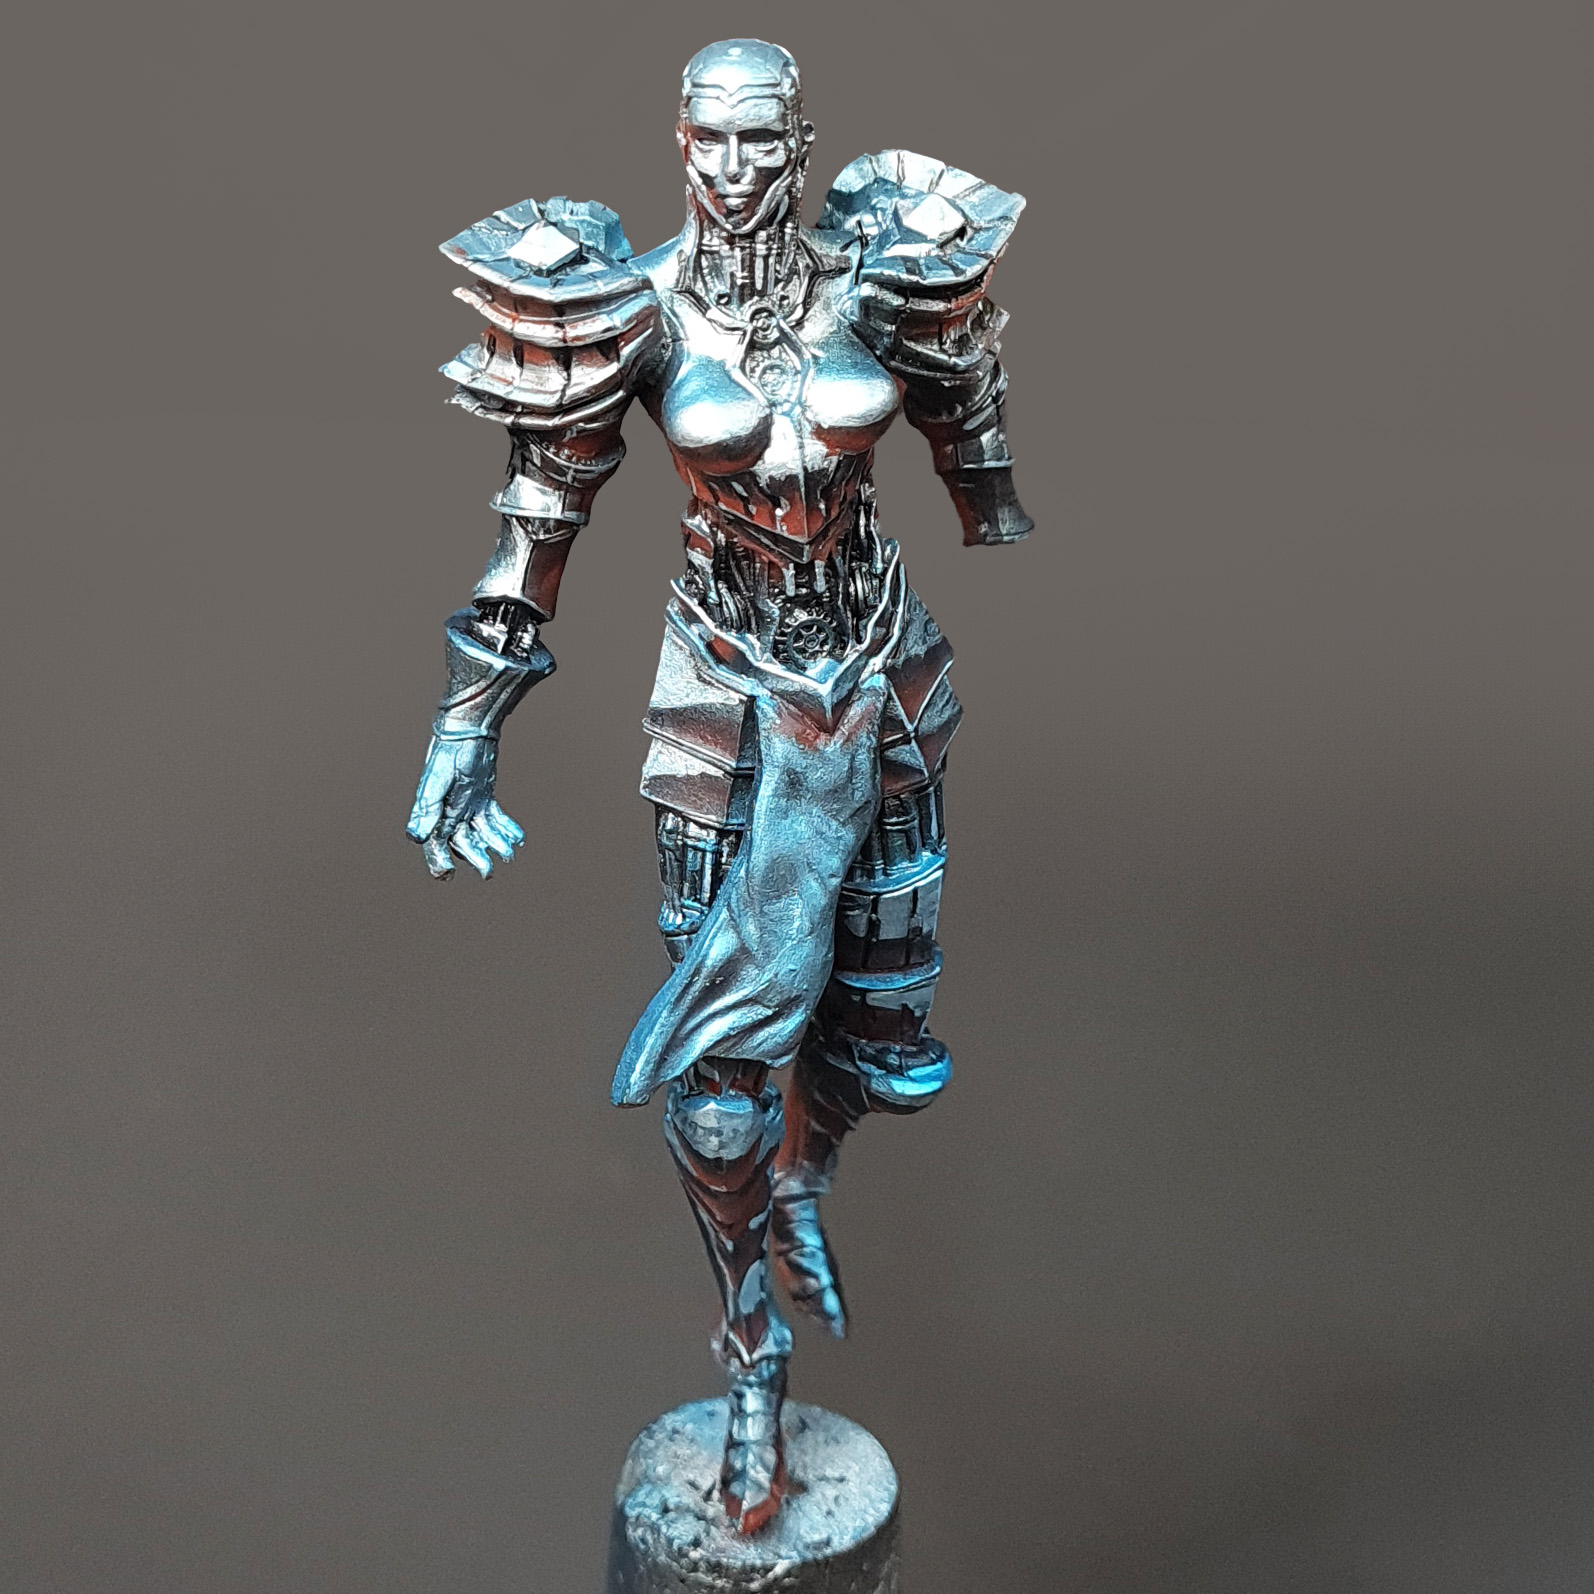
- All the secondary details received several passes of sepia ink to distinguish them.
- The hood, glove, and loincloth were basecoated black.
- Grey was used to paint the final highlights on the fabric.
- The teeth on the scythe were airbrushed yellow, followed by red.

Final Assembly
With all the models painted, we were finally able to assemble our diorama with ease by simply gluing everything in place. While we made a few touch-ups here and there, we felt like it was missing that certain something. To achieve the desired effect, we added smoke as a final touch. Using aquarium filter floss, we ripped and shaped it before airbrushing it with shades of yellow, black, and blue. Once the smoke was glued in place, the diorama was finally complete, and we eagerly moved on to the photo shoot.
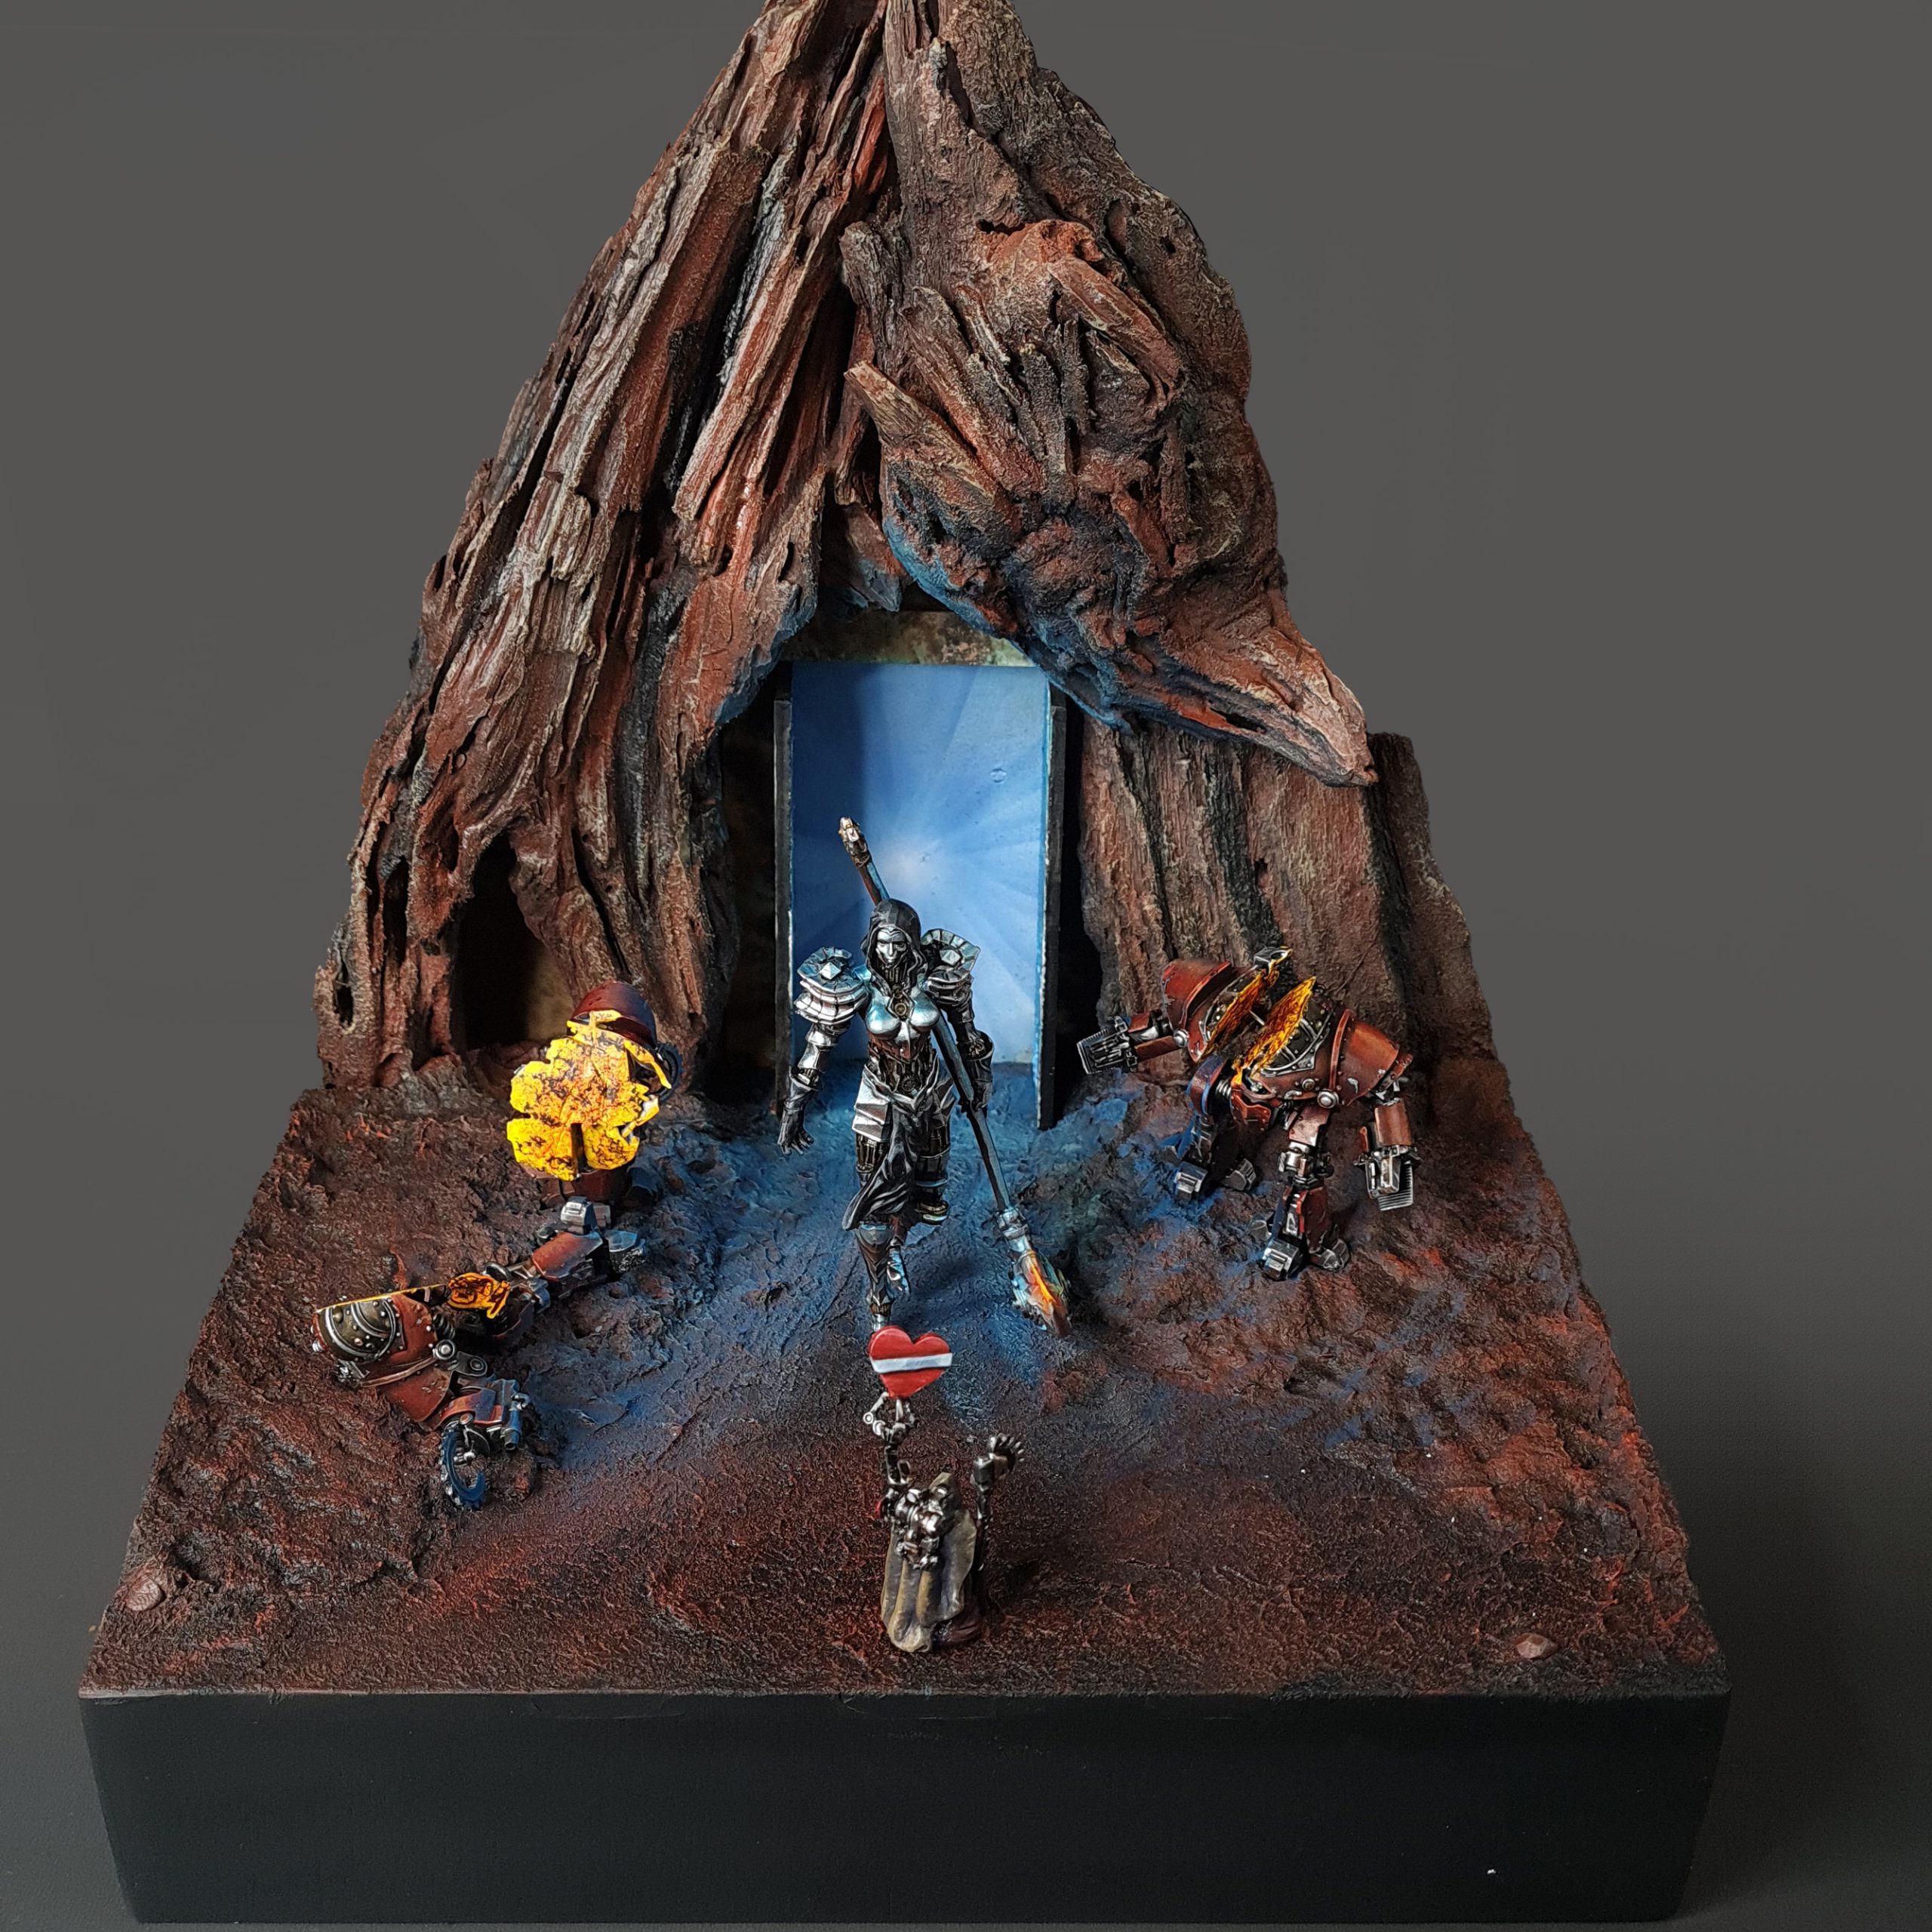

Thank you for joining us on this journey, and join us next time for the final gallery and beauty shots.