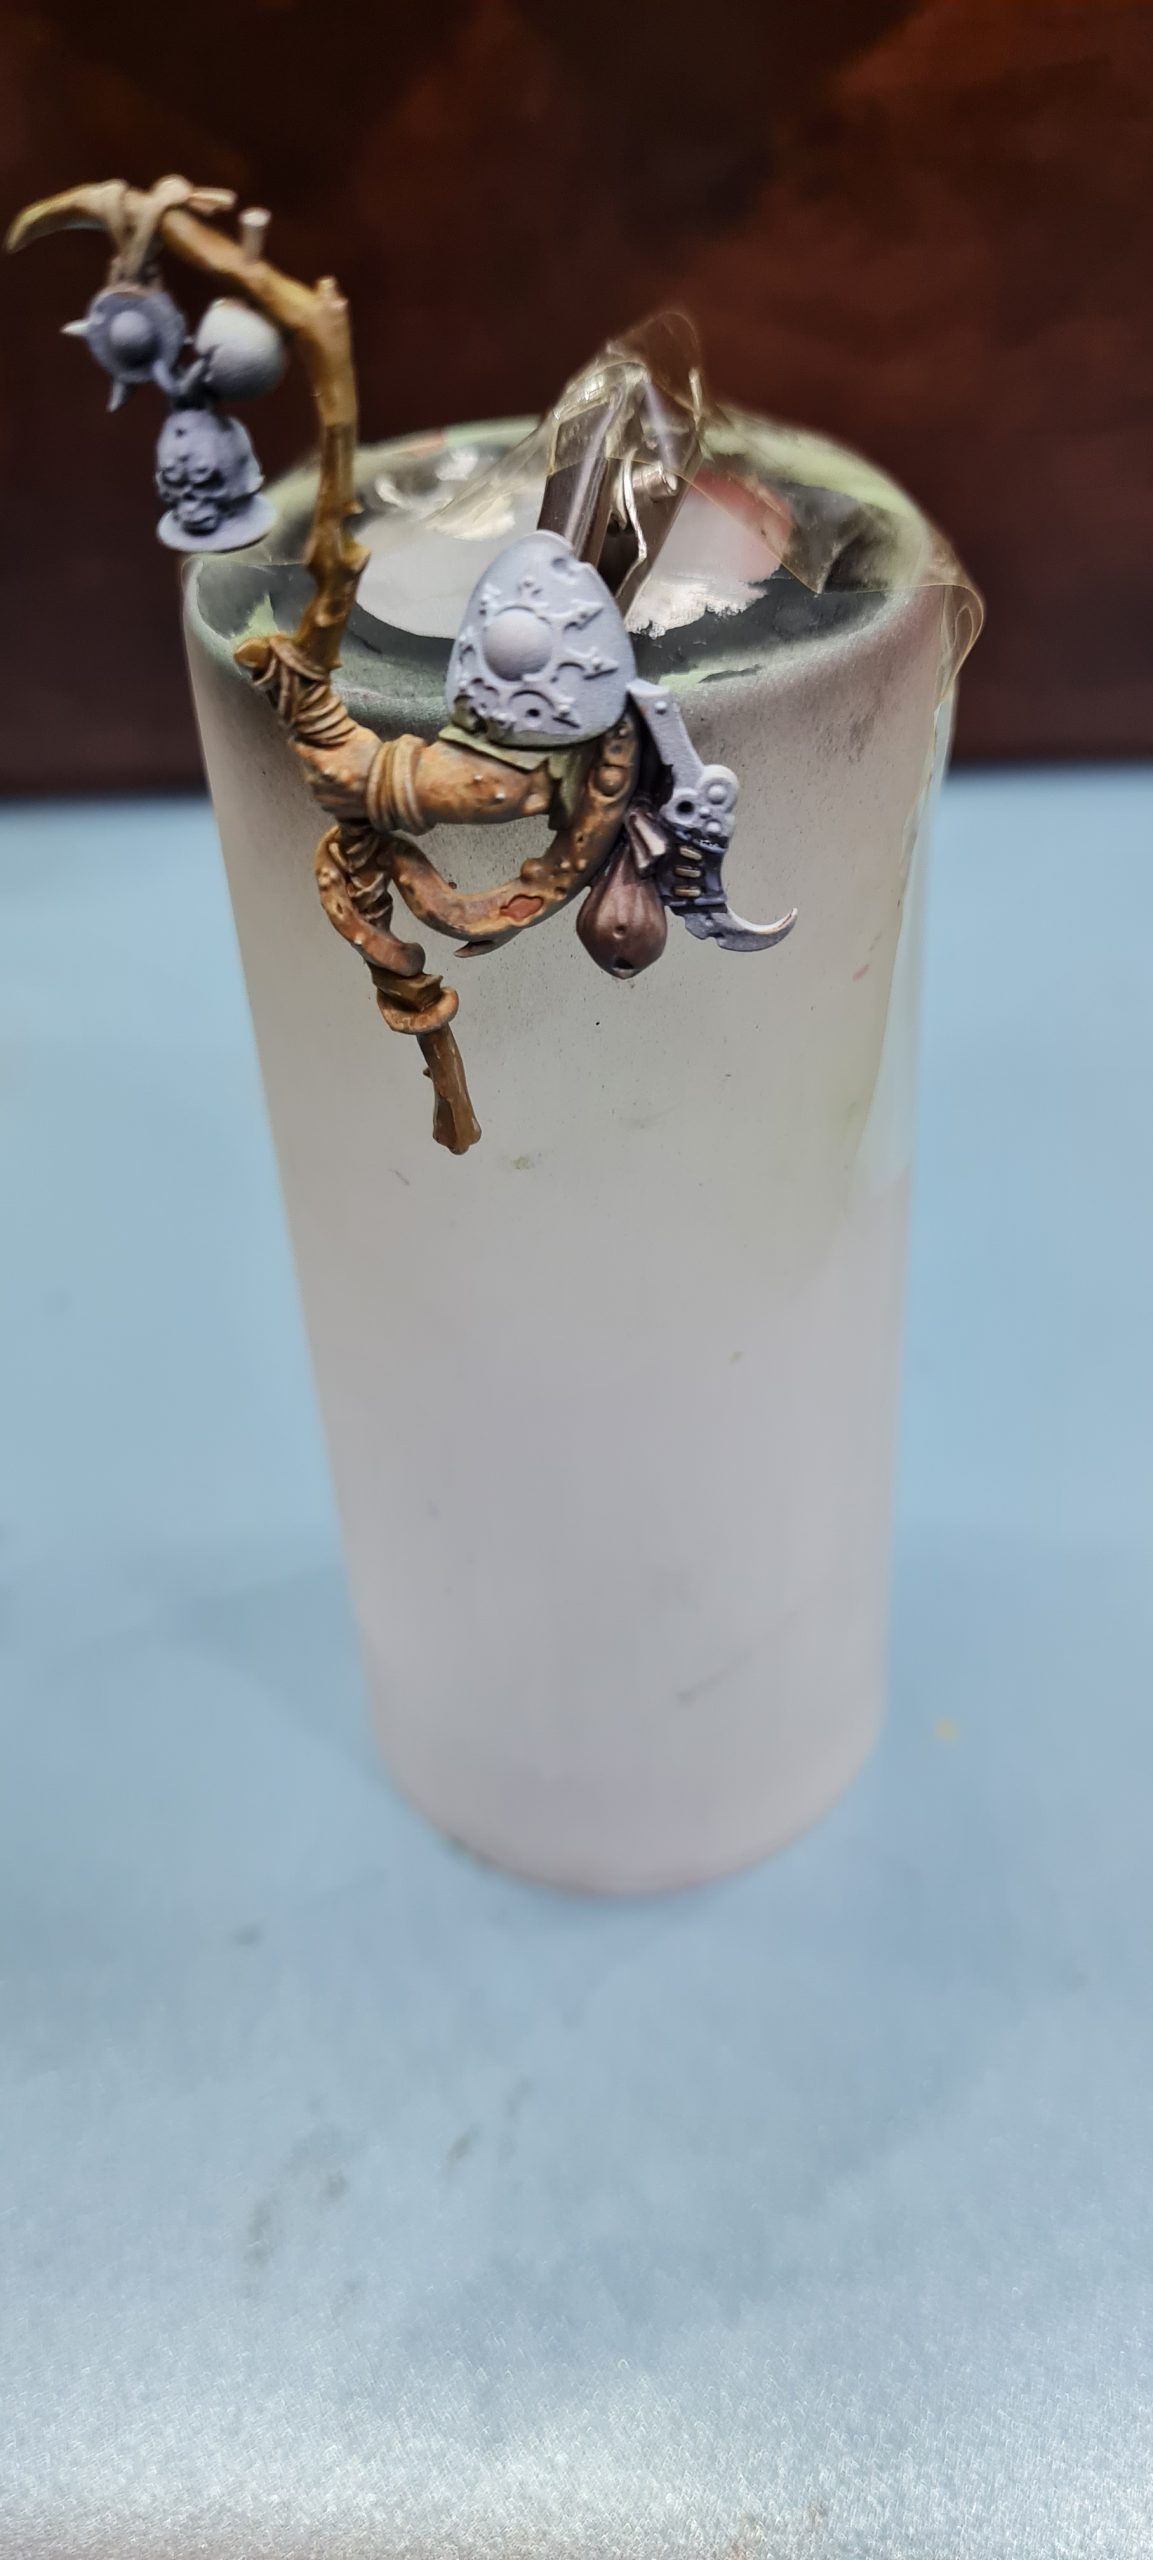
Miniature Painting Tutorials
Color Palette from an Image – Miniature Painting Tutorial (Part 1)
Oct
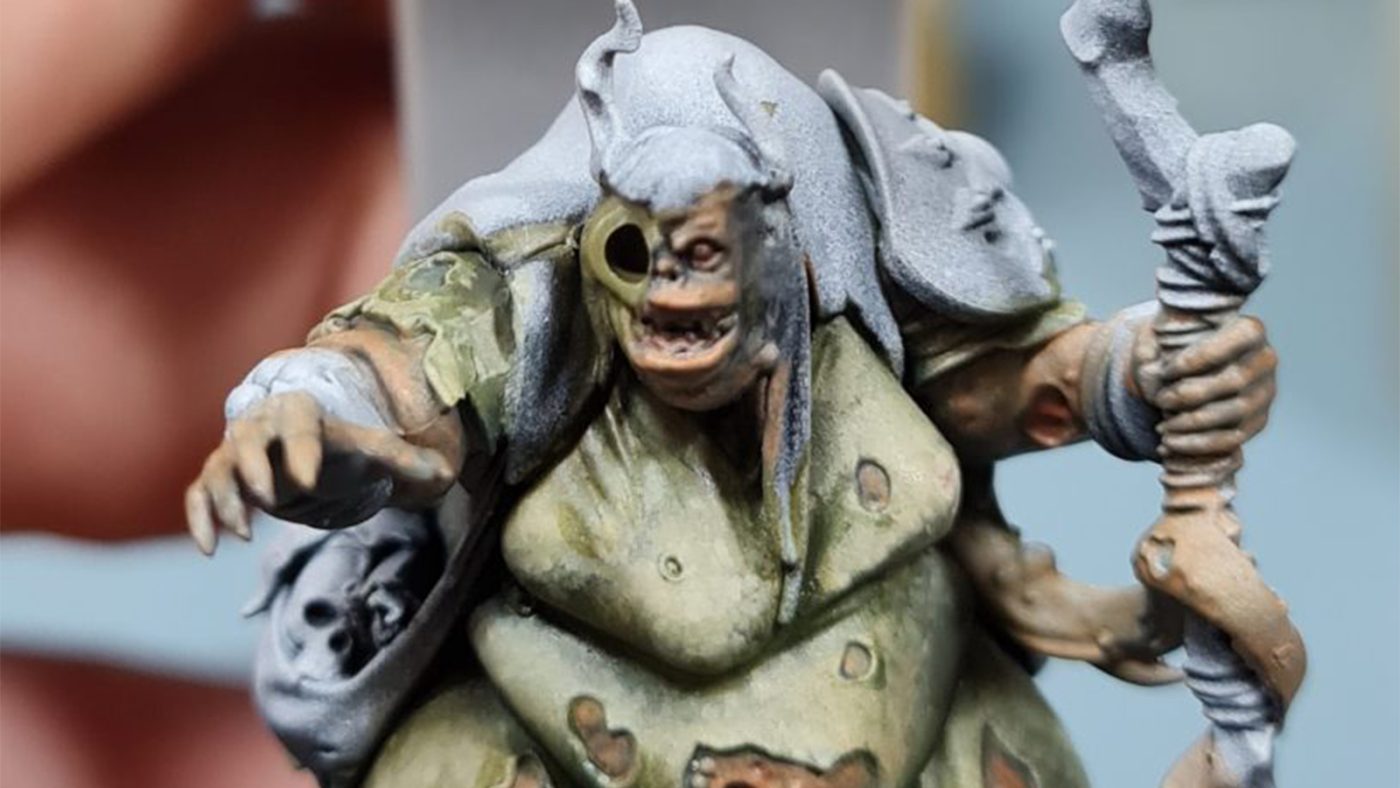
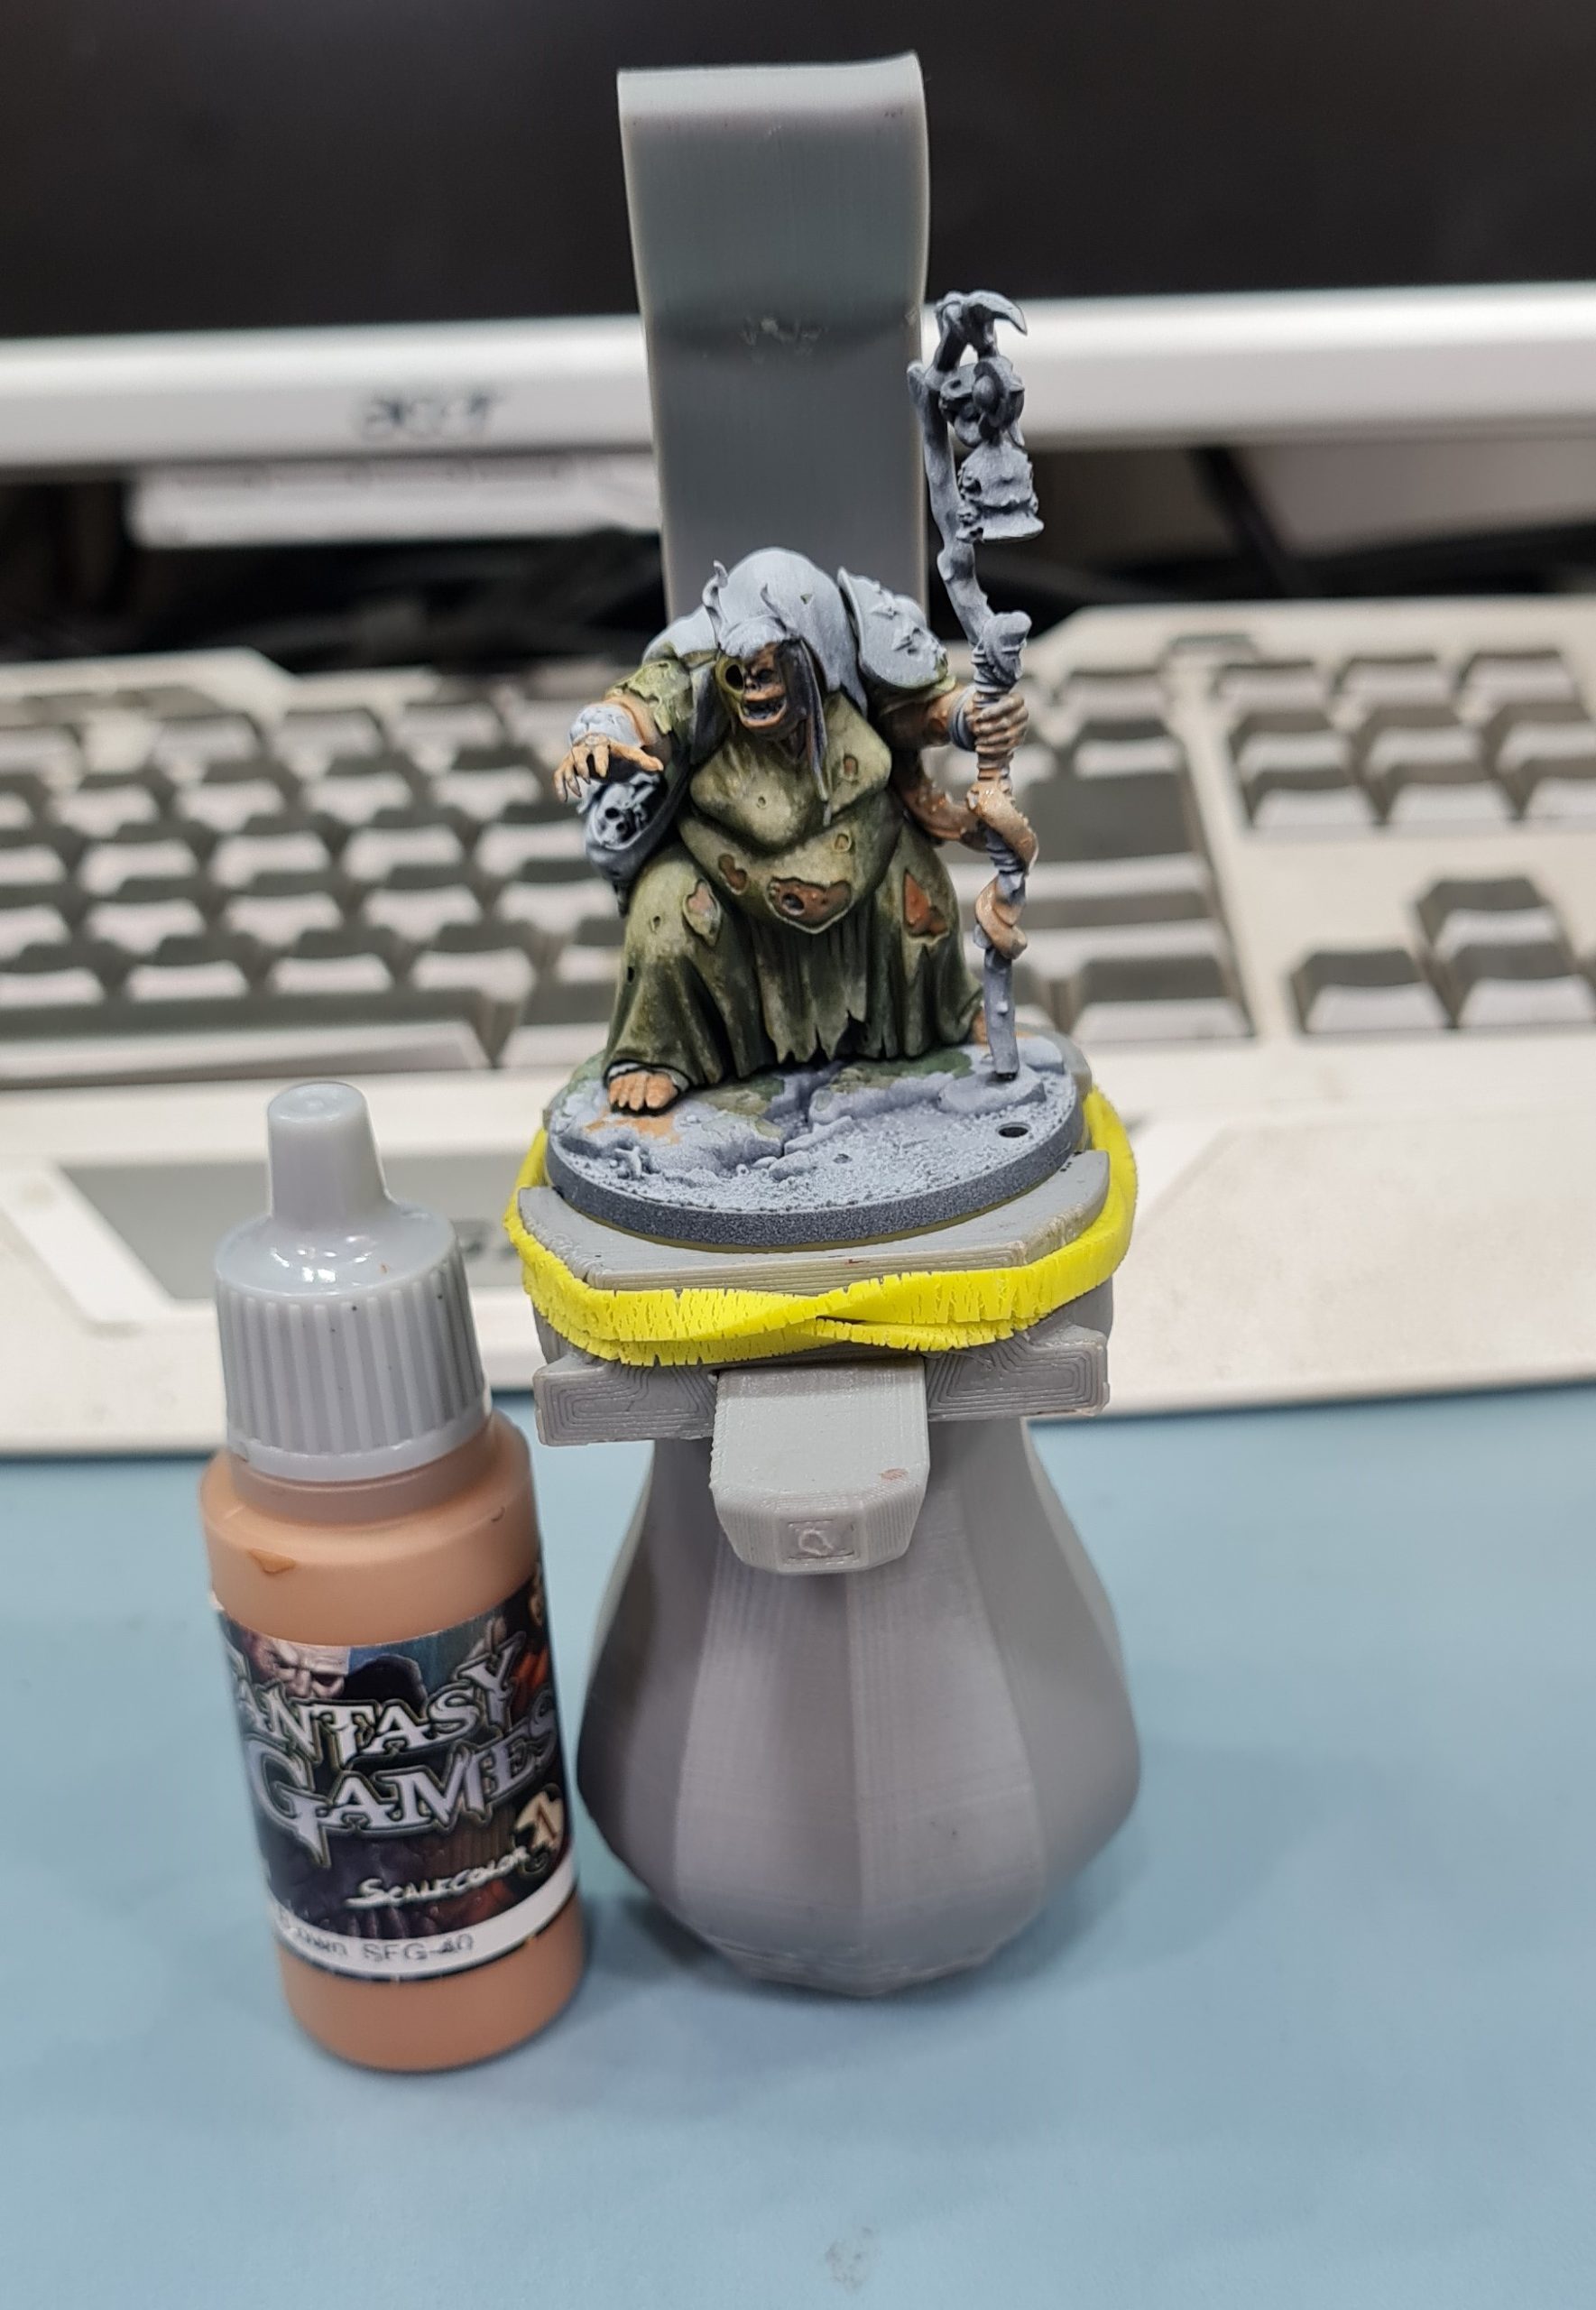
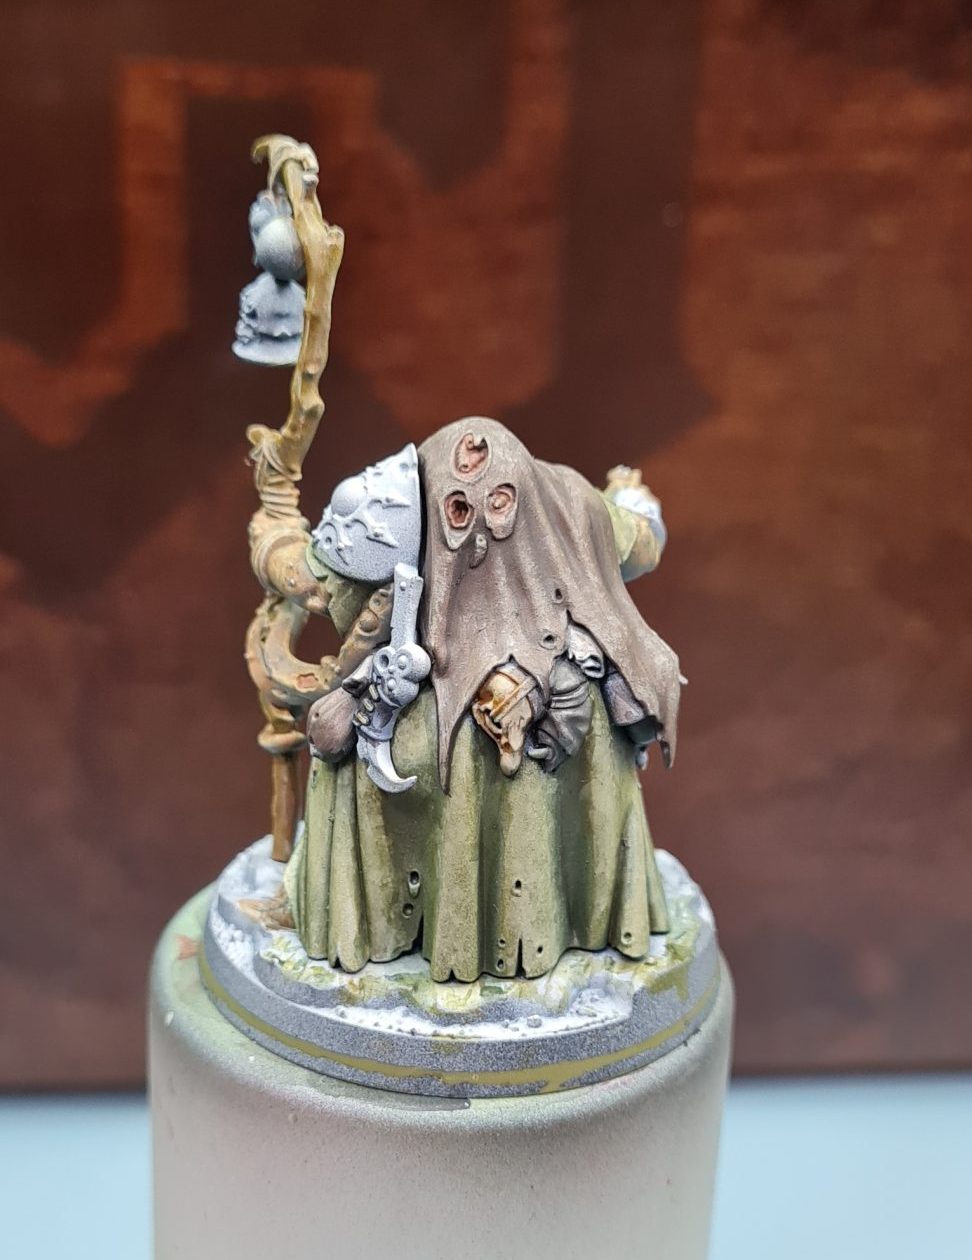
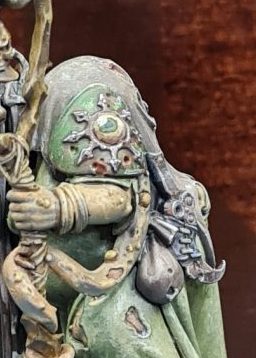
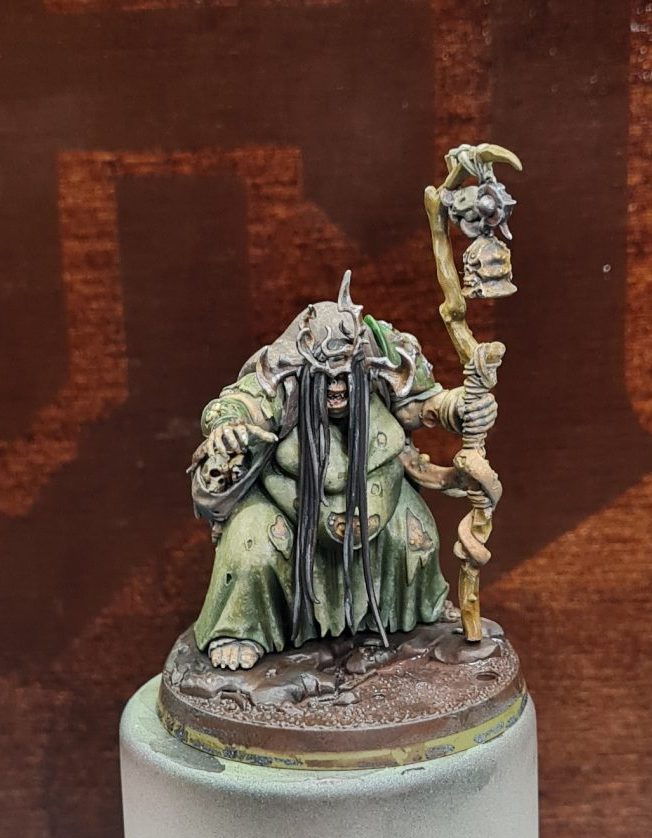
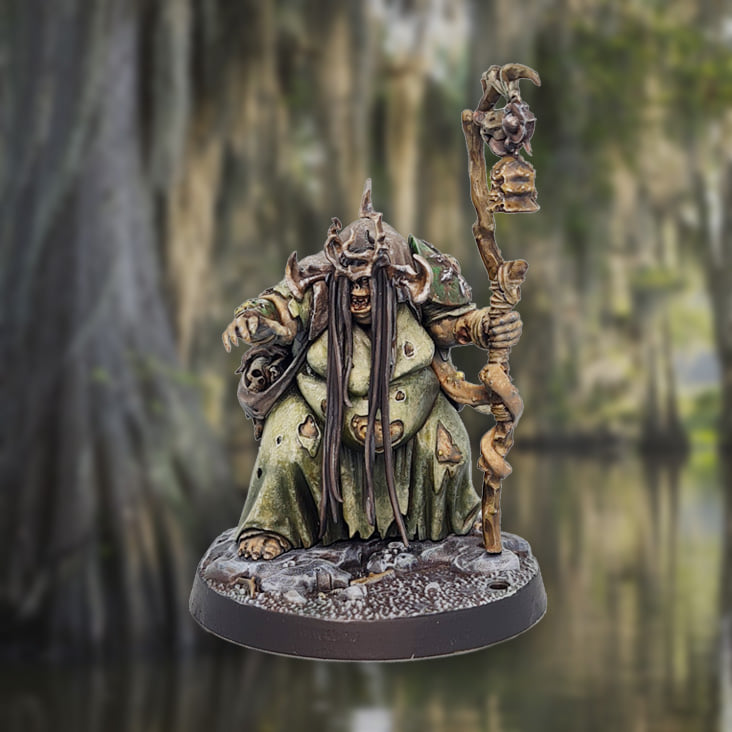
Roman of Frontier Wargaming here. Welcome to the second article of our PIcture Pallet Challenge. In this article, I want to cocover the painting process for Fecula Flyblown. We will cover how various parts were painted. Challenges I faced and overall tips and tricks I picked up while painting.
THE PLAN
Tackling any project requires a plan. It helps to ensure success and lays out a pathway of milestones to reach the final goal. Not to mention dealing with constraints or problems that may happen. For this project, there were three main problems I faced. First of all, a limited pallet. I needed to figure out which paint combinations to use in advance. Secondly, my time was limited. The deadline was in 4 days. I could only paint for 2-4 hours a day. This is why all the painting steps were split into sections. I wanted to avoid wasting time on unnecessary steps. The last factor was quality. The end result needed to look good for the announcement poster. The painting quality I wanted to reach was “it looks good on the gaming table and looks it ok in the display case”.
The painting process can be split into 3 phases.
Phase 1- Paint all the parts to 80% completion. Use as many time-saving techniques as possible. Paint starting from largest areas to smallest.
Phase 2- Refine the shades, colors, and highlights to tie everything together.
Phase 3- Paint the base.
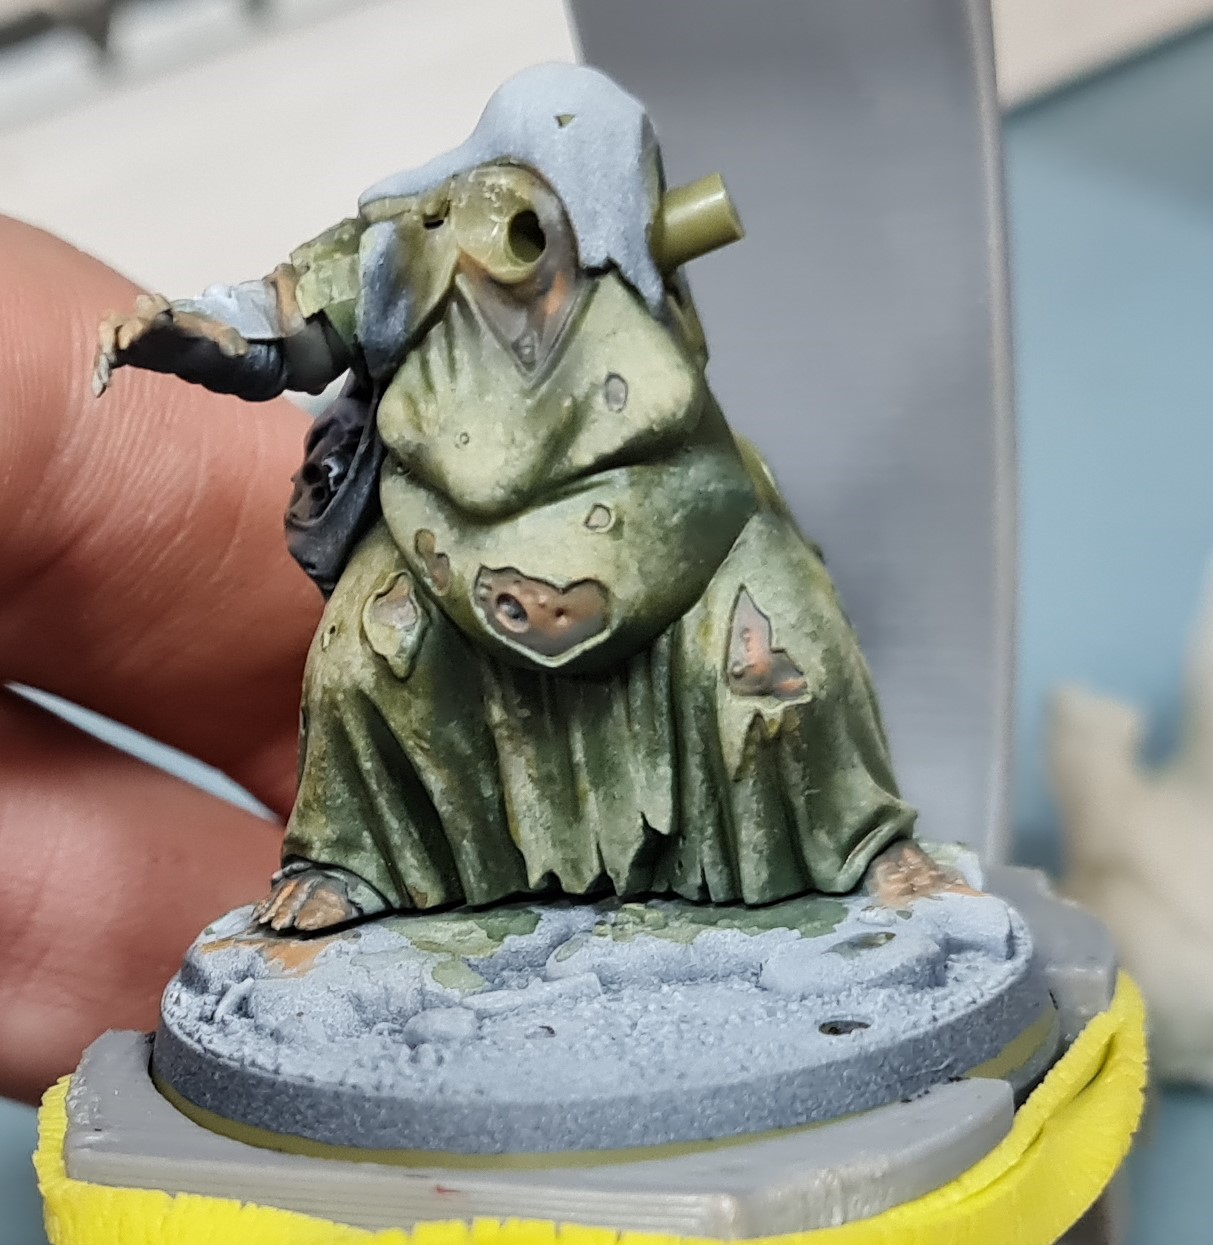
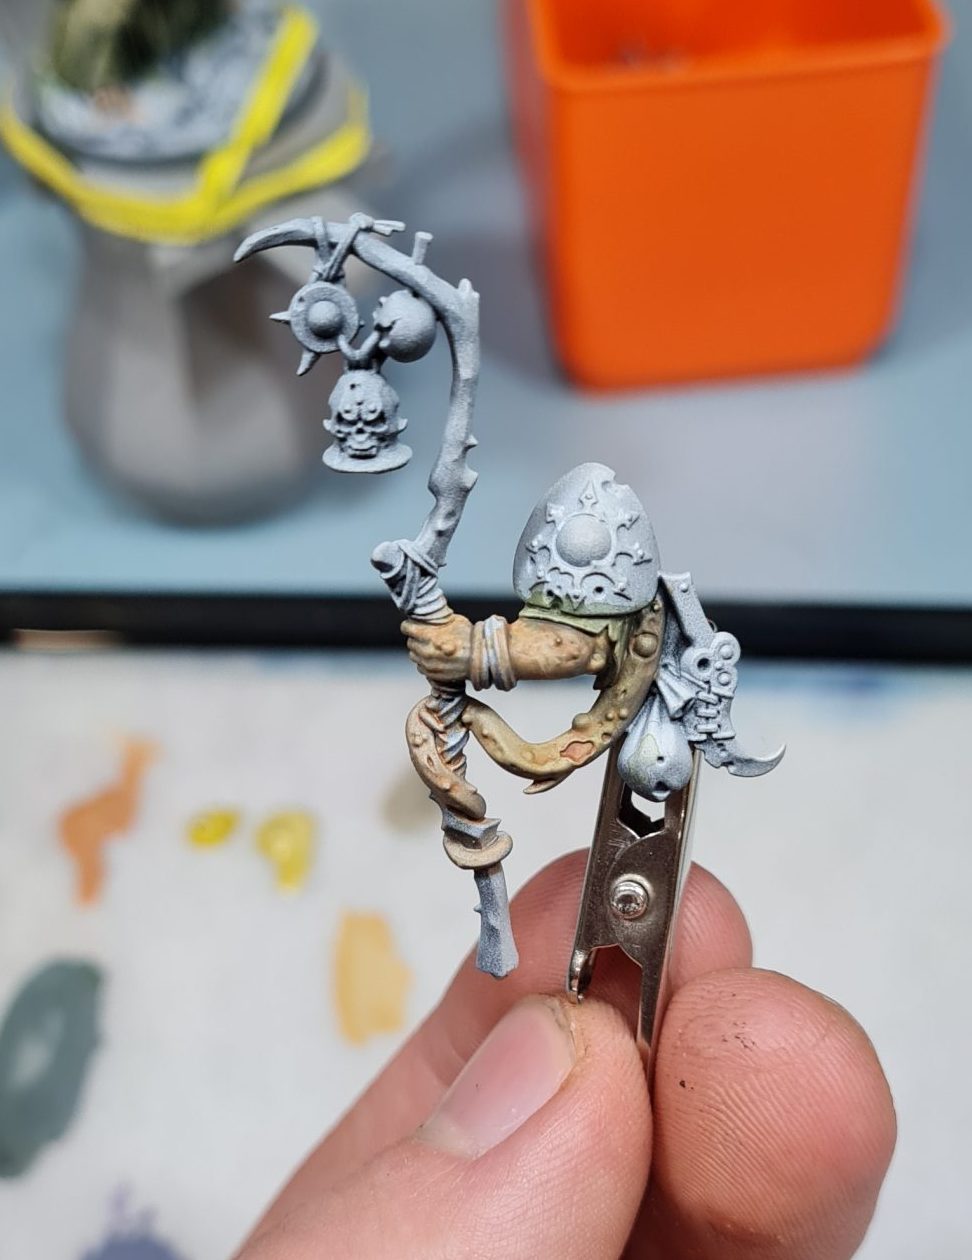
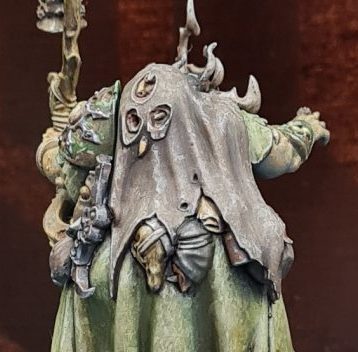
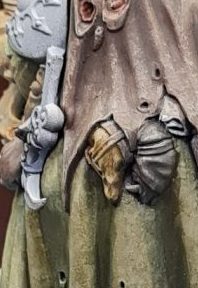
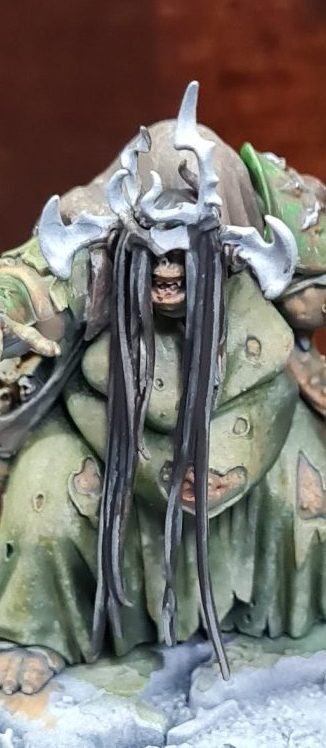
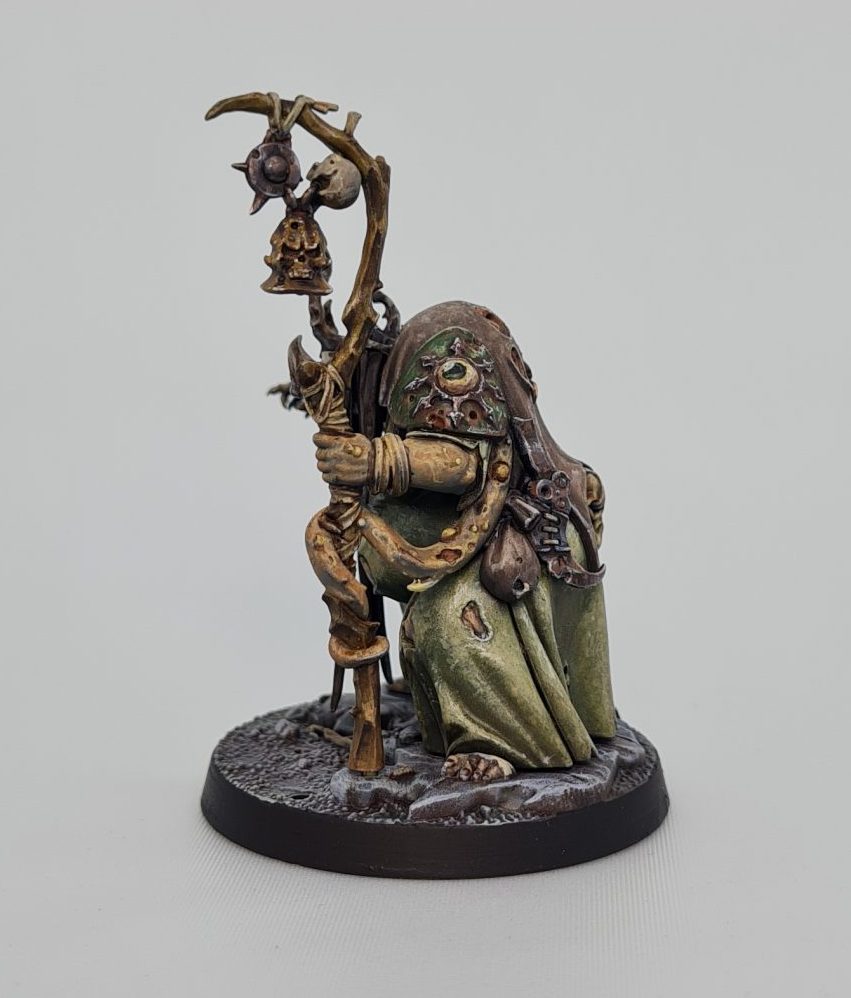
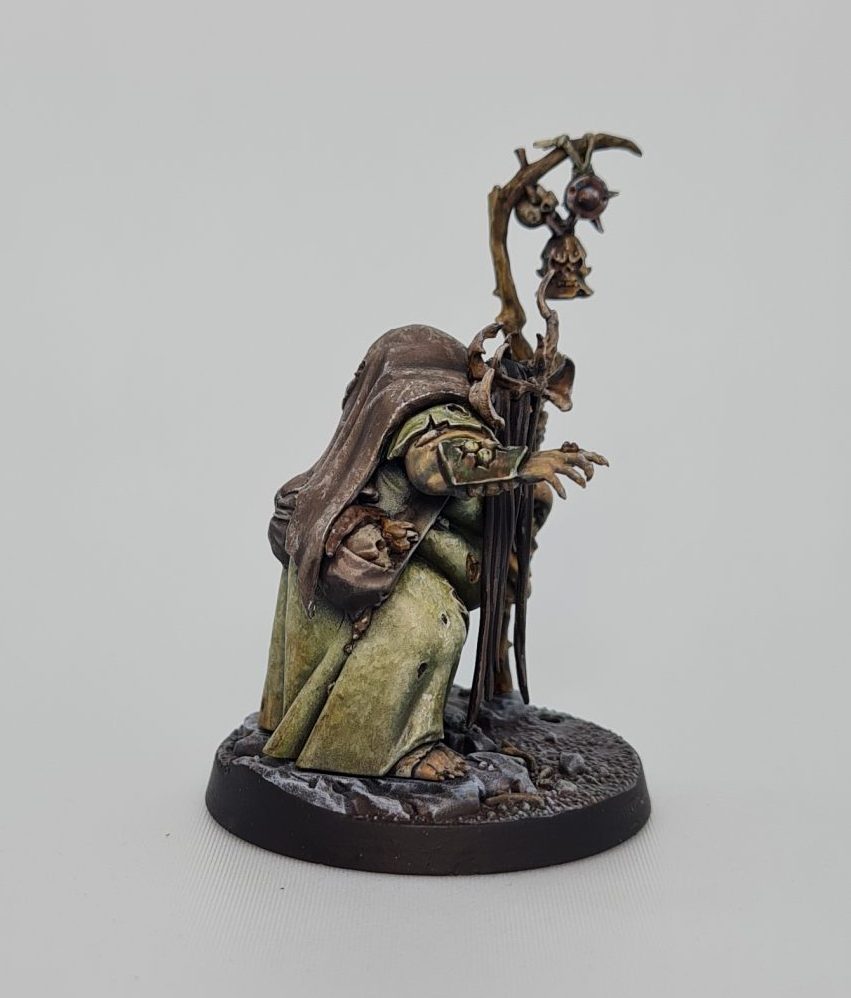
The dress
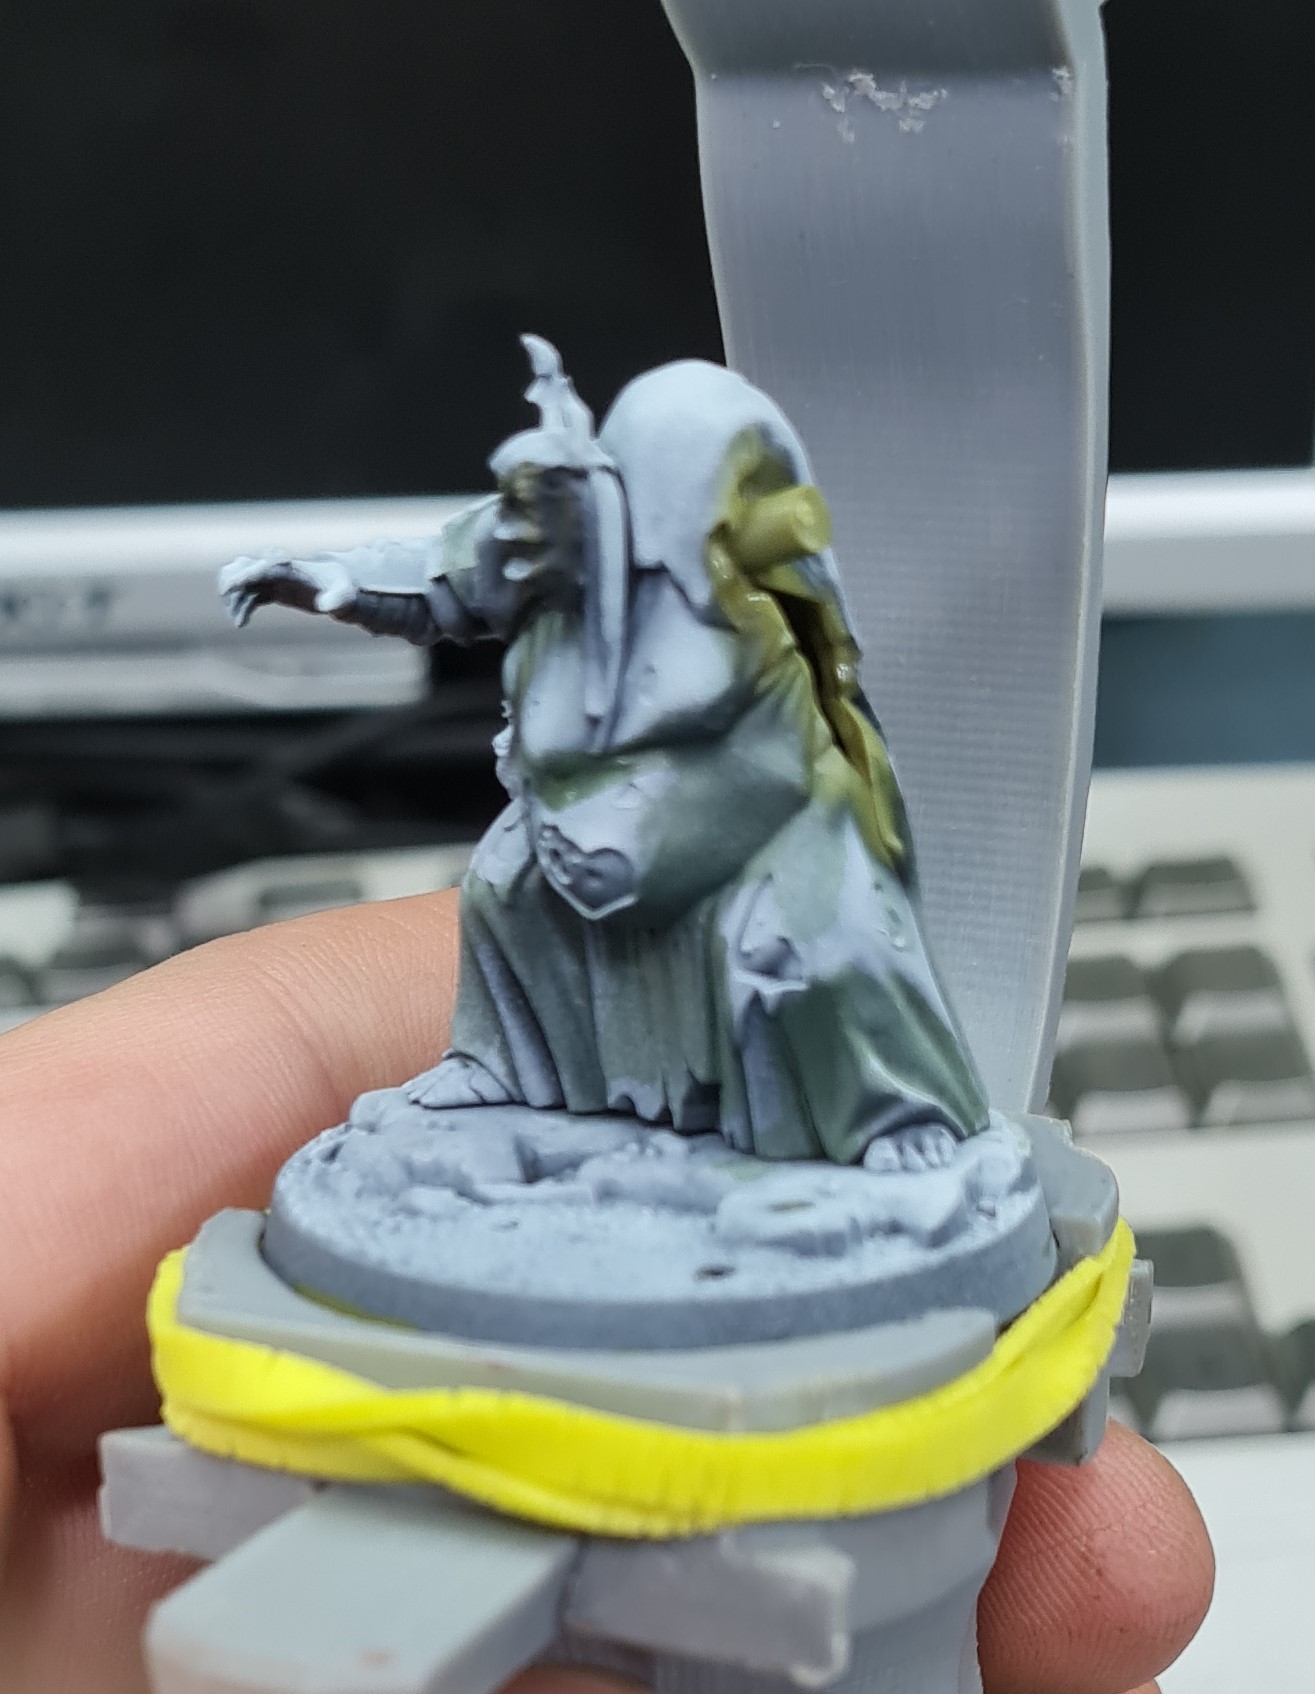
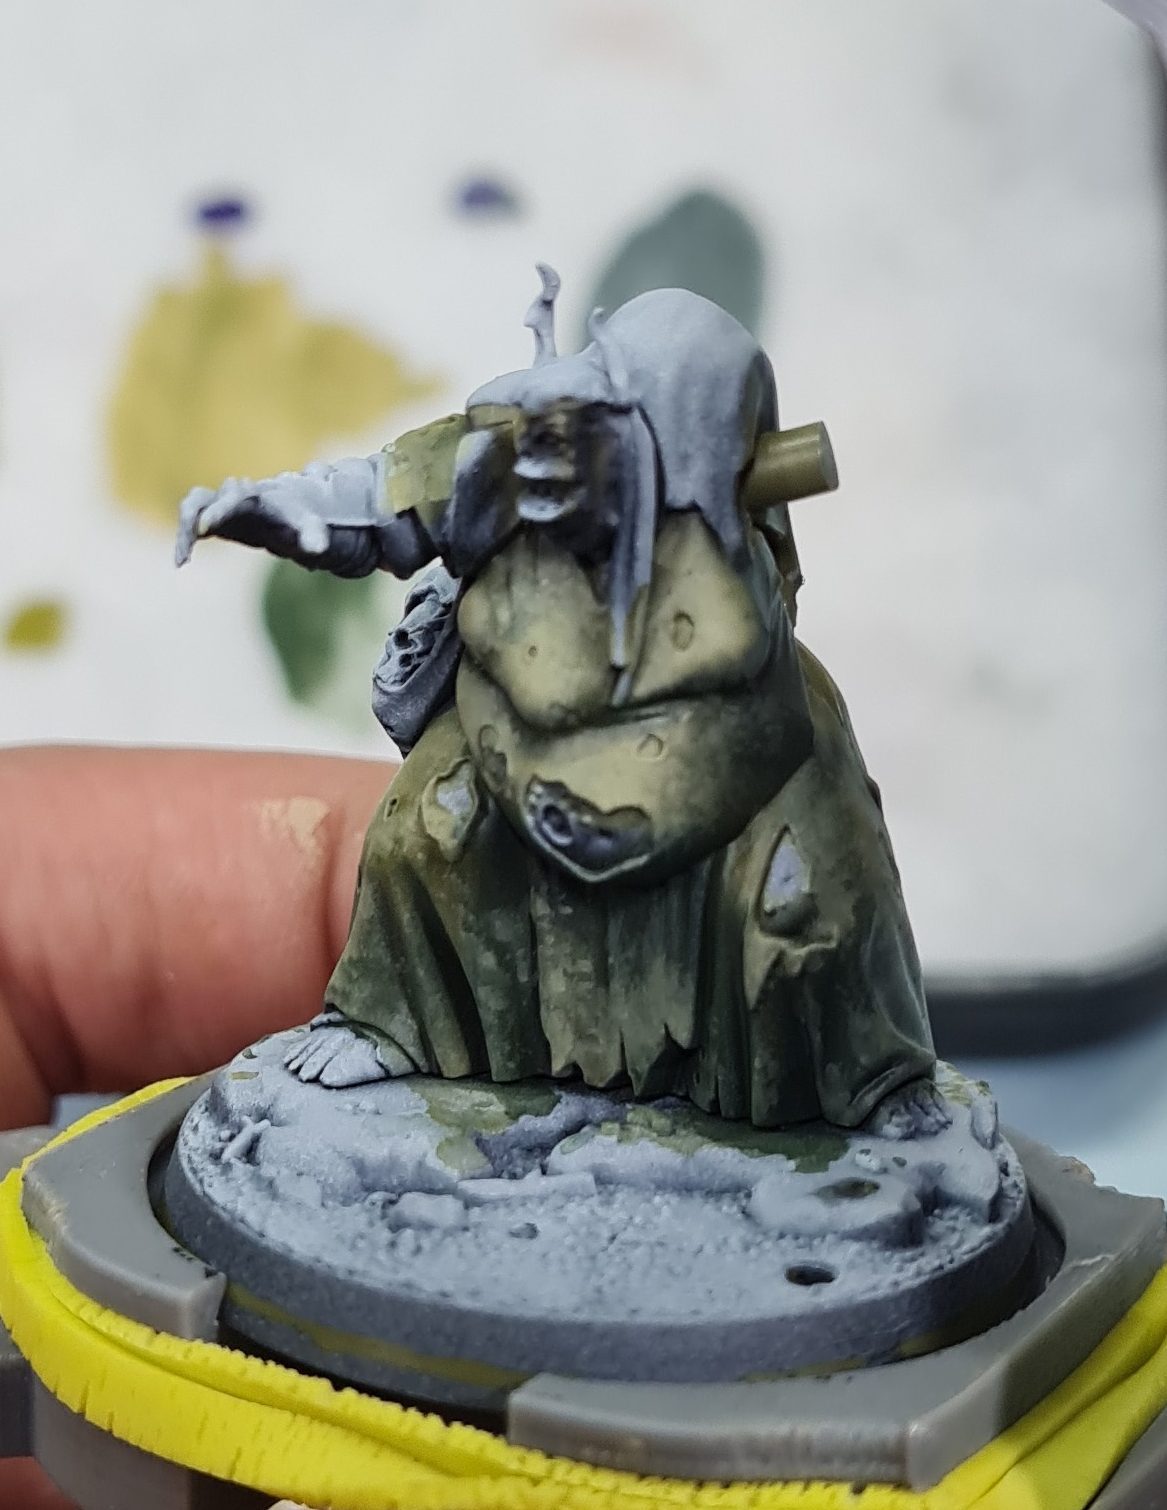
The dress is the biggest detail of this model. Naturally, it is the first thing we want to paint. The goal was to try and create a weathered old fabric. It allows us to be sloppy with paint application. Therefore we can use wet blending and stippling to paint these parts in a quick and efficient manner.
4 colors were used to paint the dress. Vallejo game color (VGC) Yellow Olive for shadows, VGC Charred Brown for deepest shadows, Vallejo Model air (VLM) Interior Green for mid-tones. VML Sand (ivory) for highlight.
1) VGC Yellow Olive is applied over surfaces facing down and surfaces that don’t receive a lot of light. Zenithal highlights remove a lot of guesswork from this step. All you have to do is paint the darkest areas. A few liberties can be taken here and there to accentuate certain details.
2) VMA Interior Green is applied as a basecoat for highlighted areas. In this case, the lightest areas need to be painted. No need to fully cover the white. Instead, apply several thin coats to retain the light to dark transition. VGC Yellow Olve was used to wet blend transitions between highlights and previously established shadows.
The key to wet blending is speed. I was not focusing on being too precise. The main goal was to establish general lights and shadows.
3)A mix of VMA Interior green and VMA Sand was stippled in multiple passes to create highlights. An old beat-up brush was used for stippling. It gave the color transitions a fuzzy texture. I started by using almost pure Interior Green and slowly added VMASand color with each new pass. Each pass covered a smaller area to create a transition from lights to shadows.
The final highlight step was done using almost pure VMA Sand color. I never went up to the pure VMA Sand at this point. This is done to make it easier to fix future mistakes and accidental paint splotches.
4) Yellow Olive mixed with VGC Charred Brown was glazed over the shadows. Charred brown helped define the shadows by adding a contrasting color to green.
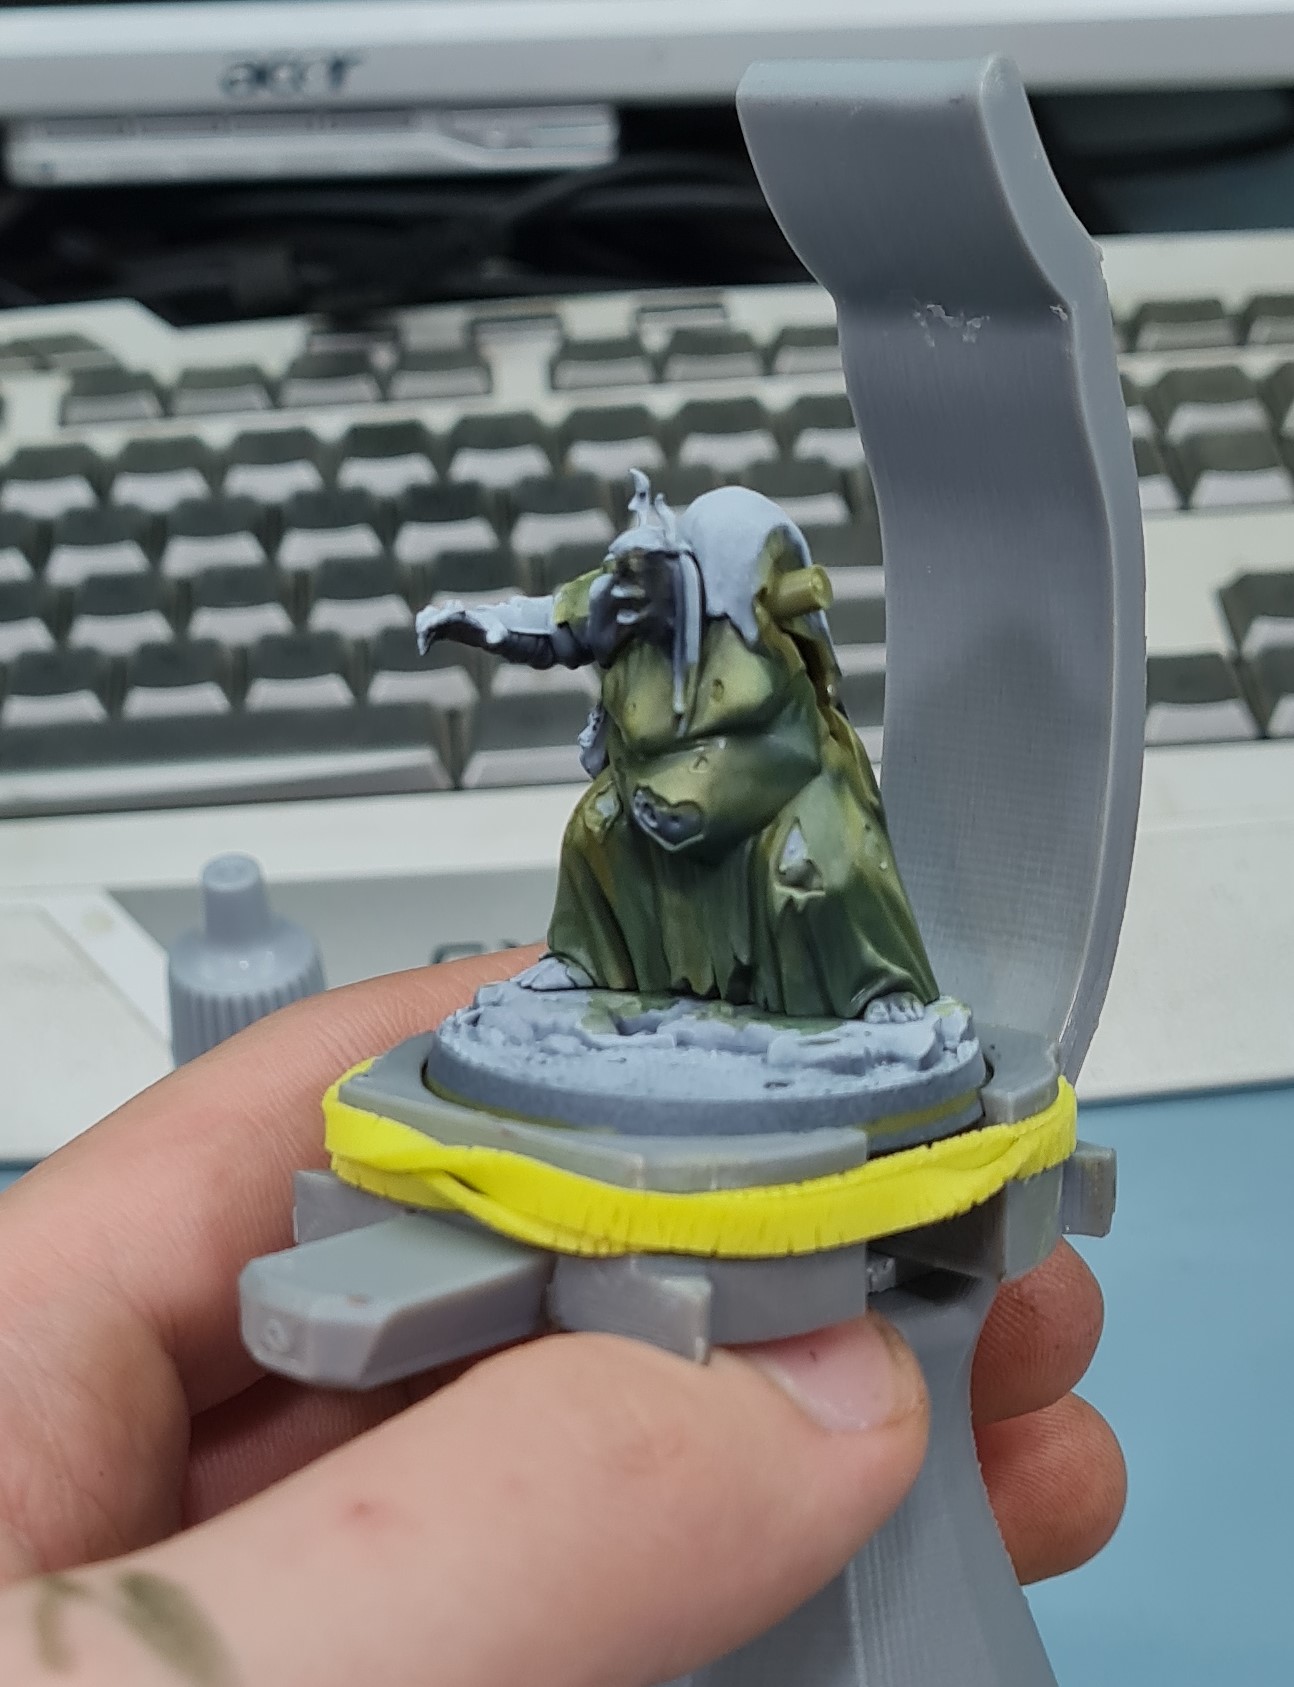
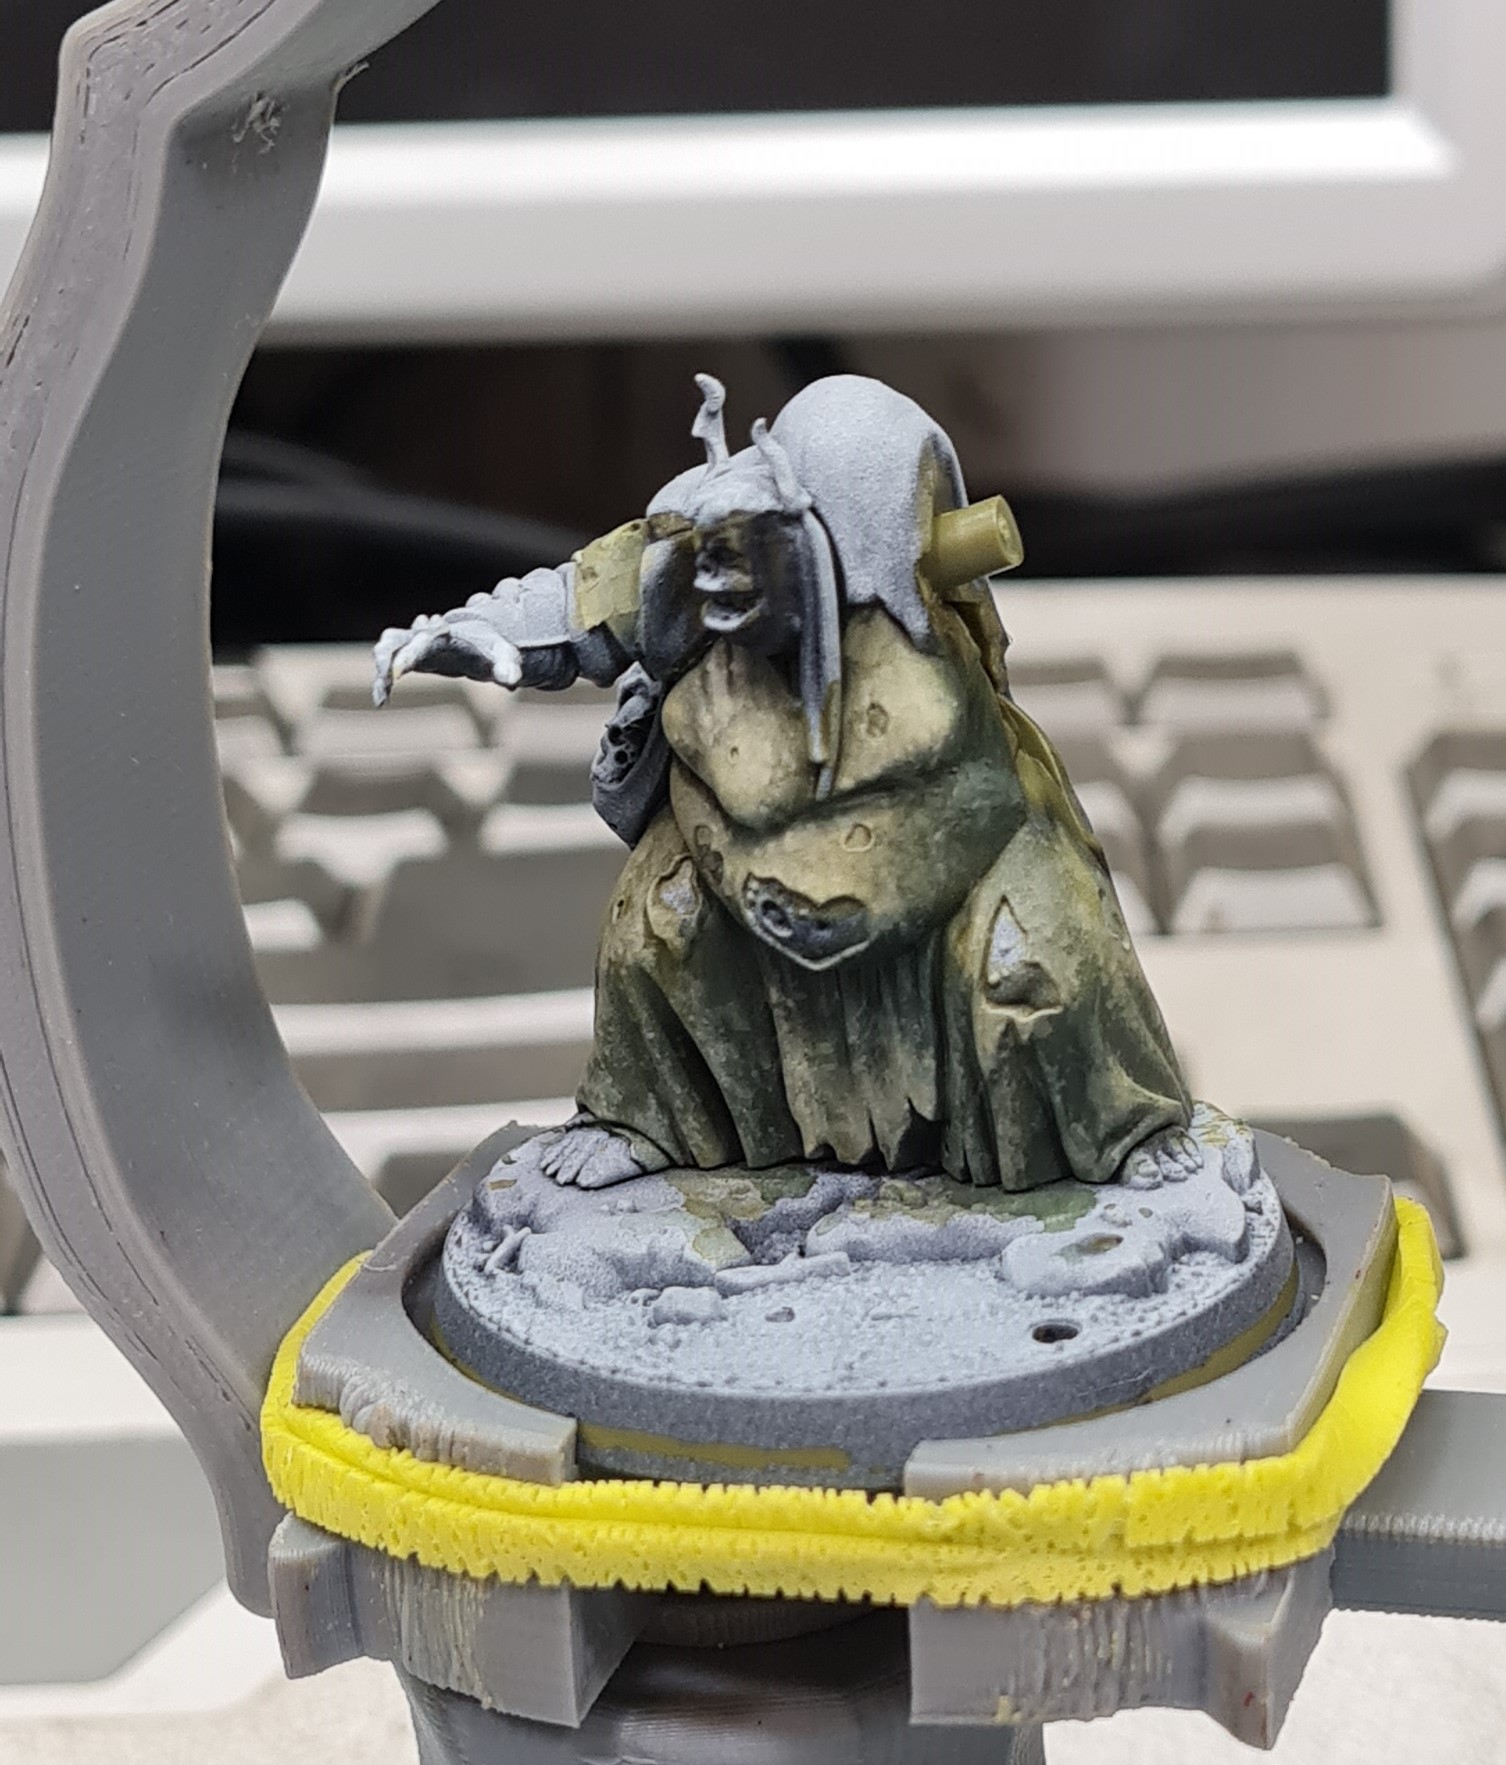
With this, the dress was 80% done and we can move on to the next step. Not finishing it 100% allows us to fix any mistakes made in future steps and adjust things as needed.
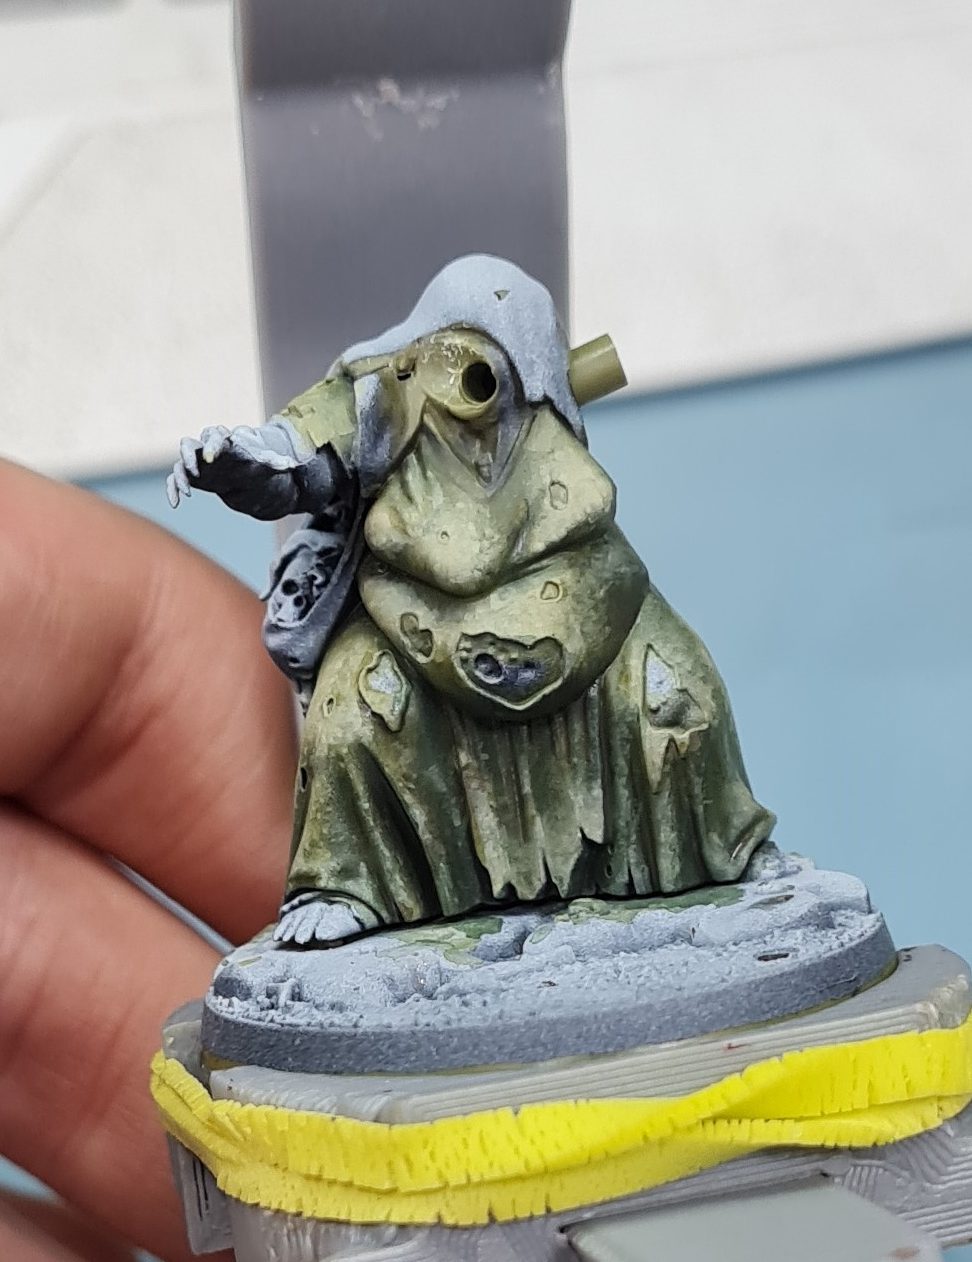
SKIN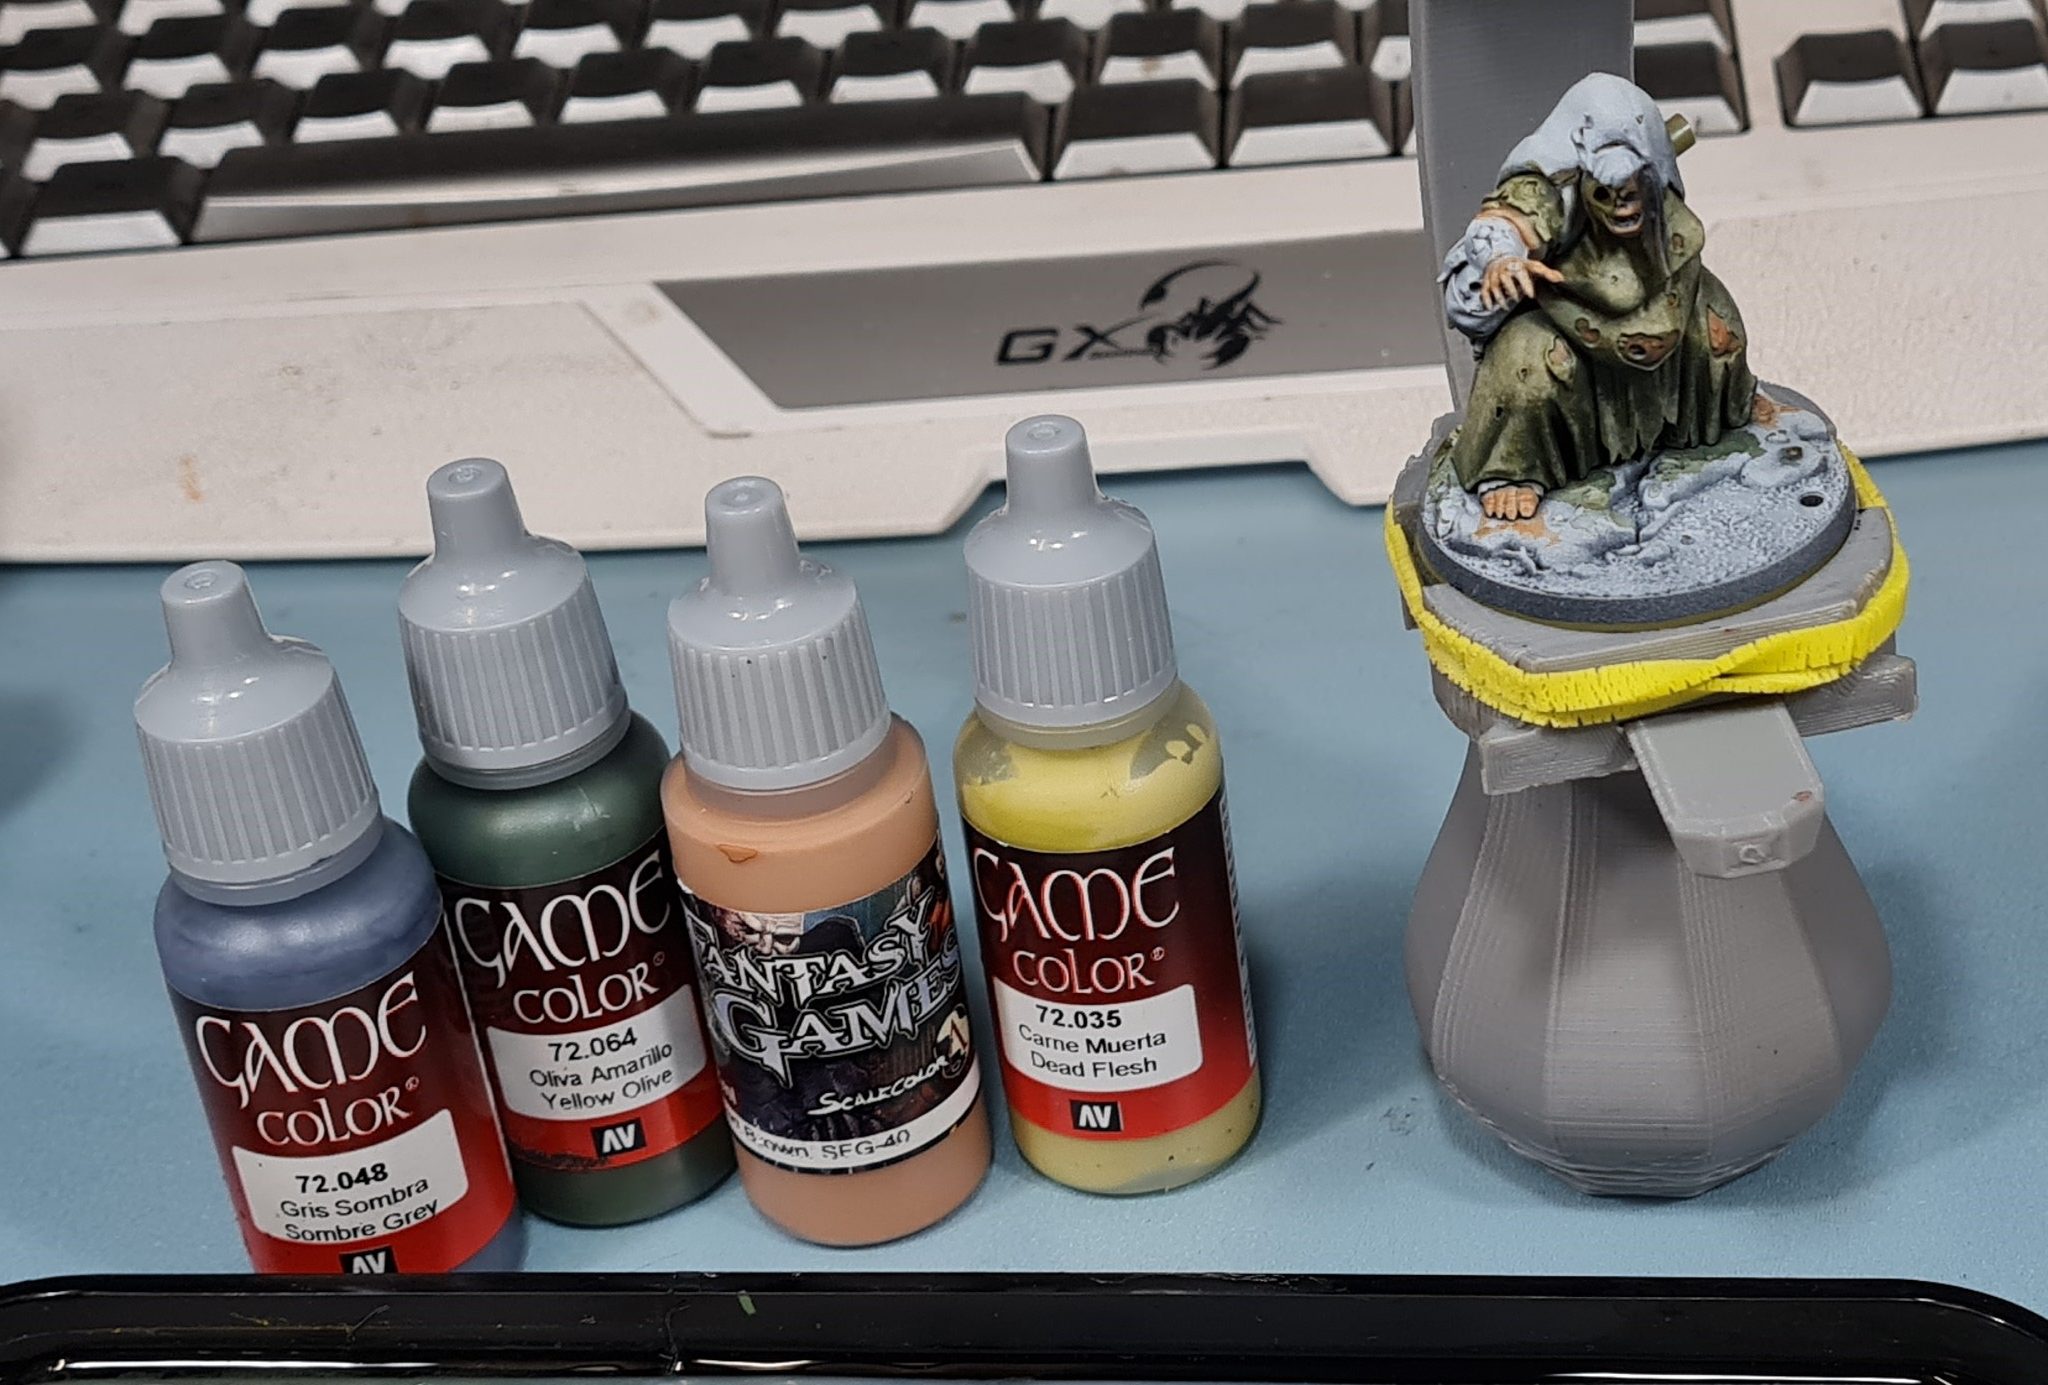
The main challenge for the skin was to make it stand out from the green and brown clothes while making it look dirty or unhealthy. 4 paints were used to try and achieve this effect. Scale 75 (S75) Blacked brown as a base color. VGC Dead flesh for highlights. A mix of VGC yellow olive+ VGC Sombre Grey for shading. A combination of wet blending and stippling was used to paint the skin.
1) Diluted S75 blacked brown was applied over all exposed skin.
2) Shadows were painted using a mix of VGC Yellow olive+VGC sombre grey, 3:1. I added this mix to S75 Blackened brown little by little to create a transition over several layers.
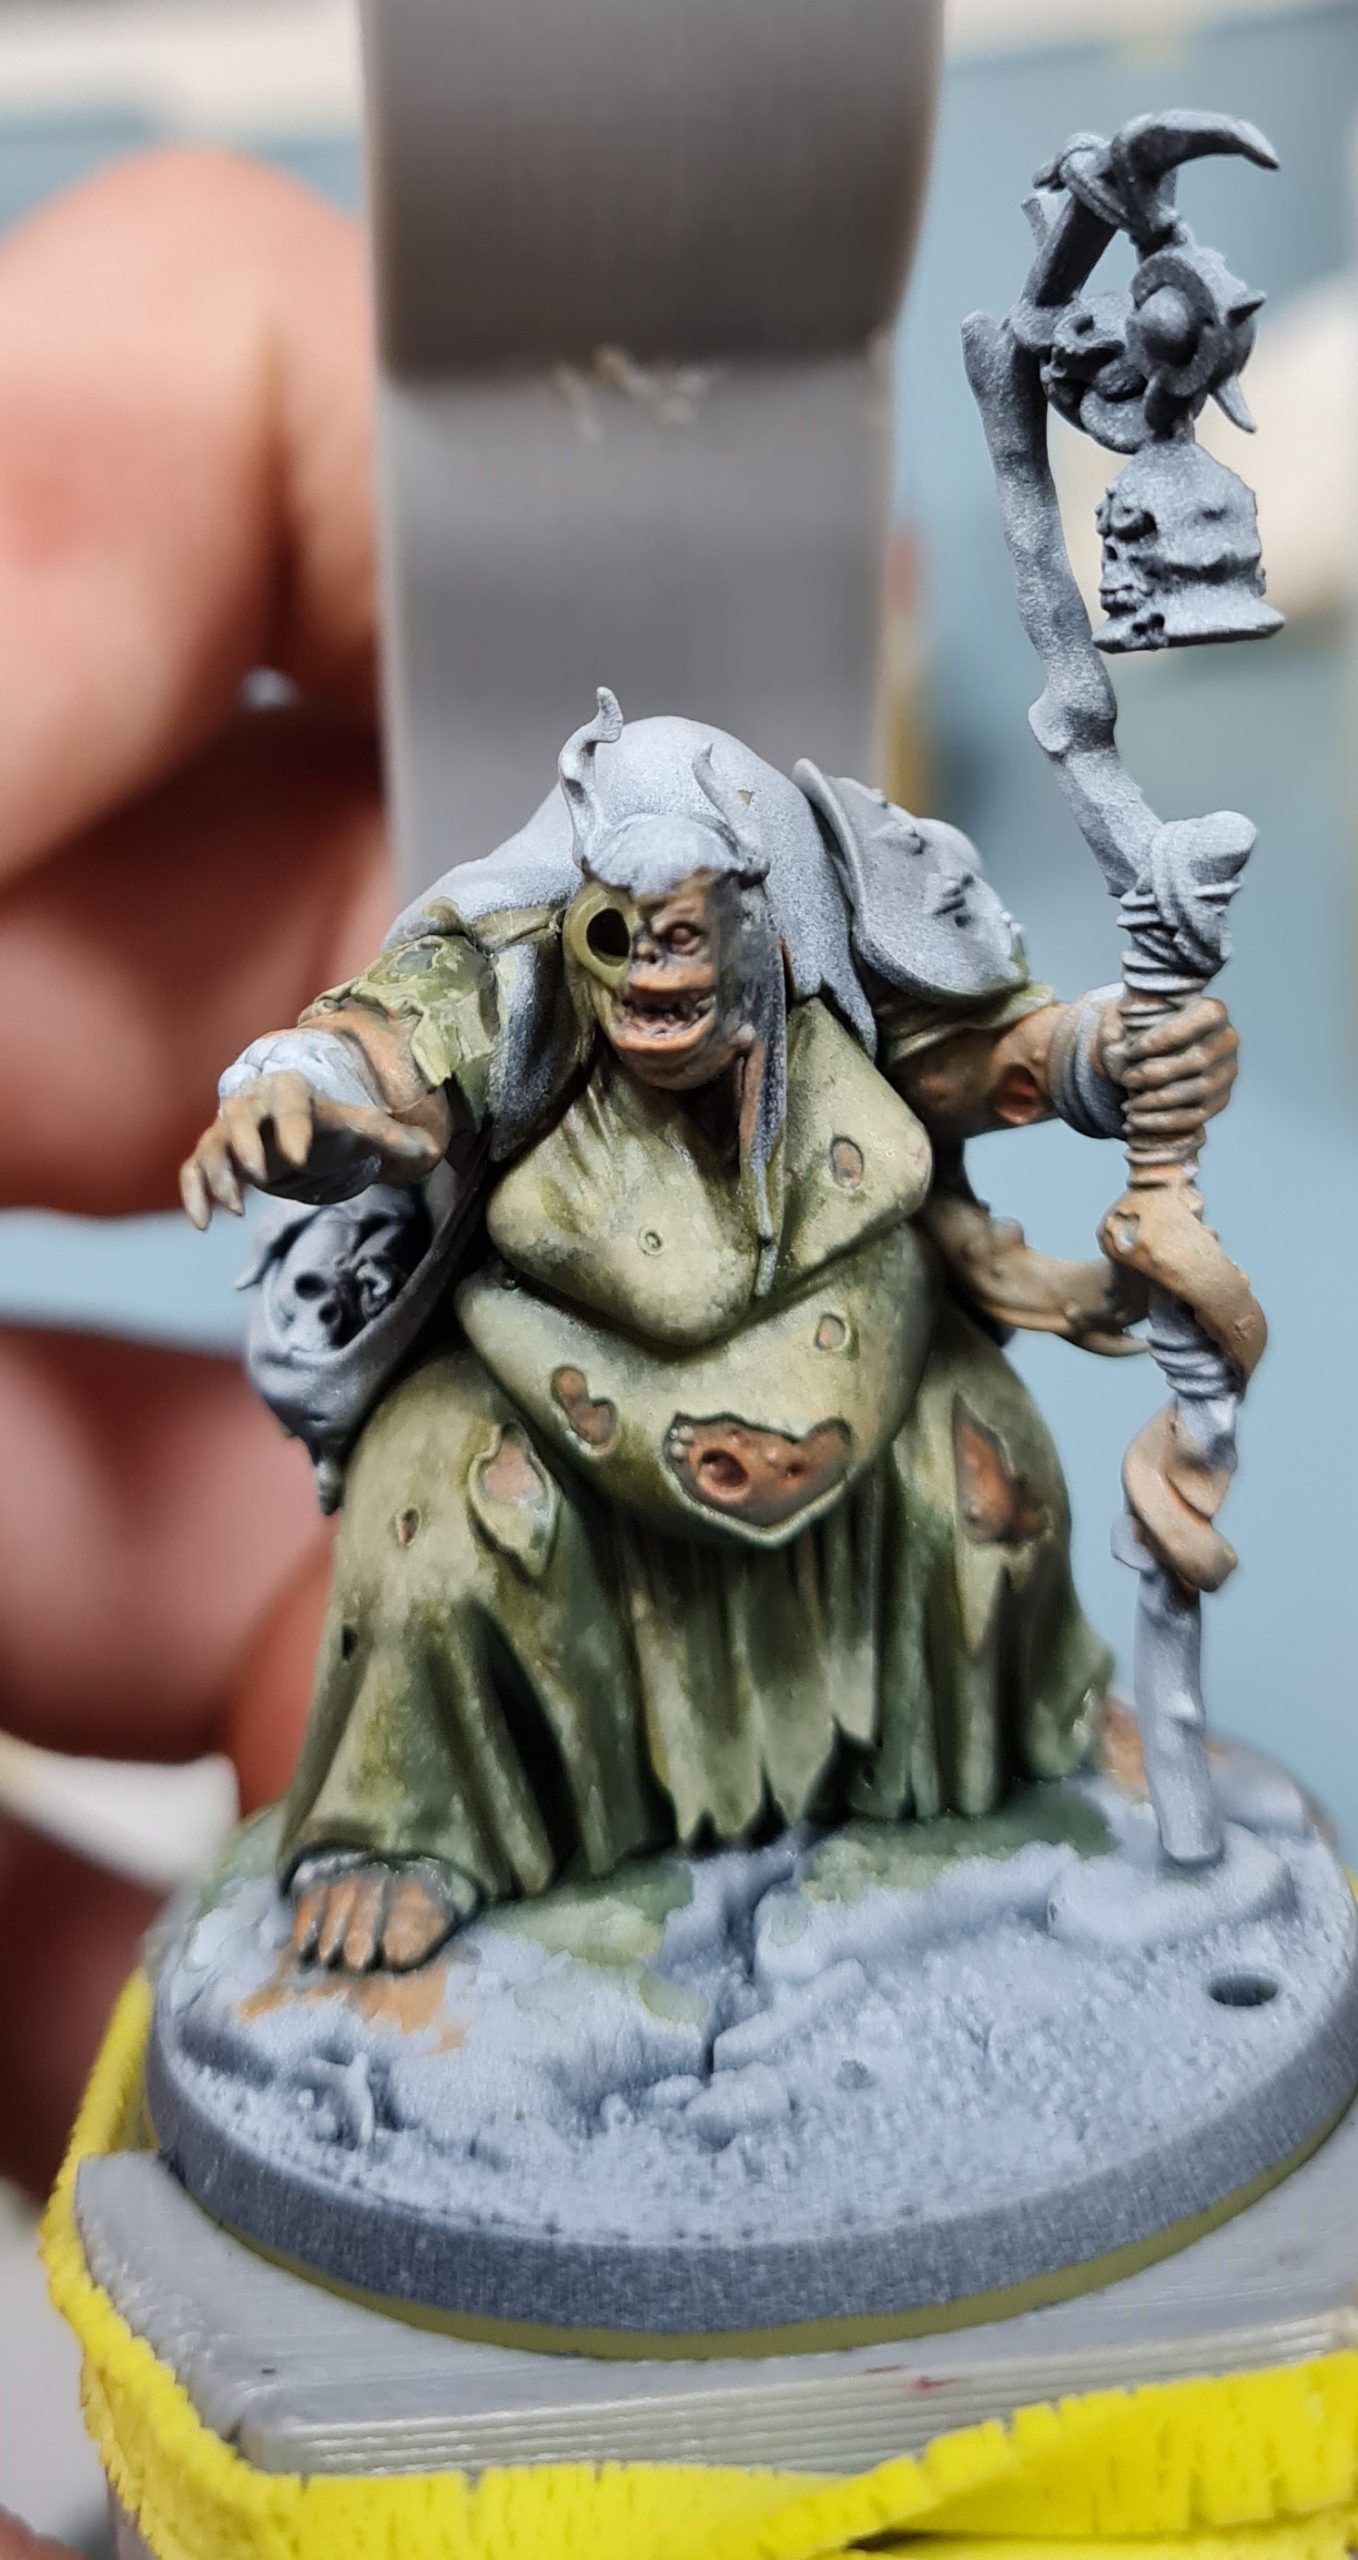
2.5) VMA rust paint was used to mark open wounds in the skin and to paint the eyes and the gums.
This step was done to mark areas I need to avoid for now. Remember, I was improvising as I painted. This allowed me to see in advance if changes needed to be made
3) S75 Blackened Brown was stippled to to blend the shadows
4)VGA Dead Flesh + S75 Blackened Brown was used to highlight skin.
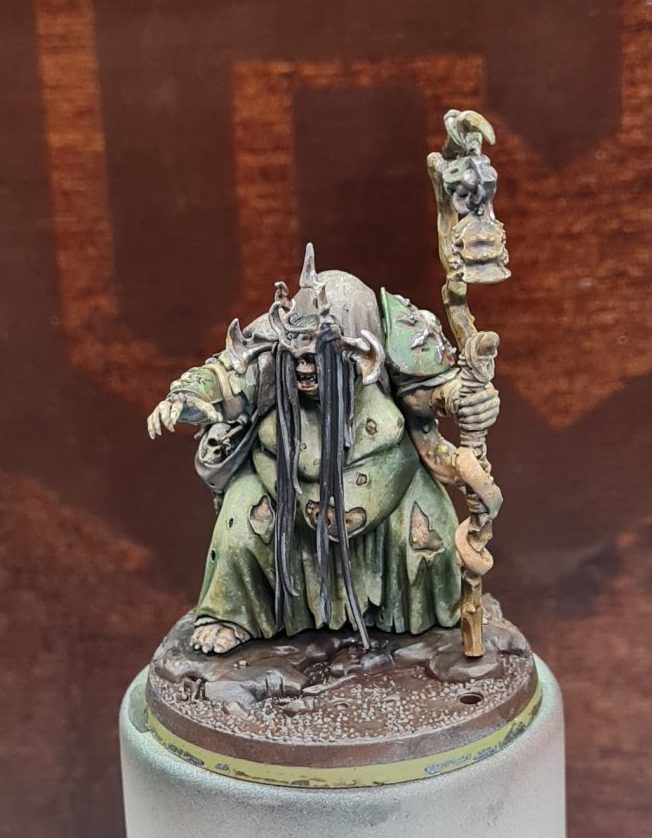
THE EYE
The eye on this model is a barely visible part. I saved time on it by painting it as simple as possible. Plus the eye was already undercoated leaving only two steps to be done.

1) Paint the eyeball with VGC Dead White. Leave some rust color on the edges to help separate the eye from the skin.
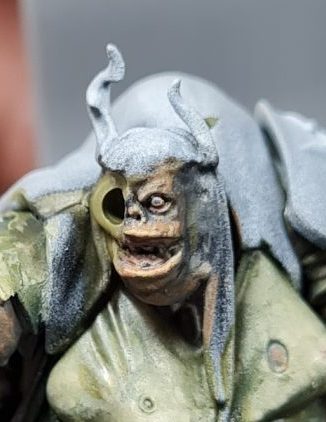
2)Paint the pupil with Citadel Russ Grey

3)Doesn’t add that much to the final model.
THE POLE
I wanted the pole to look like old weathered wood. To achieve this effect 4 paints were used VGC Beasty Brown, S75 Hikey Yellow, VMA Interior Green, and Charred Brown.
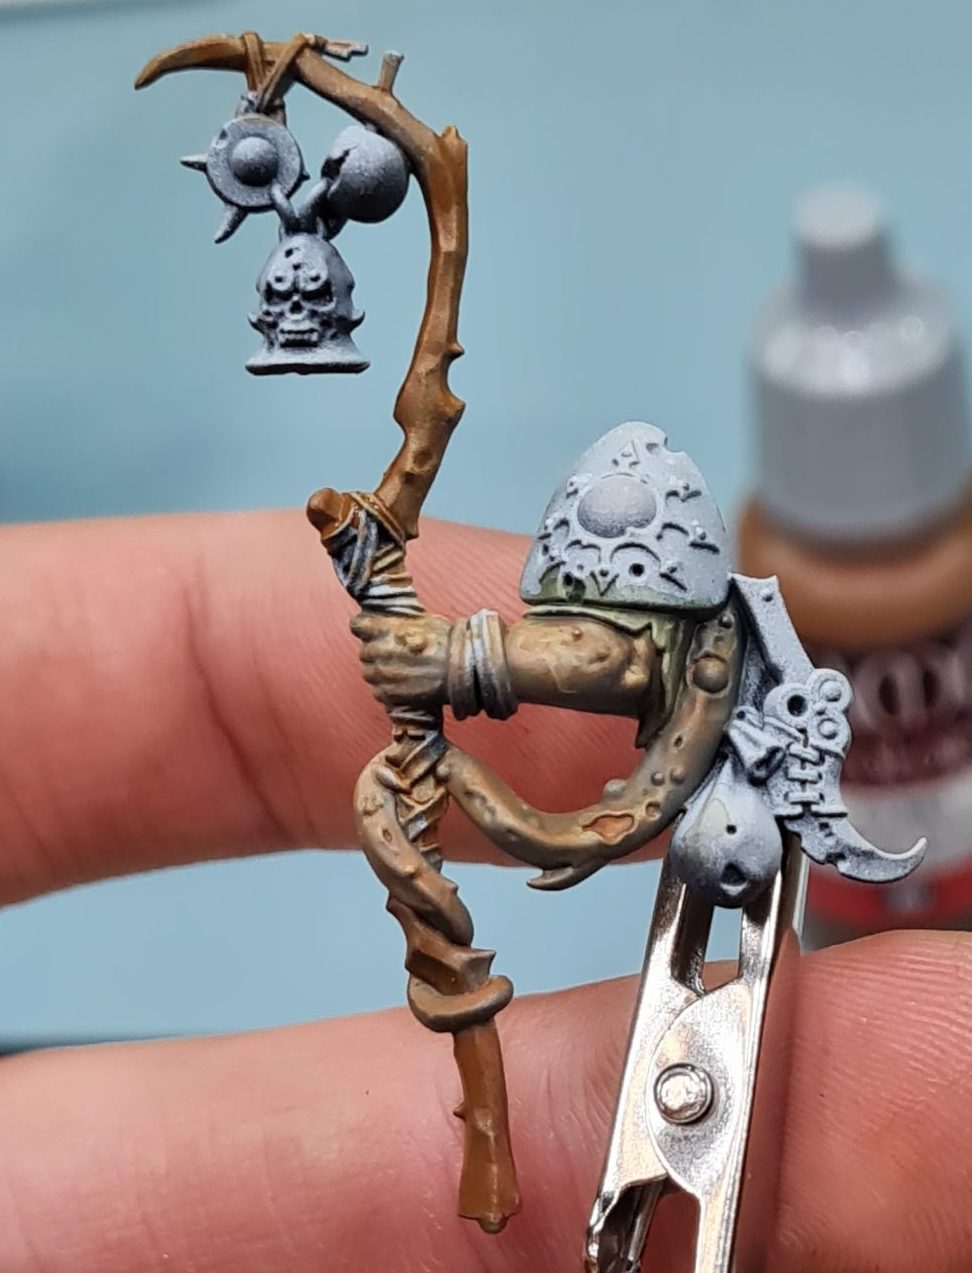

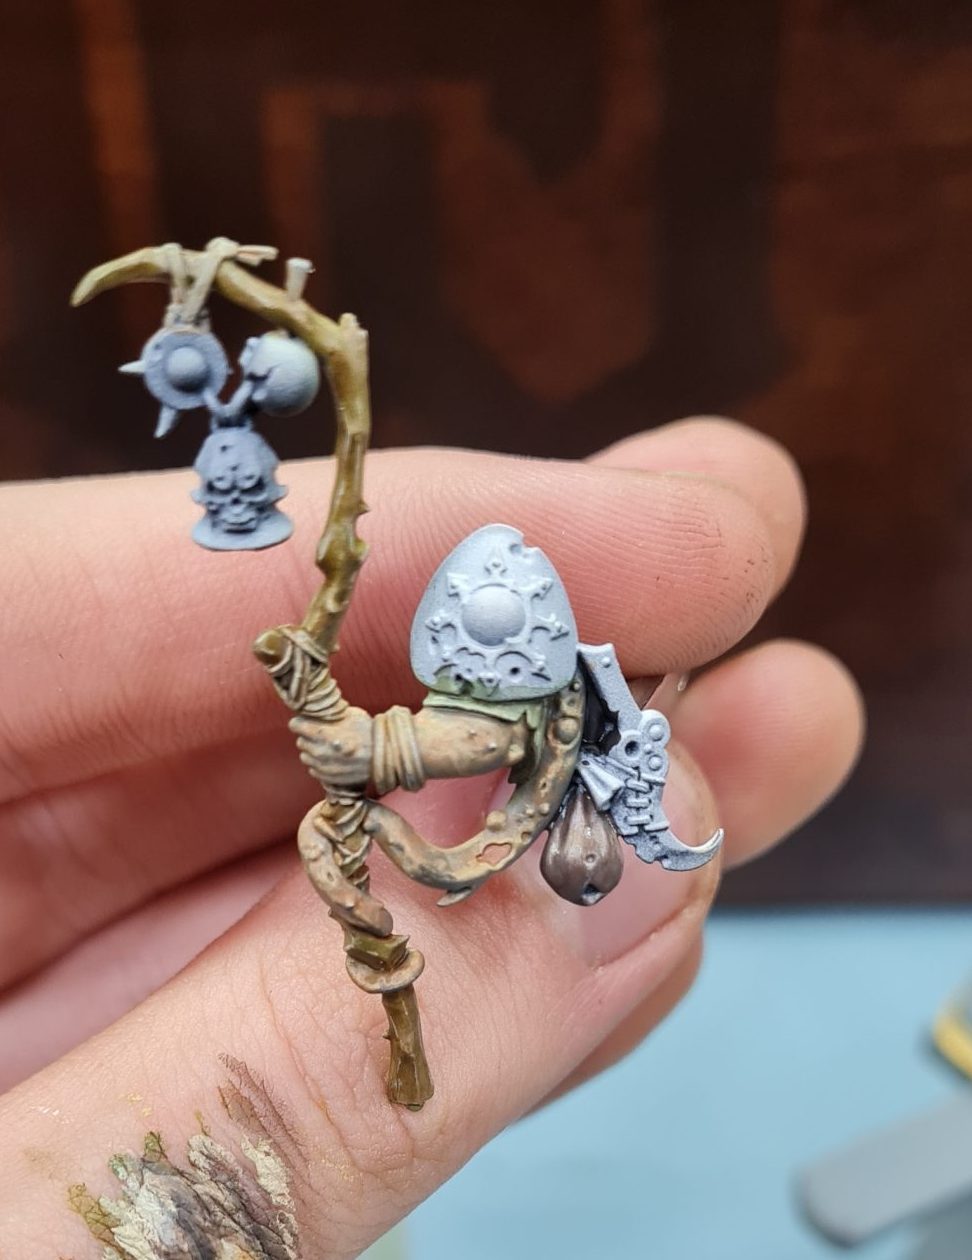
1) Beasty brown was applied to create a base coat for wood.
2) A mix of Beasty Brown and Hickey Yellow was drybrushed for highlights.
3)For the final step I applied a glaze of Interior Green over the entire pole. Followed by a glaze of Charred Brown in the deepest shades.
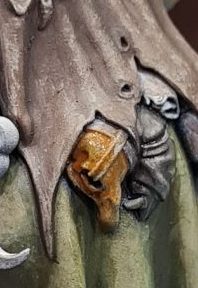
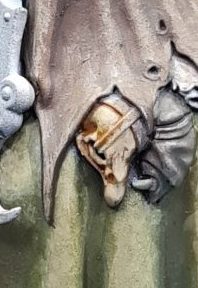
OTHER DETAILS
The model has several parts that can be painted to resemble leather or other materials. For variety, I painted brown fabric and black leather.
Brown fabric
For brown fabric, I used VMC Leather Brown as base color, S75 Hykey Yellow for highlights, VMC smoke and VMC black for shading. Wet blending shortened the painting process to a view quick steps.
The small bag was painted wet blending VMC Leather brown and VMC Smoke. Followed by a wet blending s75 hykey yellow and leather brown for highlights. The last step was a quick wash of brown to refine the shadows.
Black leather
The goal was to try and make a black leather holster. It ended up looking more like rubber.

1) A layer of VGC Sombre Grey is applied to the entire surface.
2)Wet blend Sombre Grey with Black
3)Highlight leather with Sombre Grey. apply Hykey Yellow as a highlight for stitches.
THE CAPE
The cape was painted the same way as the dress.
1) VMC Leather Brow was painted as a base color.
2) Shade with a mix of Leather Brown and Black
3)Stipple a mix of Leather Brown and S75 Blackened Brown
The final step is to paint the edge highlights. This will be done as one of the final steps.
THE BONES
In nature, bones come in a variety of colors and gradients. I decided to go for a more stylized look. It allowed painting the skull relatively fast while making it stand out.
1) Apply VGC Beasty Brown as an undercoat.
2)Add highlights by blending in Citadel Ushabti Bone.
3) Add a glaze of VMA Interior green to the shadows. It’s a subtle effect that makes bones look aged and more natural.
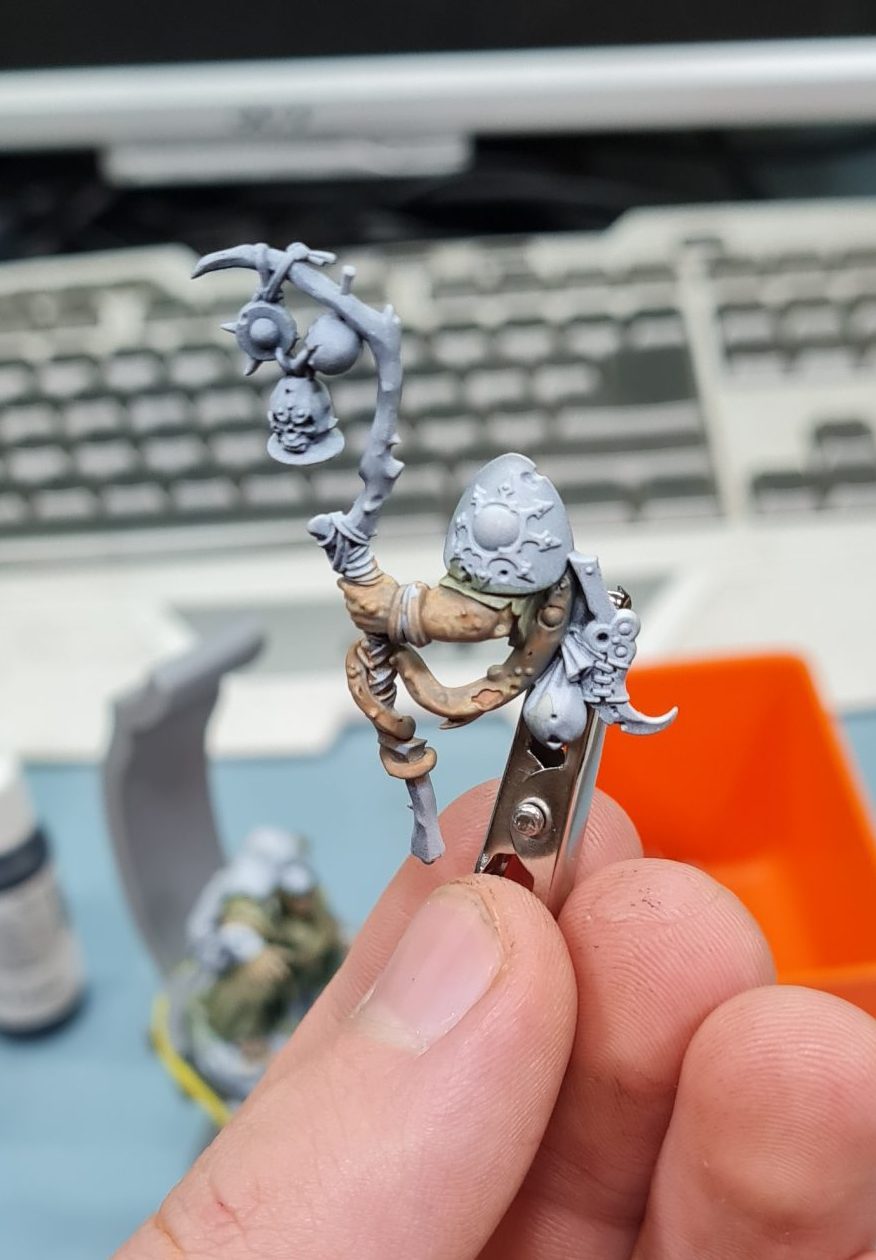
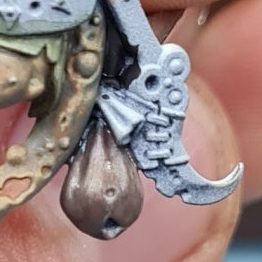
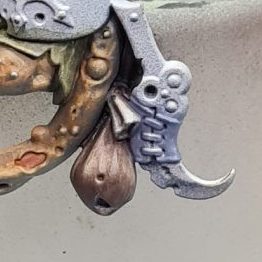
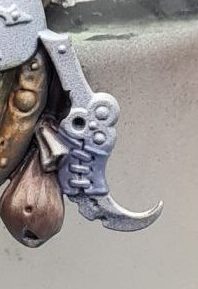
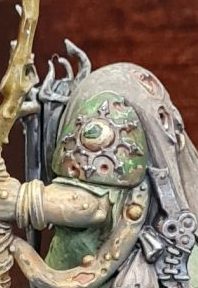
NMM
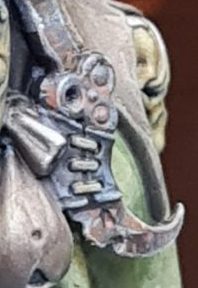
The original color pallet did not generate any metallic colors. Hence I had to paint all the metal parts in non-metallic metal. Both the dagger and the bell were painted in this style. Steel ended up looking exactly as planned while the bronze did not reach the desired look. This is why I’m only covering stell NMM in this article. I will cover bronze in future articles once I’m satisfied with the results I’m able to achieve.
In NMM it’s important to have enough contrast. It fools the brain to interpret the material as shiny. In this case, it’s also important to paint the dagger in cold colors. It will contras against warm tones of rust and weathering. I split the painting process into the upper and the lower part of the blade.
Five colors were used to paint NMM steel. VGA Sombre Grey as base color. VMA Intermed. Blue and VMA ivory for highlights. VGA Charred Brown and Black for shadows.

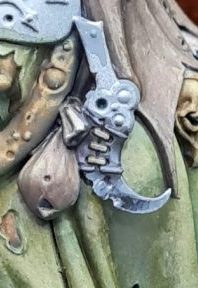
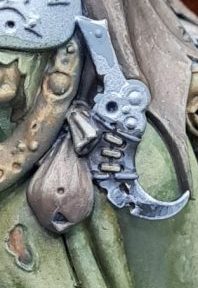

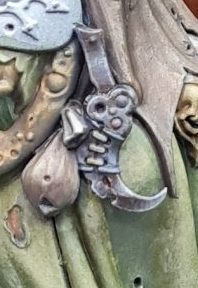
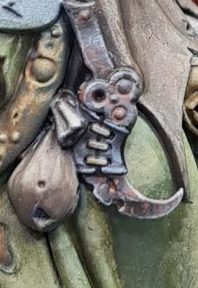
1) Wet blend Sombre Grey and Black to sketch out shadow.
2)Add VMA Intermed. Blue for highlights.
3)Refine highlights with ivory.
4)Repeat previous steps for the upper part.
5)Glaze shadows with Charred Brown for contrast.
6) Glaze rust for deeper weathering. Add random dots of rust to represent random rust speckles.
With this, the dagger was 80% done. The final highlights were added using pure VMA ivory. The metal trim on the shoulder pad was painted the same way.
THE ARMOR
Sticking with the swampy Nurgle theme I wanted to paint the armor green and weathered. Painting weathered armor on models always brings me joy.
To make the armor stand out 4 paints were chosen. VMA Flat Green as basecoat. VGA Yellow Olive and Charred Brown for shading. Citadel Ushabti Bone for highlights.
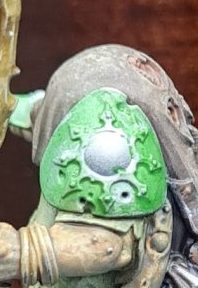
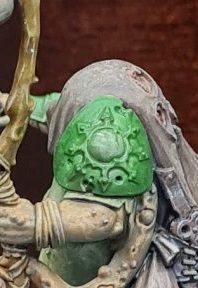
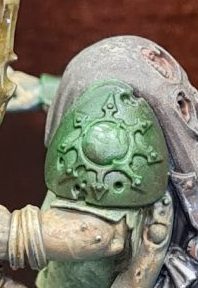
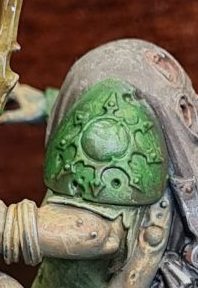

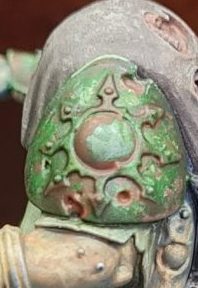
1)Flat Green Is applied as a basecoat.
2) Yellow Olive is used as a shade
3) Mix Yellow Olive with Charred Brown for shadows
3) Use pure Charred Brown to map out paint chipping.
4) Highlight using Flat Green and Ushabti Bone.
5)Refine deepest shadows with Charred Brown. Add Rust for rust effect.
There is not a lot I can say about painting the armor details. how I painted those details was covered in previous steps. The trim was painted the same NMM steel. The eyeball was painted using VMA flat green for the pupil.
THE HAIR
I wanted the hair to look dirty and greasy. I also didn’t want to spend too much time on those dreadlocks.
Hair was painted using 3 paints VGA Beasty Brown, Black, VGA bone white.
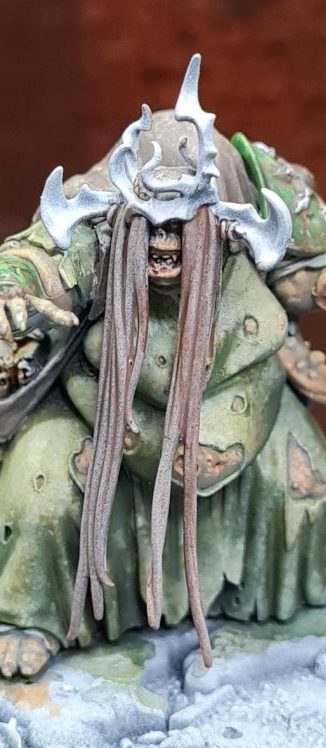
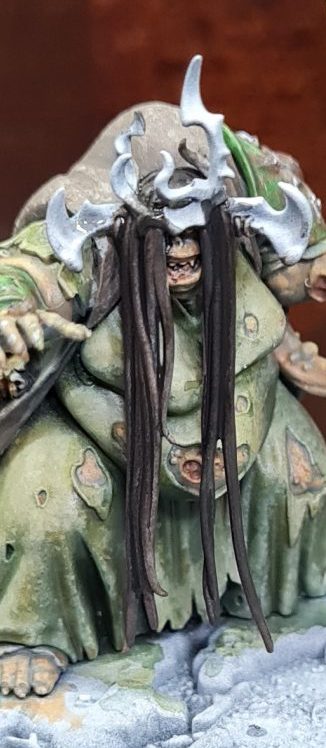
1) Wash with Beasty Brown
2) Add a second wash of Beasty Brown + Black
3) Highlight with Bonewhite
The hair is 80% done. It will be adjusted in the refining phase.
REFINING PHASE
This is the stage of painting where I define transitions, adjust highlights and shadows, and paint all the tiny details. I was rushing to meet the deadline. Great exercise for efficiency, not so much for documenting.
To sum this step up. Maggots were painted S75 Hykey Yellow and washed with Charred Brown. Biles were painted with VGA Bonewhite and glazed with VGA Moon Yellow. The crown piece was painted just like the bone but, charred brown and black were used for shading.
Because brown was added to most shadows we are able to outline parts with a mix of Black and Smoke paint. Paint a thin line of this mix into every crevice where parts meet or material changes. This effect is subtle but it helps a lot in separating all the different components
Refining shadows was much the same. I went over the entire model with Bonewhite and Ivory to create the brightest highlights. In the case of skin, cloth, and leather, I added some of the base colors to the highlights to tie them together.
THE BASE
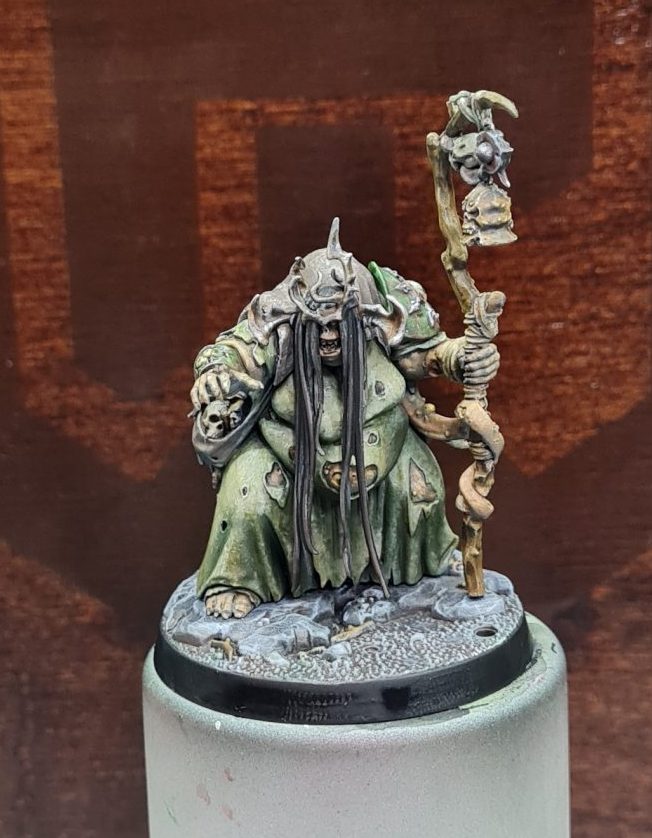
The base needed to accentuate the model. This is why I painted it in a contrasting color.
In previous steps, I undercoated the base with Charred Brown to test how it will look against the model. While looking nice it was too warm for my taste. This is why Citadel Russ grey was used as a base color.
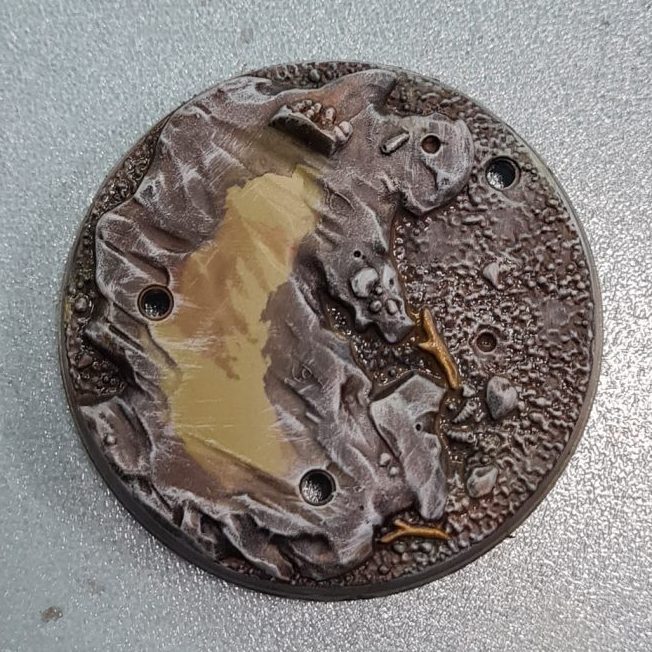
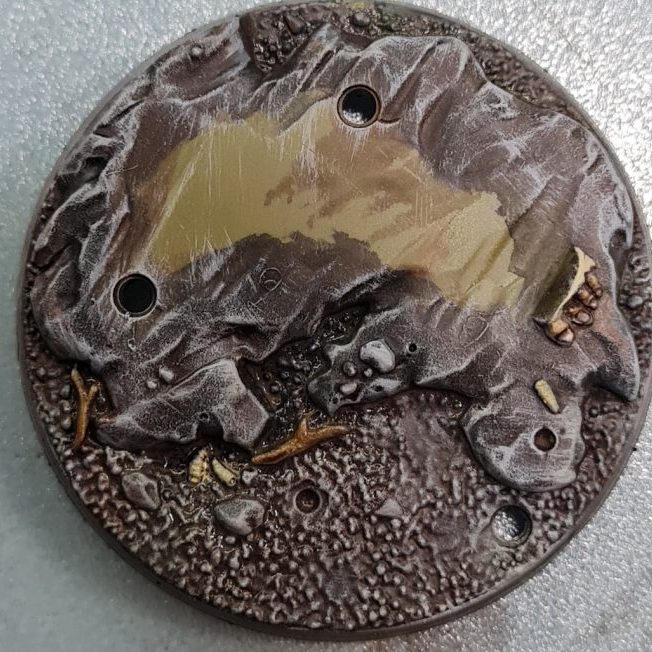
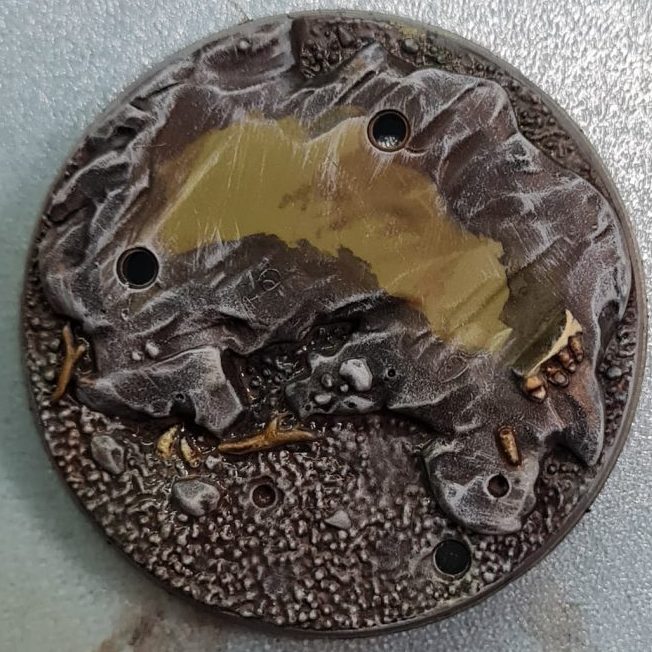
1)After undercoating the base drybrush with Citadel Russ Grey
2)Paint the small details. Beasty Brown for twigs and Hykey Yellow for maggots
3)Wash details with a mix of Smoke+Back
4)Paint the base trim black

FINAL THOUGHTS
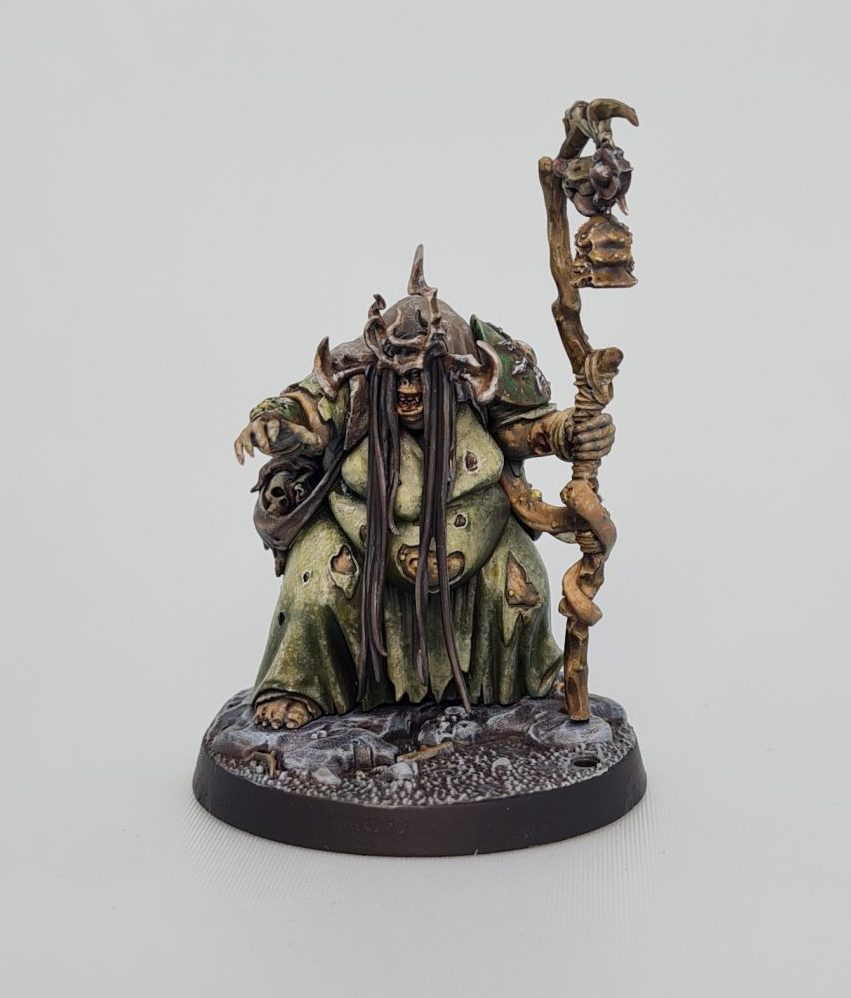
With the model painted I set up the lightbox, took the final pictures, and sent them off to our designer. After the weekends I returned to office to evaluate my paint job with fresh eyes.
I was happy that the model achieved previously set goals. The overall color tone of the model matches the image I chose. It looks great as a gaming piece and if you set it on the shelf it looked good.
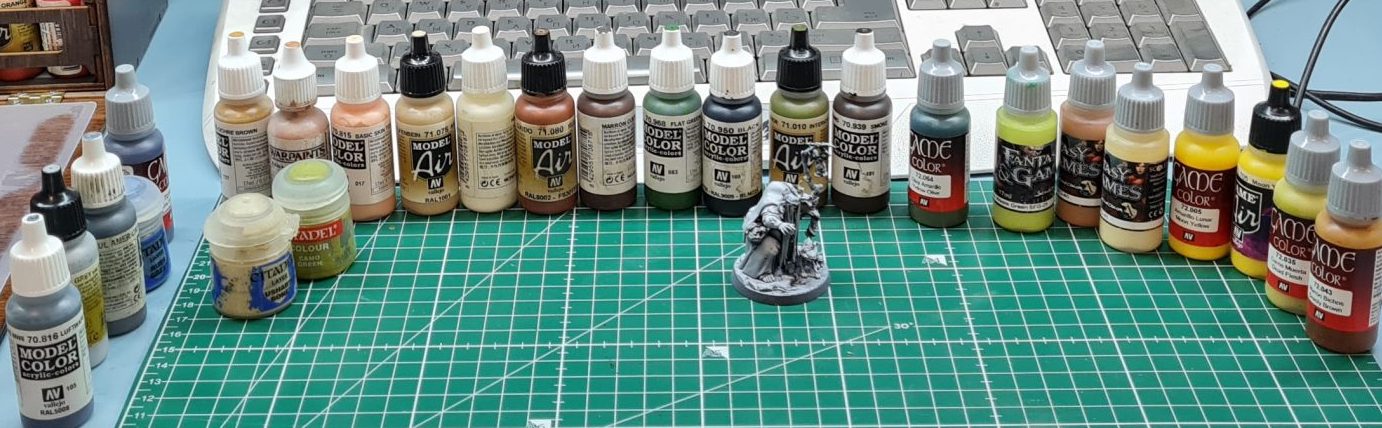
Out of 26 paints I chose I ended up using around 20. Most colors could be achieved by mixing.
However, the model was not perfect. First of all, I didn’t have enough time to paint the “dog-looking thing” on the base. Secondly, the paint job was rushed and there were painting mistakes littered throughout the model. Third of all, I missed some paints I could have used. I had only 4 days to paint the model but the original challenge gave 30days.
This is why I’ll be revisiting this model and touching up the paint job in part 3 of this challenge coverage.
Thank you for your time!
-Roman