Miniature Painting Tutorials
Color Palette from an Image – Miniature Painting Tutorial (Part 2)
Oct
Color Palette from an Image – Miniature Painting Tutorial (Part 2)
by Roman, Frontier Wargaming (October 22nd, 2021)
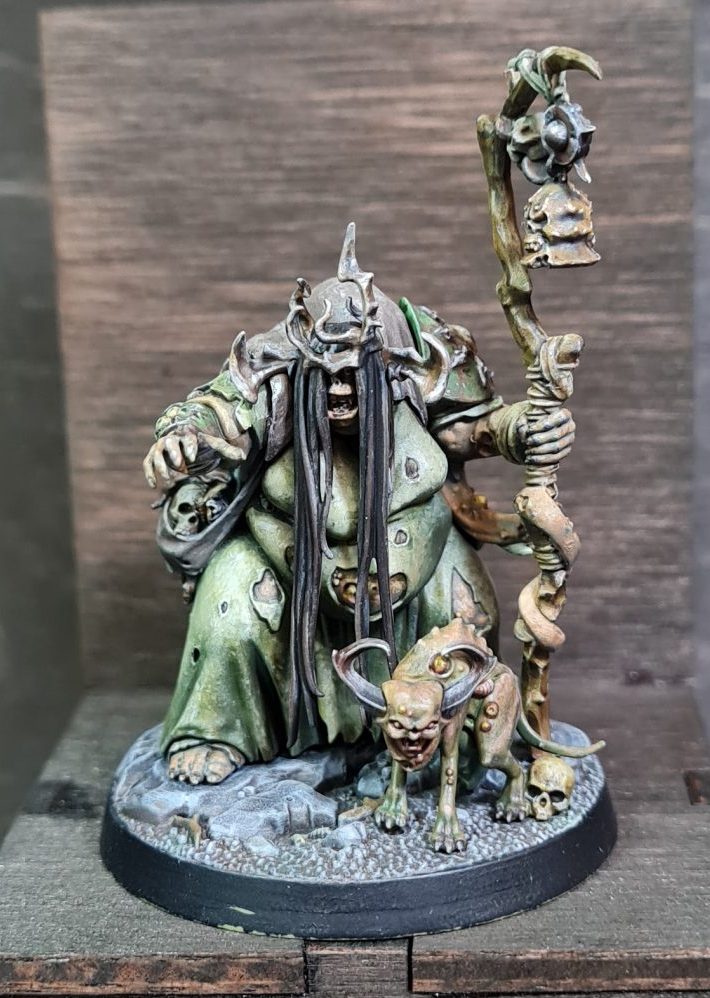
Roman of Frontier wargaming here. In the previous part of this series, we went over the preparation and the painting process of the Fecula Flyblown model. A paint palette was generated from an image and the model was speed painted using it. Due to time constraints, the creature on the base was left unpainted. Some details on the model were left needing a touch-up. Therefore a great opportunity to revisit this model and enhance the paint job opened up. At one point or another everyone who does creative work wants to revisit old projects for improvement purposes. But it is important to set boundaries to not ruin previously successful work.
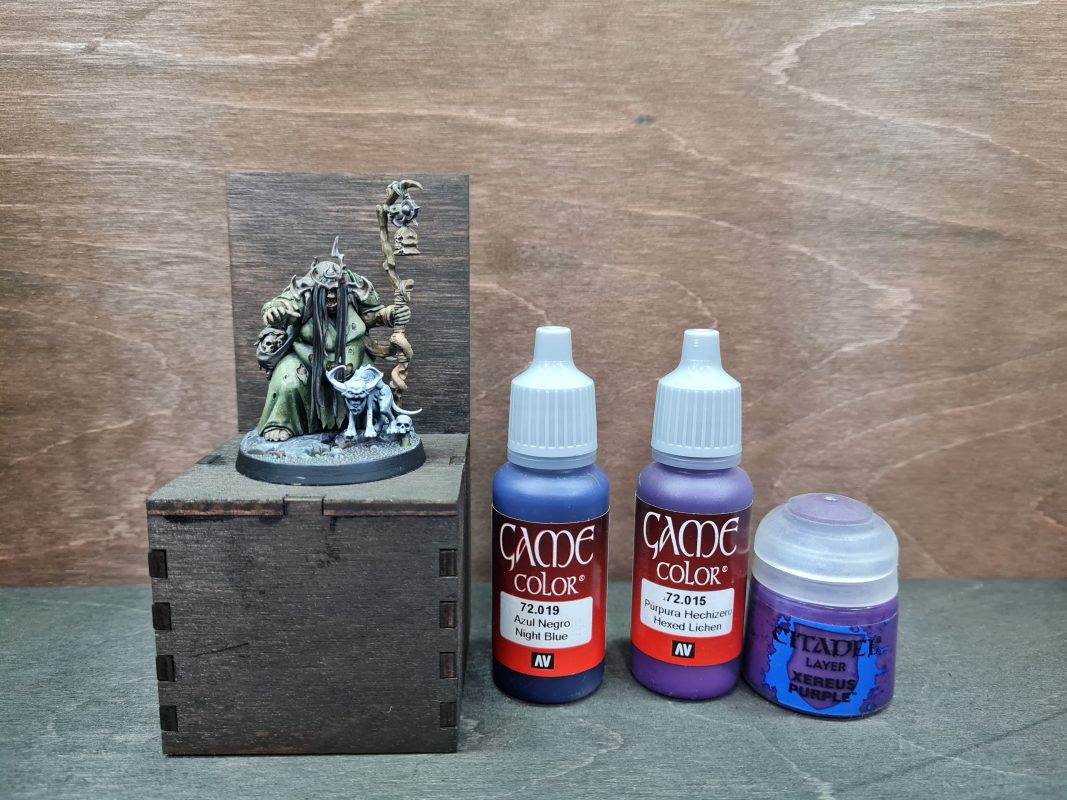
The first thing I did was figuring out what needs to be done. Luckily I had an entire week to do so. Note that the model was sitting on my work table as I was typing the articles and editing images. This allowed me to examine my own work and pick what needed to be done. I ended up with 3 major fixes. First of all, I needed to paint the creature on the base. Secondly, the dress looked too clean and needed to be weathered more. Third of all, I wanted to add purple to the palette. It’s a color that in theory should help bring life to skin and flesh.
Adding Colors to the Palette
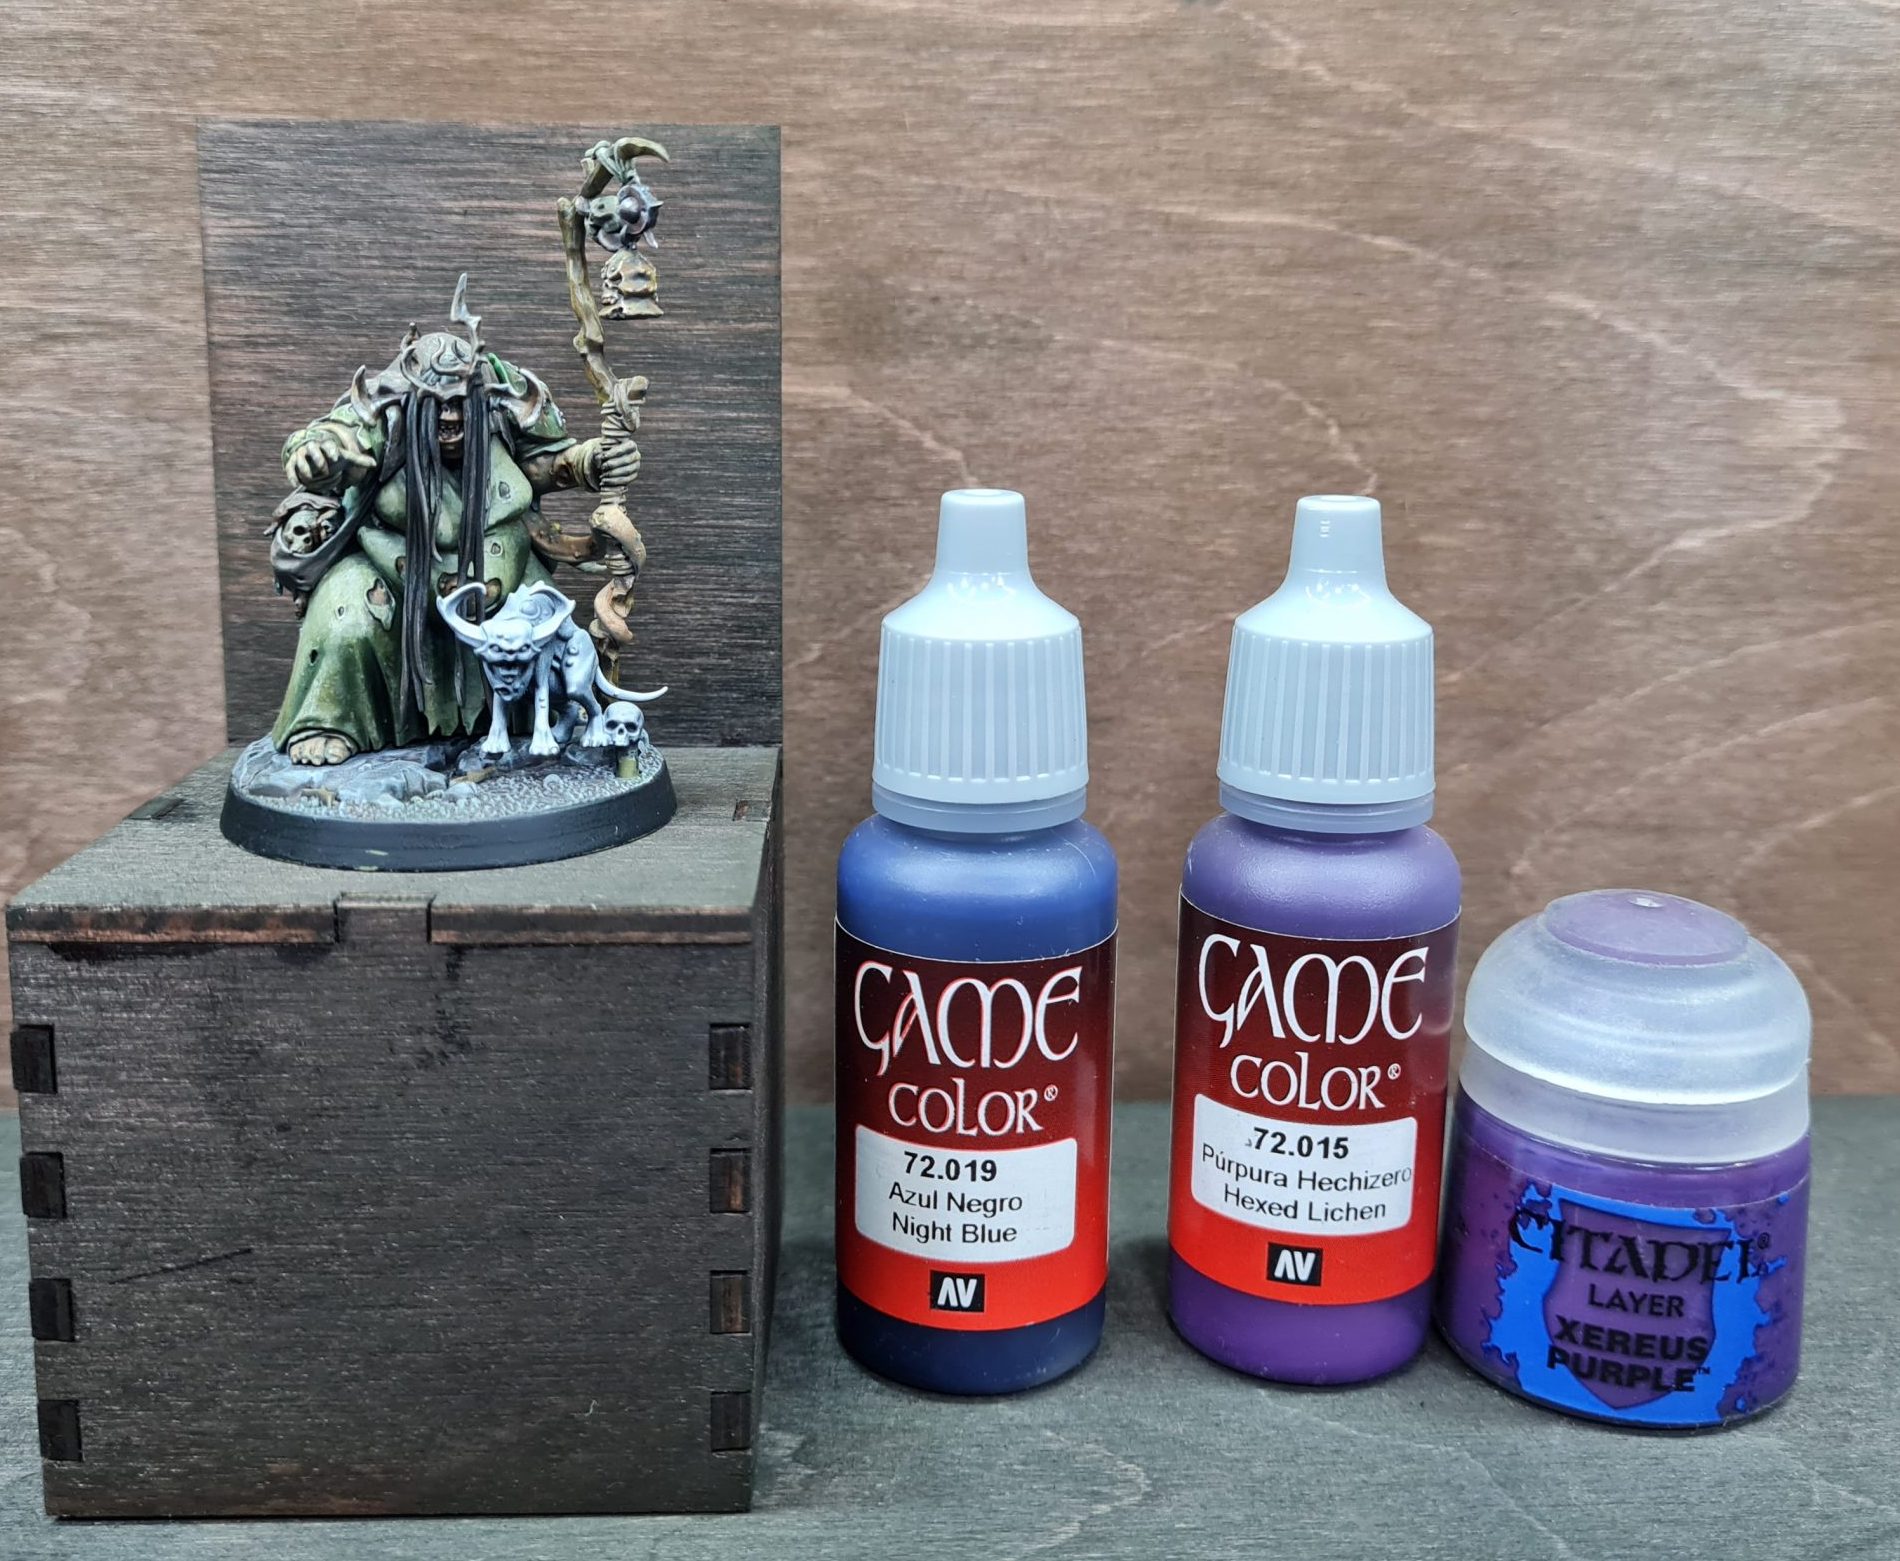
I revisited the original palette generated in photoshop. Three colors were picked by holding the paint pot against a monitor. I ended up needing only one of three, VGA Hexed Lichen. So, while 3 colors were picked only 1 found its way onto the model.
Painting the Miniature
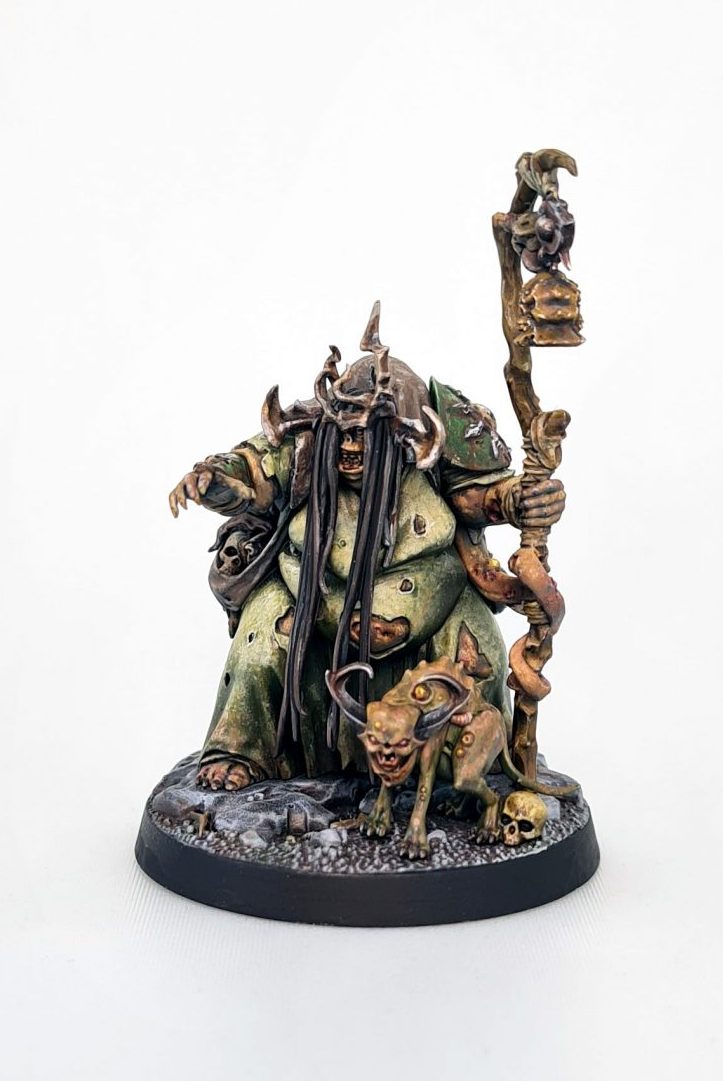
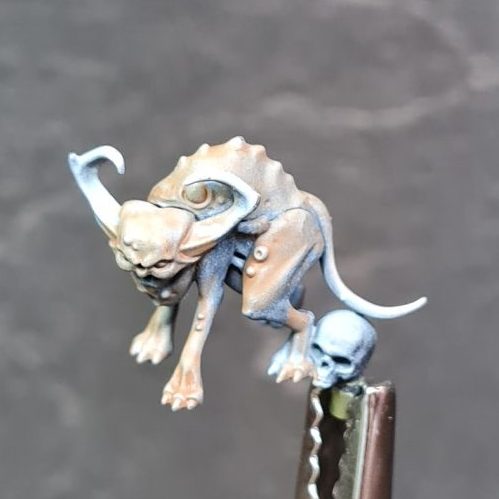
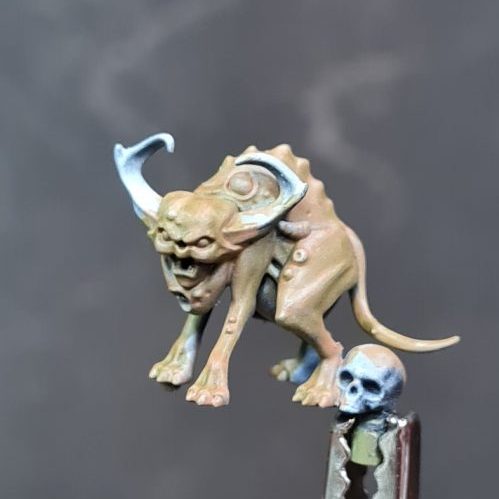
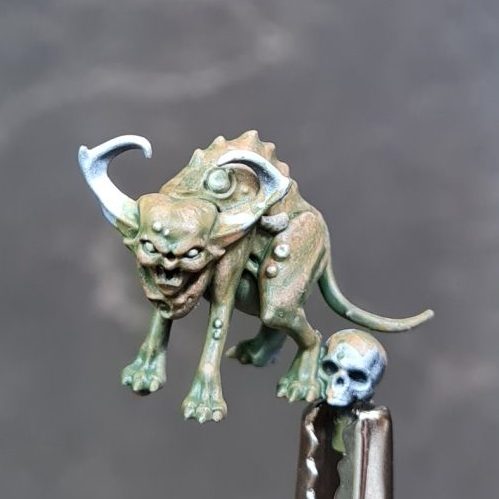
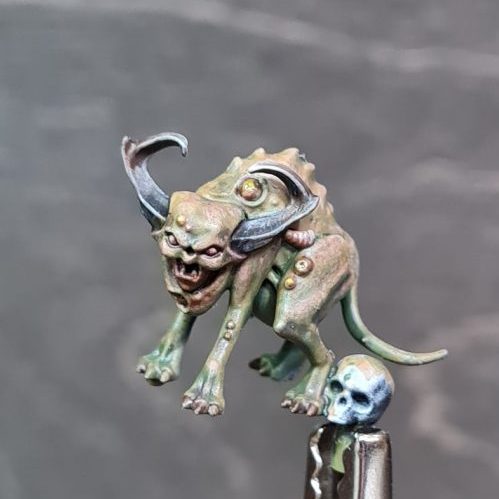
The creature reminded me of a sick chihuahua-sphynx cat mix. So, I decided to paint him in a sick greenish skin tone. The idea was to make the bulk of the skin look pink with dirty green shadows. Dark horns for contrast, and yellow boils.
Just like with Fecula I started from the largest details and ended with the smallest. When mounted on the base you can’t really see the creatures back. That allowed me to focus on the front of the model without wasting a lot of time on the back. The angle on most pictures is the side I focused on.
Skin
The skin was painted using 4 paints. Scale 75 (S75) Blacked Brown as a base tone. VMA Interior Green and VGA Yellow Olive For shadows. S75 Hykey Yellow for highlights.


1) Apply S75 Blacked Brown as a basecoat for highlights
2) Gradually add VMA Interior Green to (S75) Blacked Brown to create the first shadows
3)Glaze VGA Yellow Olive to the deepest shadows
4)Reapply S75 Blacked Brown to refine the highlights. Apply it using stippling to create a gradient.
5)Add S75 Hykey Yellow to S75 Blacked Brown for brightest highlights. highlights were applied using stippling.
Wounds and blisters
The model was covered in wounds and blisters. Painting them was the next step. For this step, 5 paints were used. S75 Hykey Yellow for undercoating and highlights. VMA Rust and VGA Charred Brown for gashes and wounds. VGA Hexed Lichen for glazing skin. VGA Moon Yellow to add yellow for the boils.
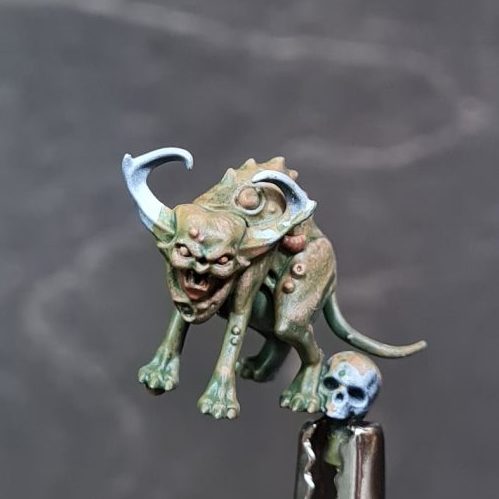


1) Base all the blisters, teeth, eyes, and maggots with S75 Hykey Yellow
2)Basecoat wounds, gashes, and the lower jaw with VMA Rust. Use it as a glaze for eyes, blisters, and maggots.
3) Shade the wounds and lower jaw using VGA Charred Brown. Also, apply it to the horns.
4) Glaze everything with VGA Hexed Purple. Focus on shadows and crevices,
5) Apply S75 Hykey Yellow as a highlight for boils and eyes
6)Wash the top of the boils with VGA Moon Yellow.
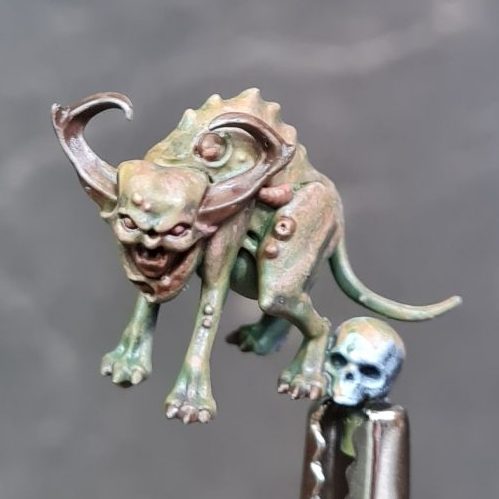
Horns
I wanted to achieve dark-looking horns. They were already based with VGA Charred Brown. That left two steps to be done.
Three colors were used in total. VGA Charred Brown as a base. Black for shades. S75 Hykey Yellow for highlights.
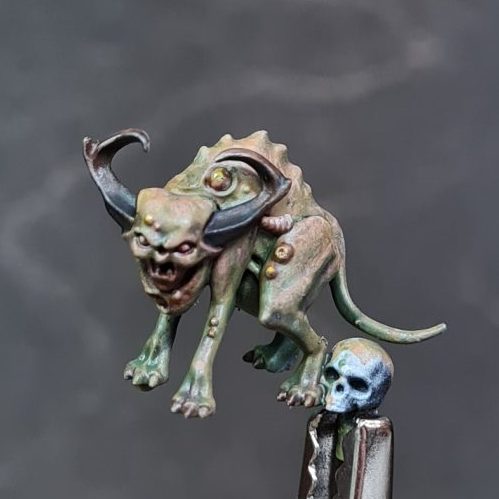
1)Shade the horns with Black
2)Add highlights with Hykey yellow

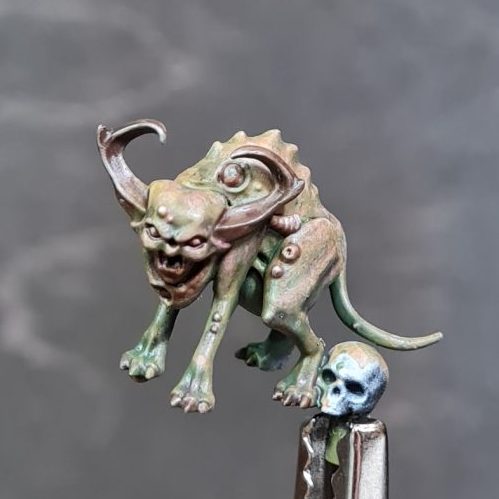
I finished the creature by painting the claws and the skull. Skull was painted the same way as bone in the previous article. The claws were painted just like the horns. I placed the creature on the base and it fitted right in with Fecula. It stood out enough to be registered as a different model. But the color tone stayed consistent on both models. There were two things I wanted to address before calling this project done. Both had to do with Fecula.
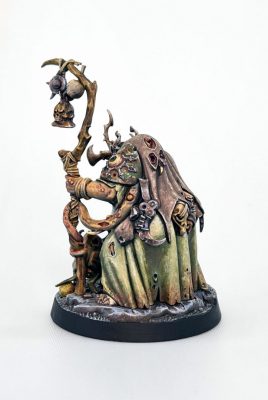
Weathering the dress

The dress looked too clean and I wanted to add some dirt on the lower part. For that 2 colors were used. VMA Rust and VGA Charred brown.
I simply took an old beat-up brush and stippled dirt in 2 steps. It achieved a mud effect.
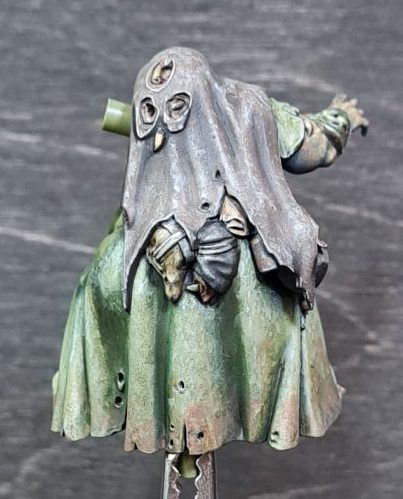

1)Stipple VMA Rust onto the lower part of the dress.
2)Stipple VGA Charred Brown.
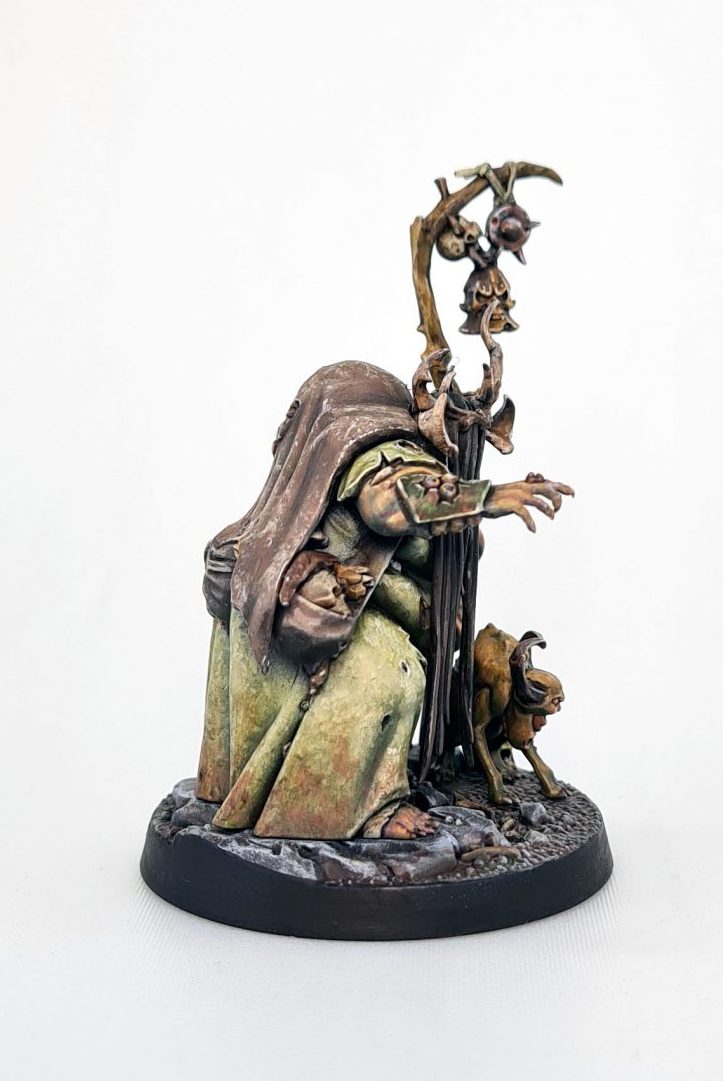
Touching up the skin
The skin was another part I wanted to address. The entire step consisted of glazing wounds and gashes with VGA Hexed Purple.
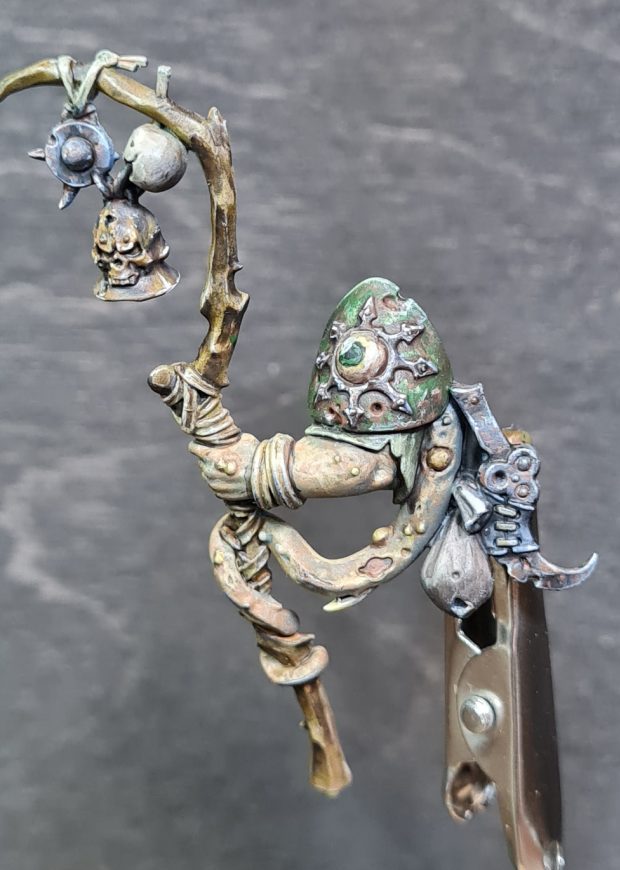

Purple was applied around the blisters and wounds. I also glazed the entire tentacle to make it stand out from the staff more.
Final thoughts
With the model finished all I had to do was assemble it and take the final pictures. While doing it I came to some conclusions about the whole Picture Palette Challenge. One of the main takeaways for me was a lesson in planning. If I planned it better and started earlier I could have achieved a more refined look. Another lesson was “letting your eyes rest”. When working with limited colors taking a break from painting allows your eyes to “reset” and makes it easier to spot what needs to be fixed. This is why painting in short sessions every 1-2 days creates a more refined look. I just focused on things that needed improvements. I learned a great deal about using a limited palette and how the same colors can be used to achieve different results. Surprisingly, this model turned out to be a great practice for painting skin. I’m happy with the end results and how the model looks on the table. I will be using things I learned in this project other models from the wurmspat box.
Thank you for reading, I hope you found this series informative and hopefully learned a thing or two in the process.
Finished Model