Photography
Miniature Photography: DIY Setup for Better Pictures

Oct
Miniature Photography: DIY Setup for Better Pictures
by Roman of Frontier Wargaming
Most of us encounter situations when we need to photograph our models but the photos don’t do the models justice. Details can get obscured, parts can get out of focus and colors can be off. Even I encountered said problems when doing my miniature photography for the first articles for this blog. Hence this tutorial was born. In it, we will cover how to set up your DIY miniature photo area.
Common Issues
The first thing we did was analyze our initial photos. Three major issues stood out to us.
- Most pictures were out of focus and camera angles kept changing.
- Inconsistent light ruined the colors and details of the miniature.
- Poor background choice made it hard to crop the picture properly and made the miniature blend in too much.
This gave us clear directions on what to study and improve: focus, lighting, and background.
Image Focus
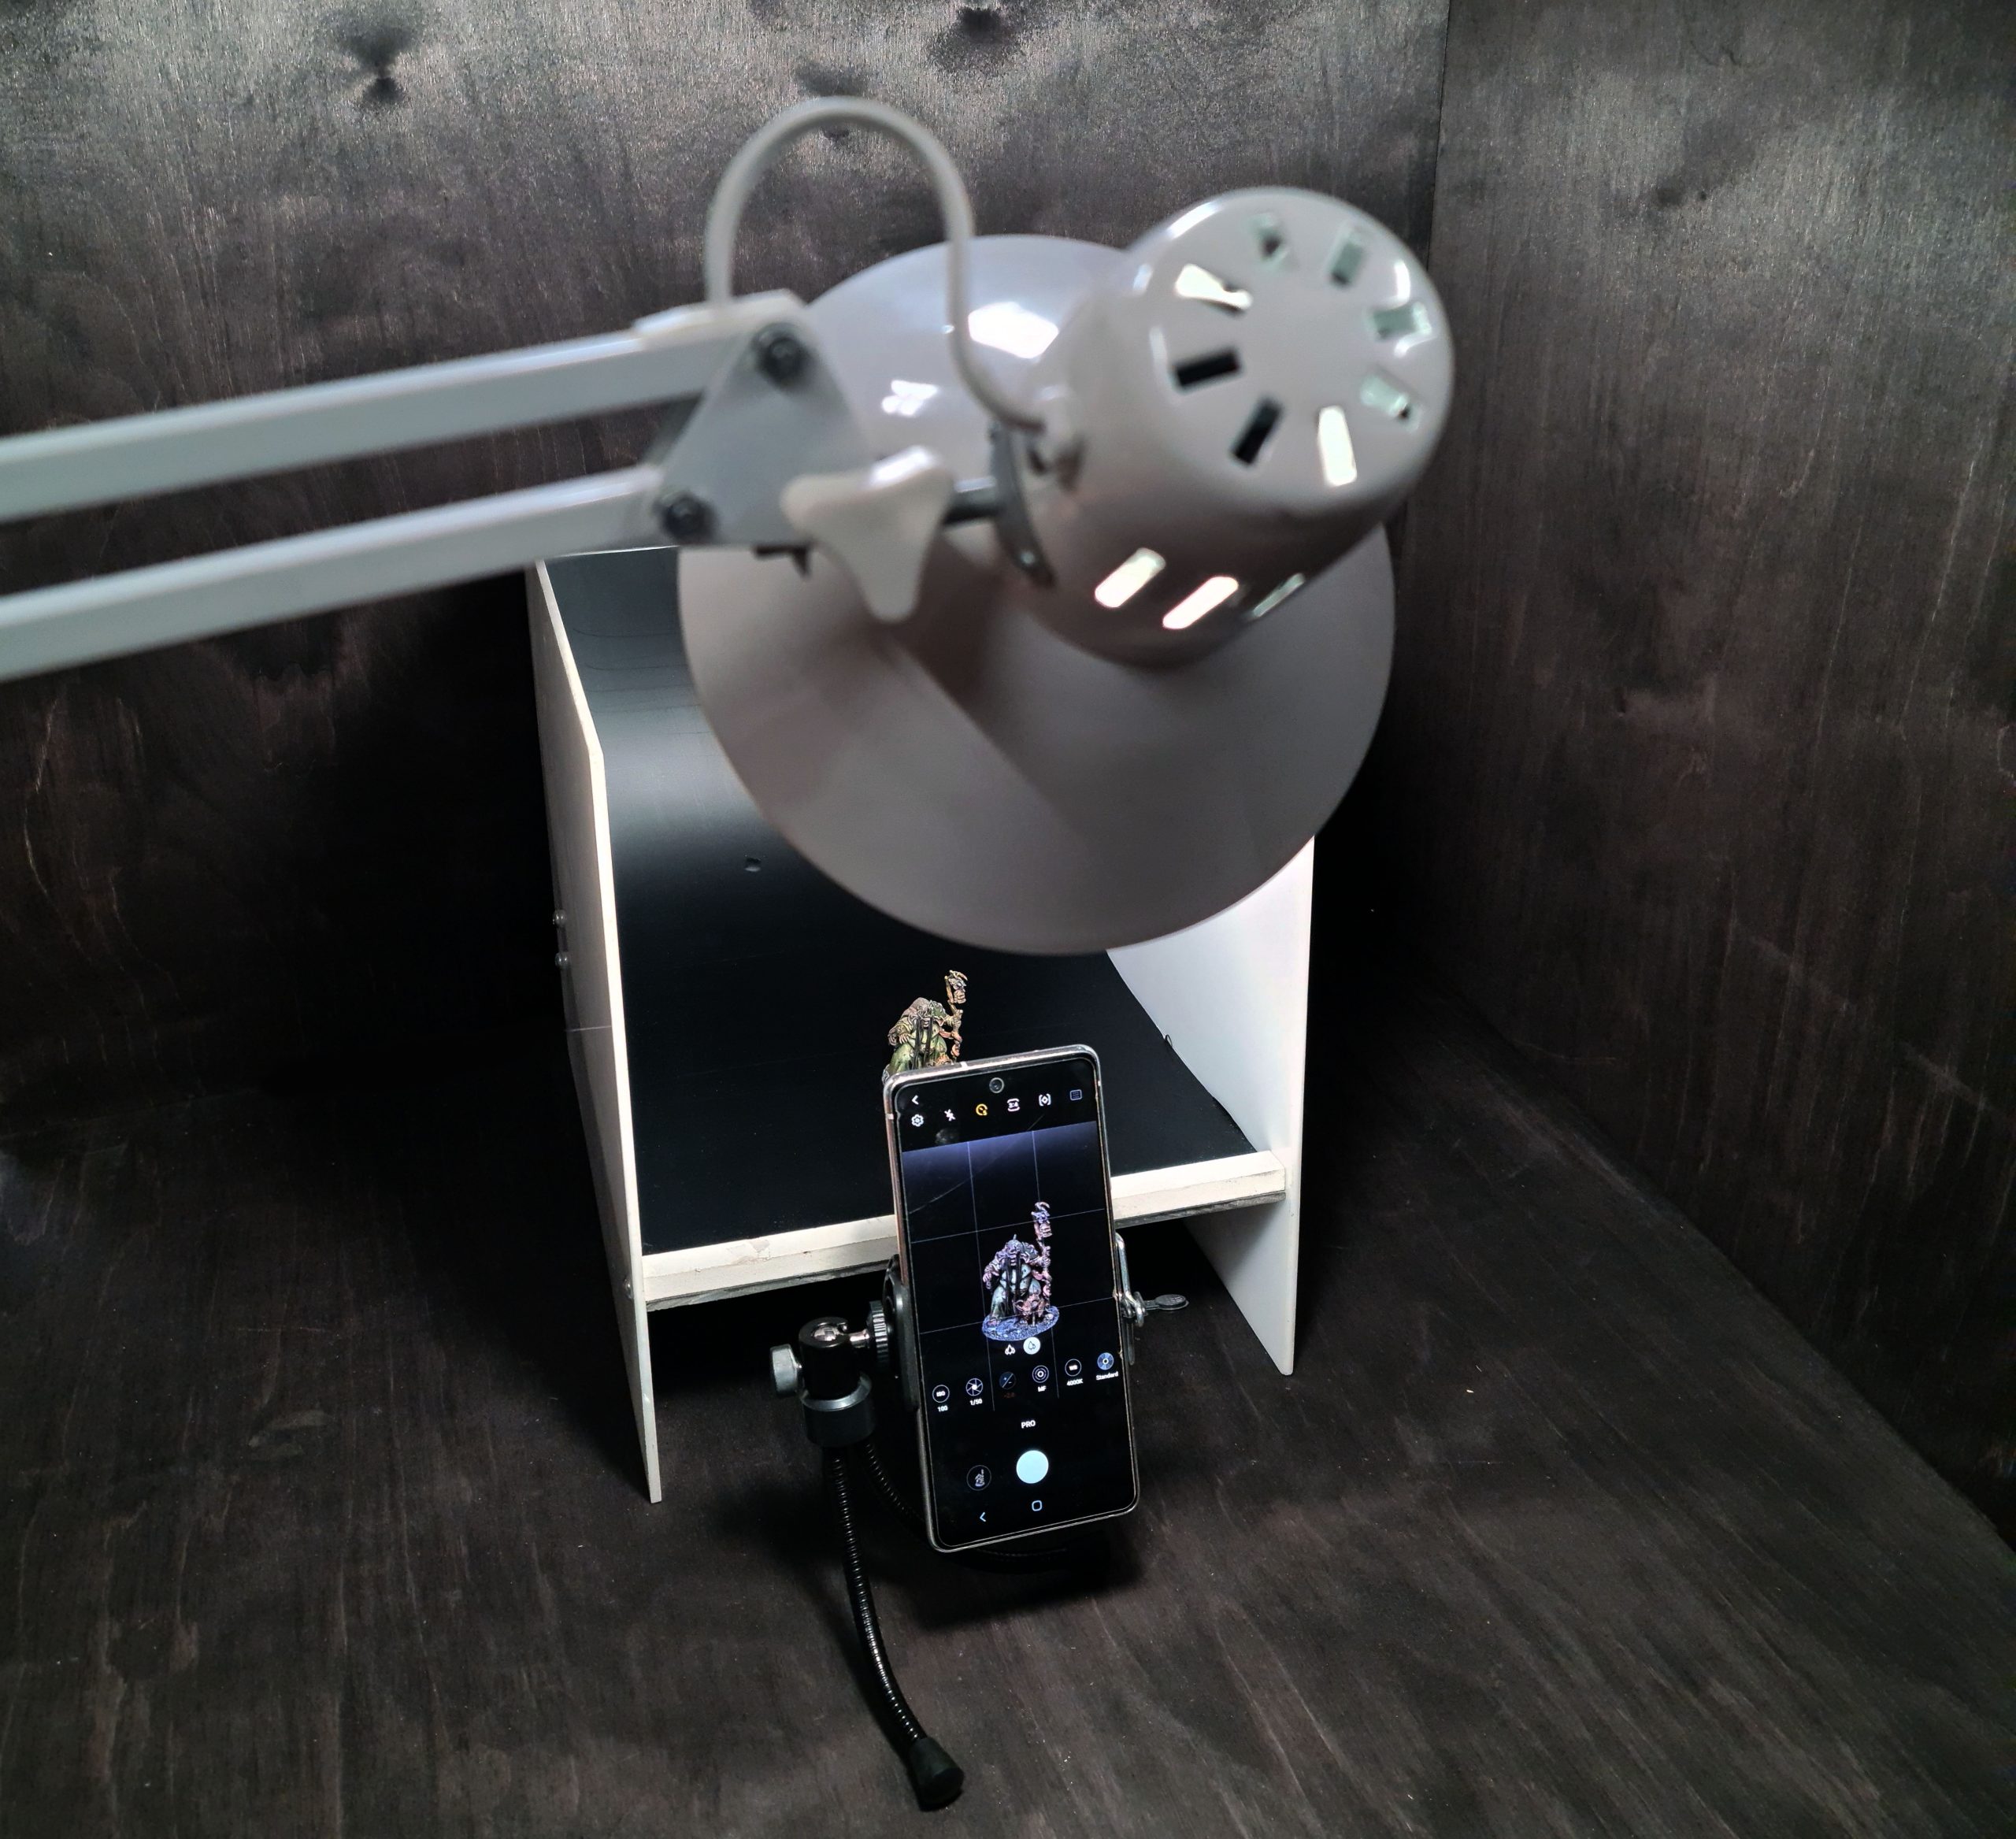
First of all half of the photos were out of focus, blurry, or had inconsistent angles. This was fixed with a simple phone stand. Any stand or tripod will do as long as it has a dedicated mount for your camera. I literally got the cheapest tripod at a grocery store and it did the job perfectly.
You can even improvise by creating a stand out of items you find laying around (i.e. books). Then simply set a timer on your phone camera so it stands still when the picture is taken.

Miniature Lighting
Secondly, the lights were addressed. Inconsistent lights can cause major color inaccuracies in photos. Not having enough light can hide details on the model. A good light source is important for a good photo.
We tested multiple lights for this step. We recommend LED lights with at least 800 lumens of brightness or more. The color range should be between 5000-6500k. This is a neutral white spectrum that doesn’t distort the colors. In most cases, 2 lamps proved to be a great option.
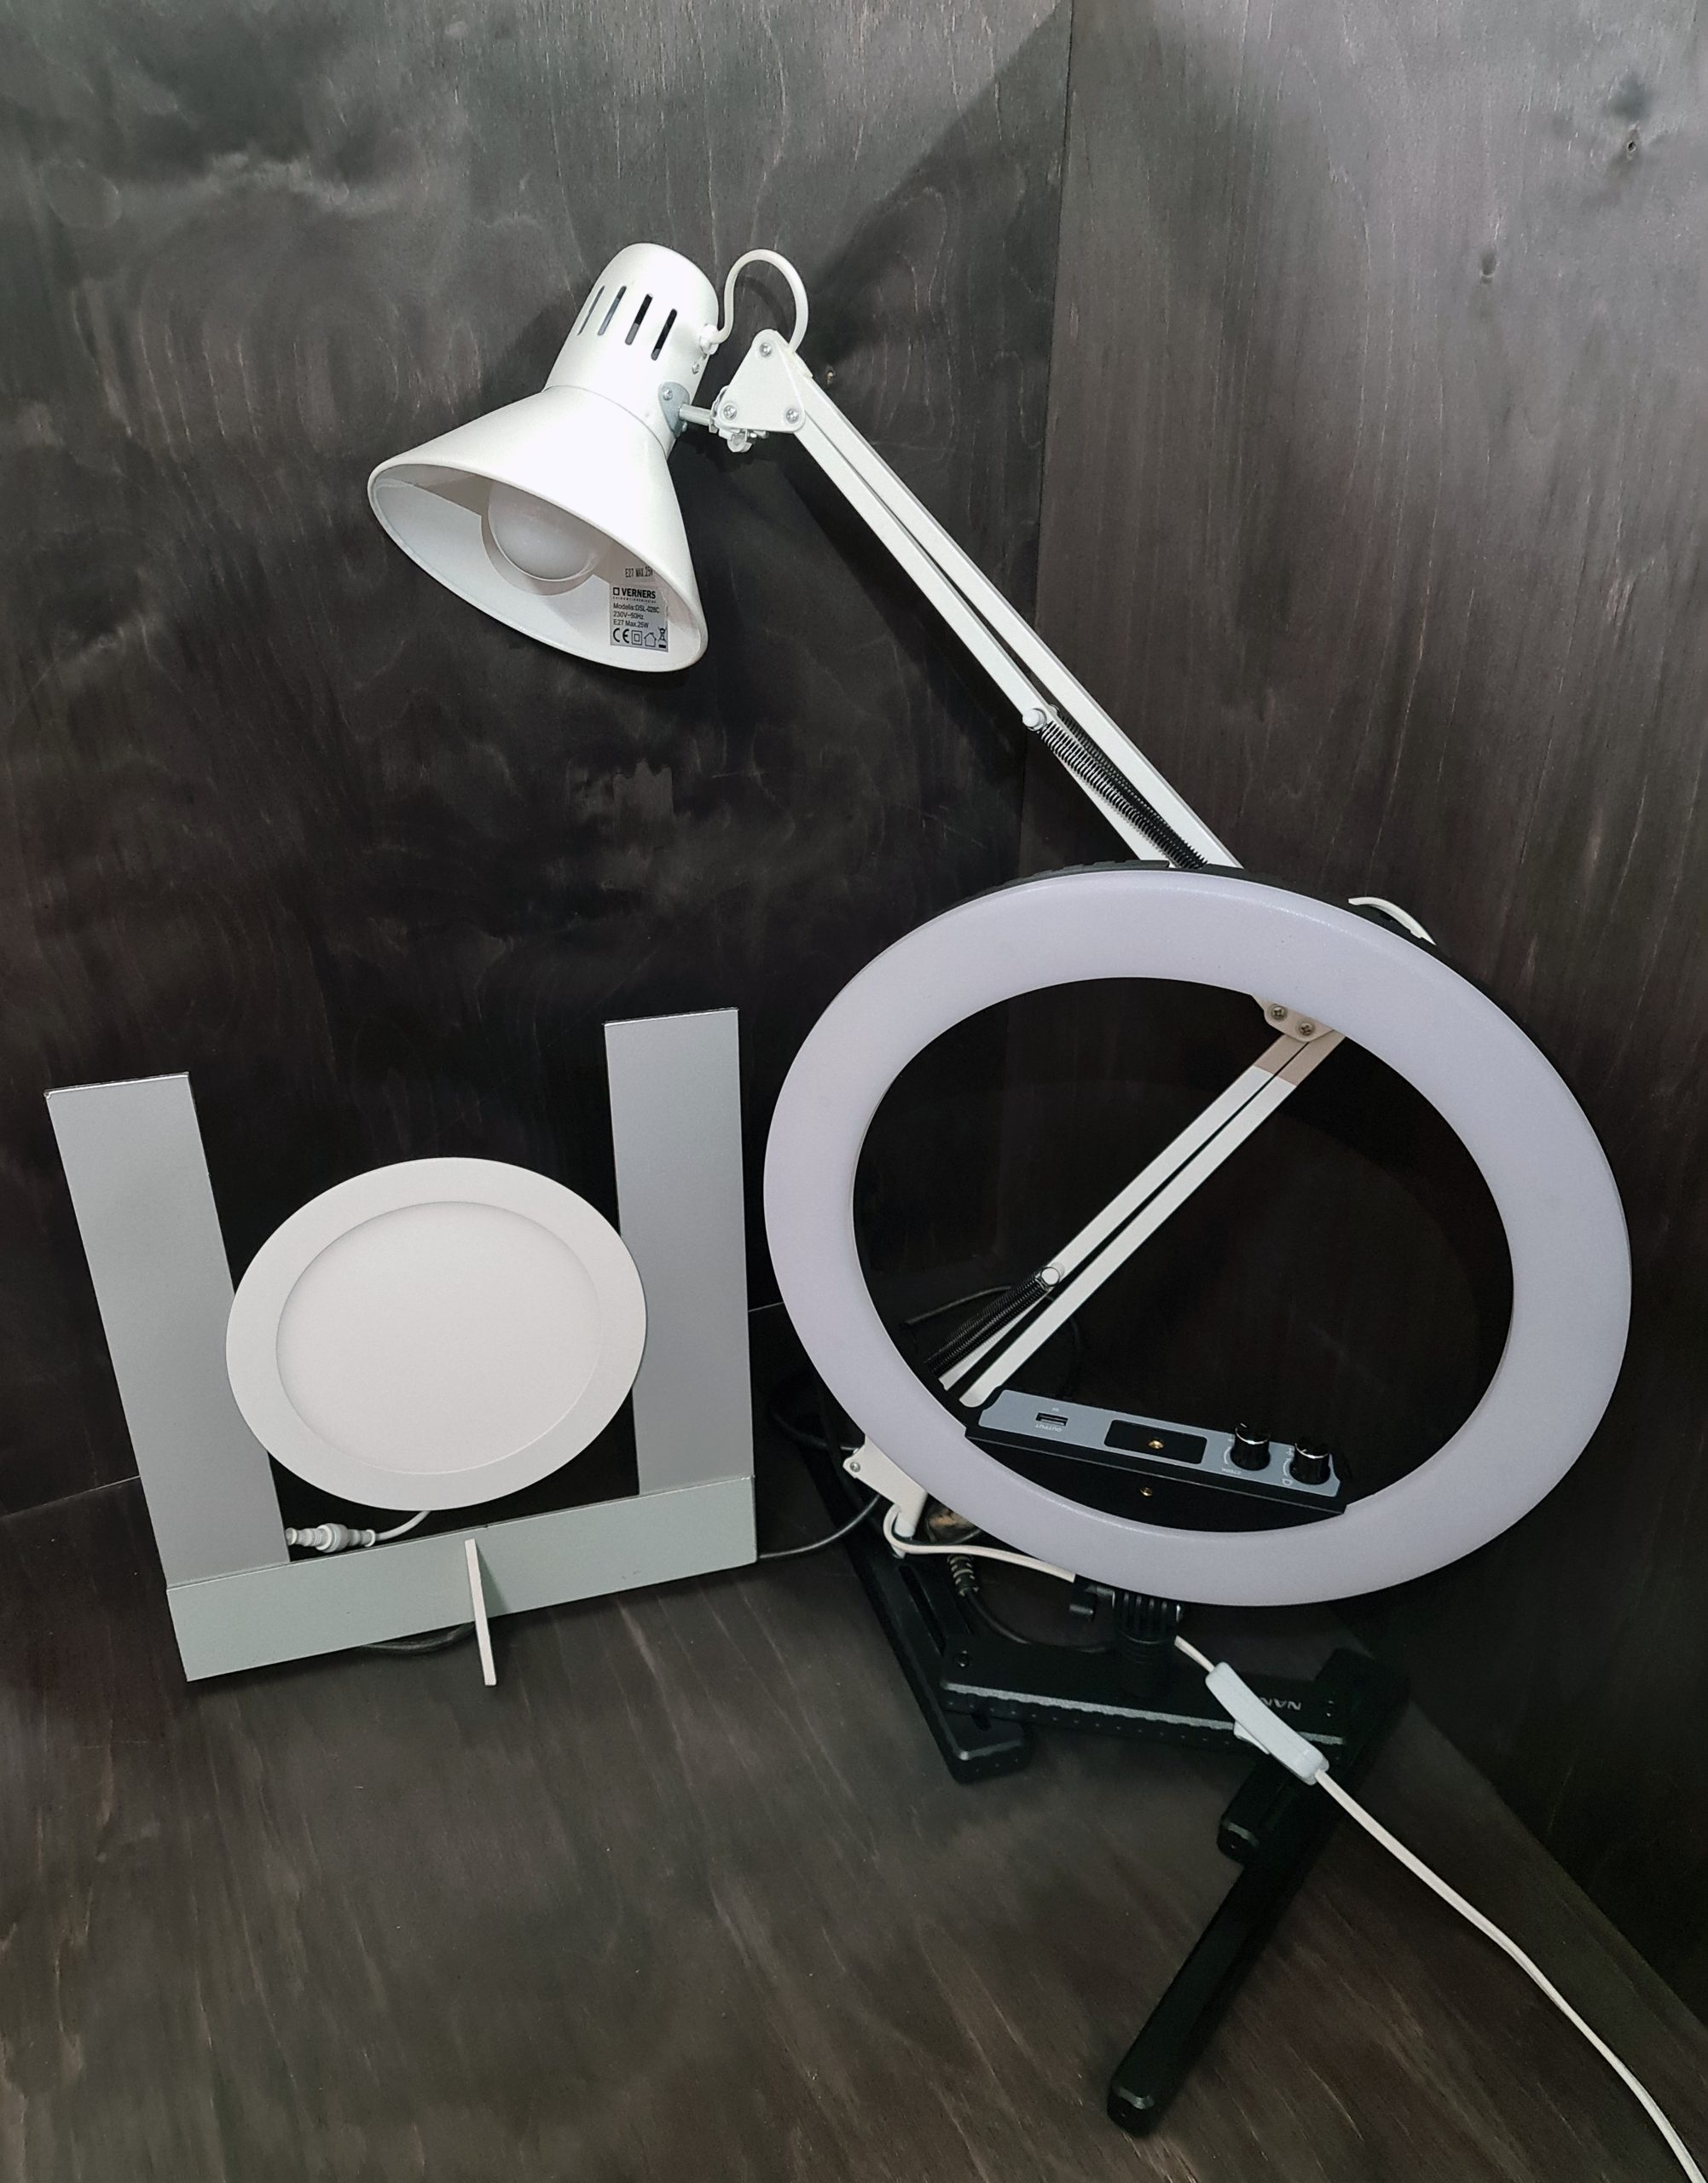
Image Background
Then we addressed the background. Having a proper background can help your model stand out. Some models look better on light backgrounds, some look better on dark
Our previous photos first used my workspace as a background. It proved to be a bad choice for a step-by-step tutorial. It made photos inconsistent and hard to take. Along the way, we switched to a wooden background which improved the consistency of the images. But, solid color or a gradient would be ideal.

DIY Miniature Photography Setup Elements
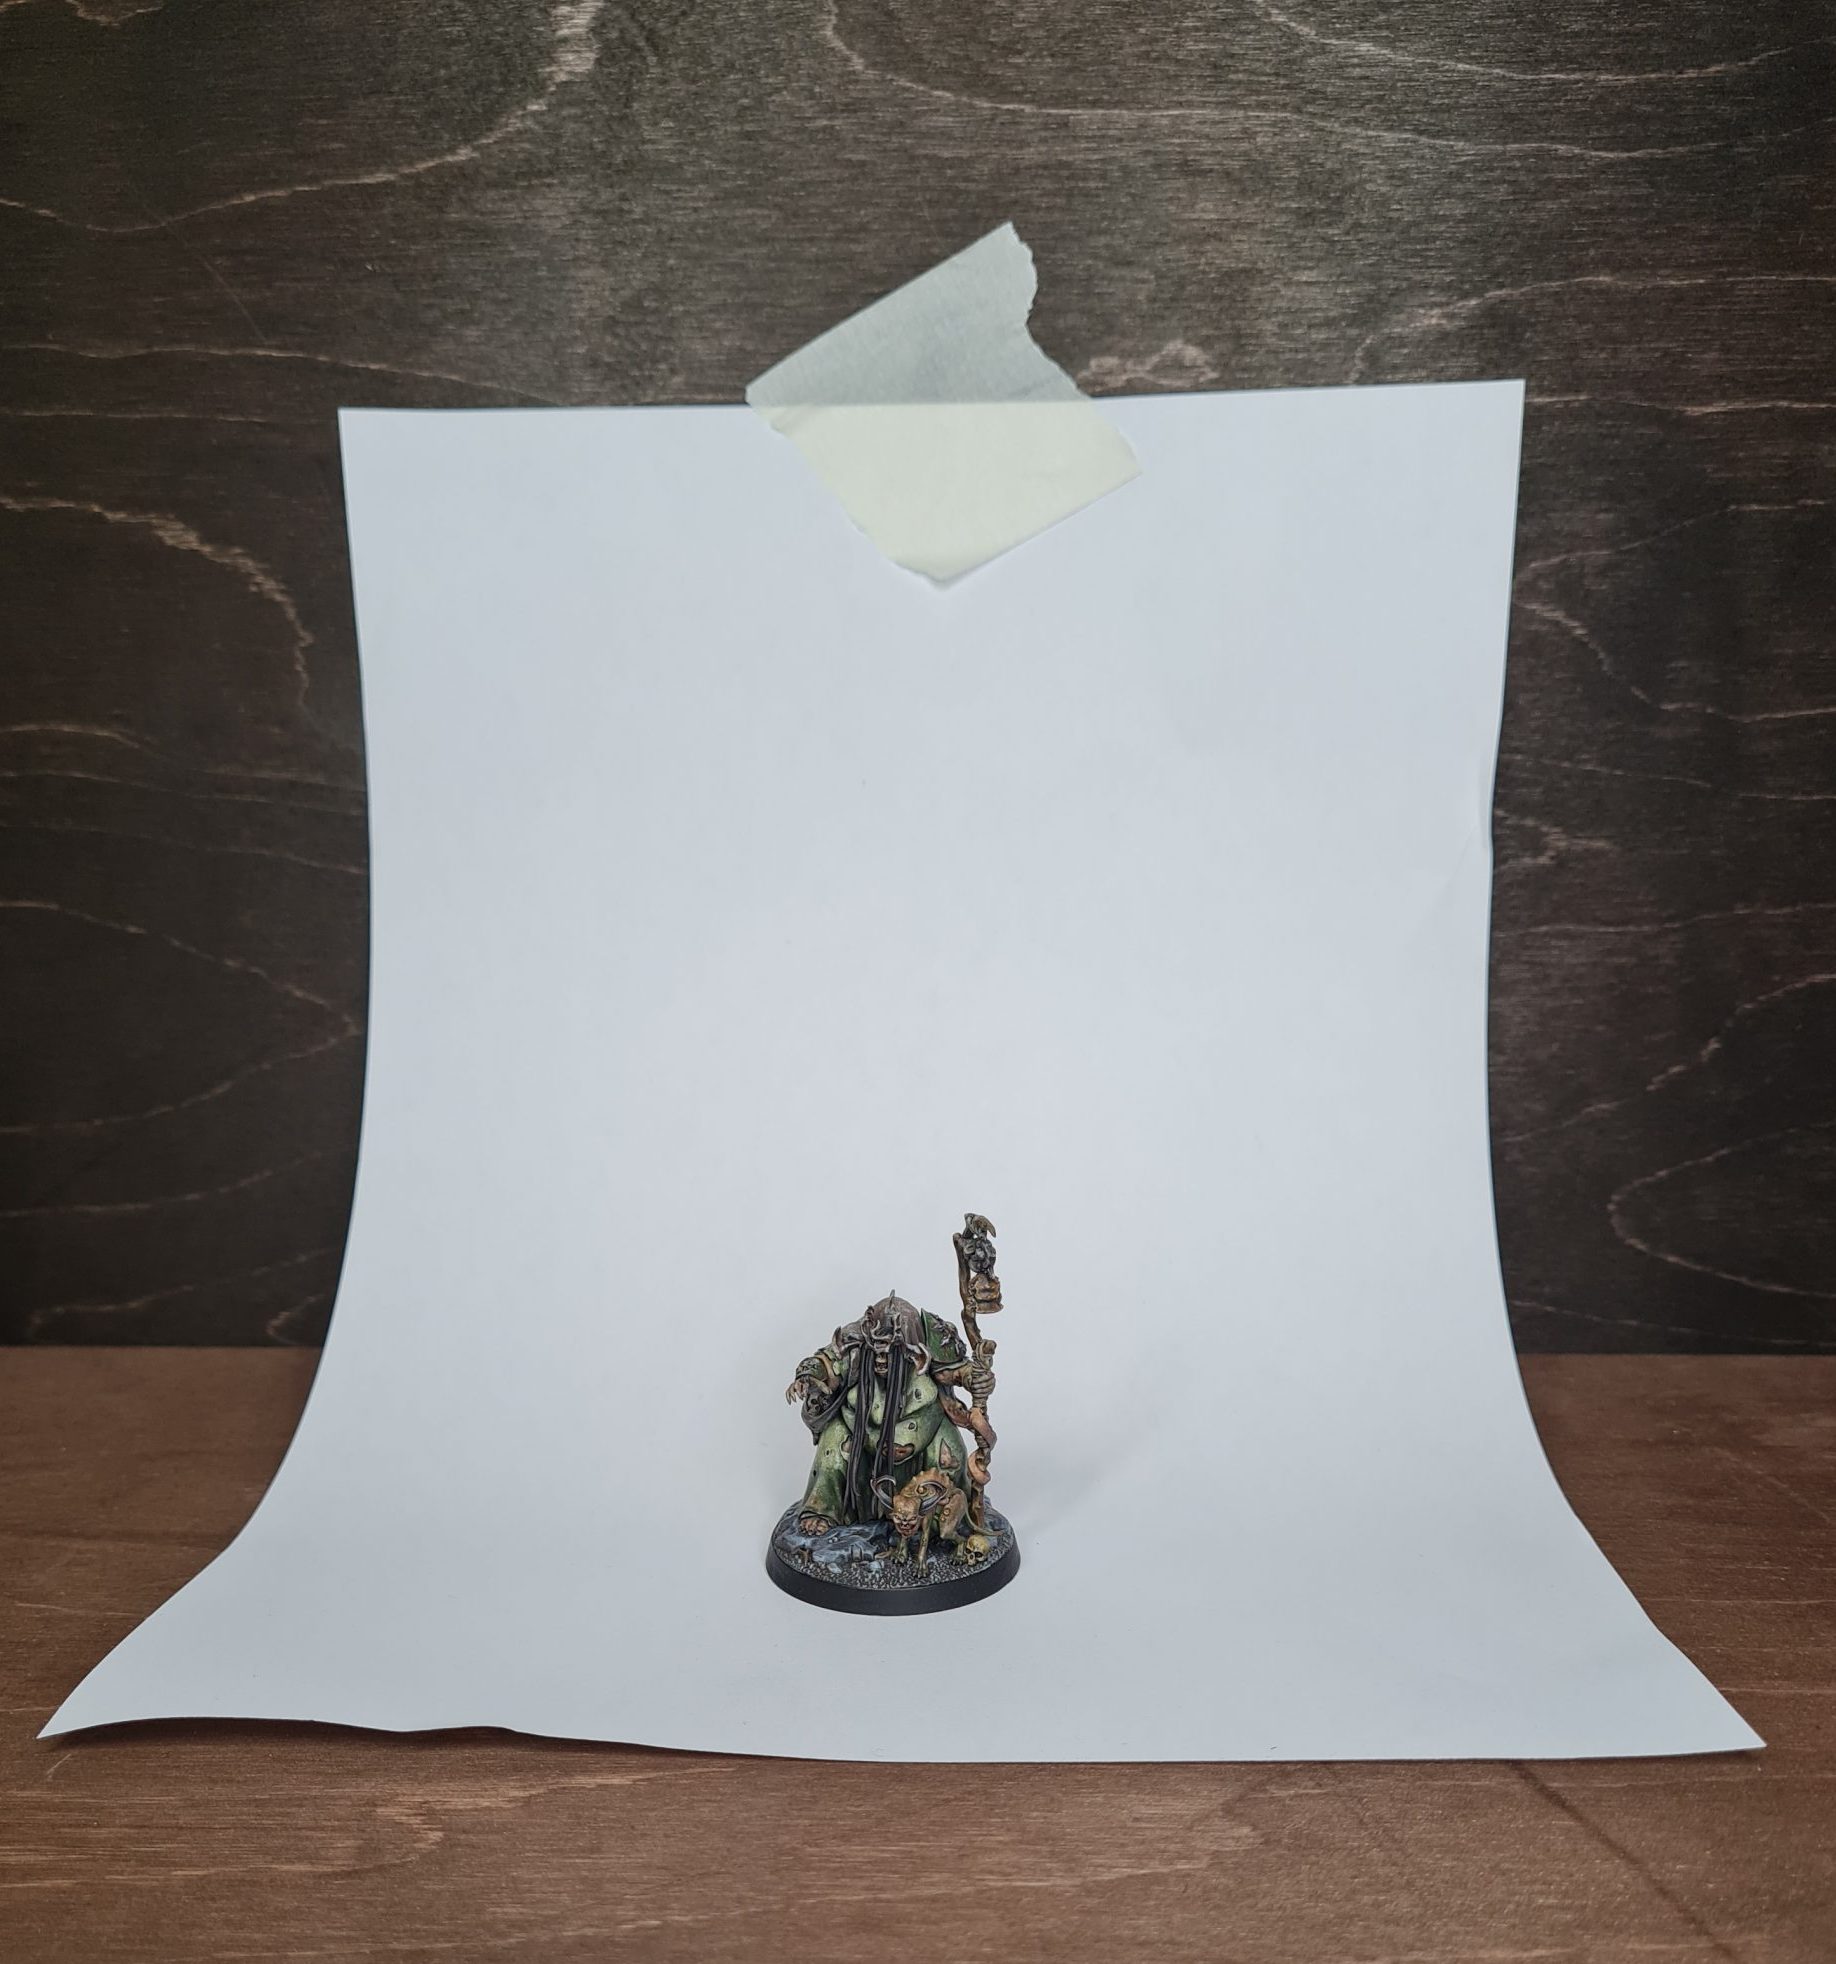
There are many ways a picture area can be set up. But, we will be focusing on some basic DIY ways it can be done. Make sure to find an area that can accommodate a backdrop, lights, and a camera stand. For our lights tests, we used a lightbox with a black background. But, something as simple as a piece of paper taped to a wall will do the job.

Background
Backgrounds come in many shapes and sizes. For best results a matt background is ideal. It needs to be big enough to create some distance between the model and the back wall. Regular paper works perfectly for this. Just attach it to a wall or a box to set it up. Alternatively, a lightbox can be used. In both cases make sure that the background creates a concave slope, and is big enough to fit the model. Some people use gaming boards as a backdrop. It makes for a decent background but often game-boards include unwanted details that can distract from the model. You’re free to use whichever method you see fit.
Lights
The lights you have will dictate how you set them up. Most often LED lamps are used for this. It’s important that all of your lights have the same brightness and hue. Brightness is dictated by the Lumen value. I prefer to use anything in the 800-1200 lumen range for painting and photography. The bulbs should be in the 5000k-6500k range. It’s the closest we have to natural light.
The distance between the model and lights is important. Set it up too close and the model will be overexposed. Too far and the model won’t have enough light. You want to aim for even scattered light.

Single Light Setup
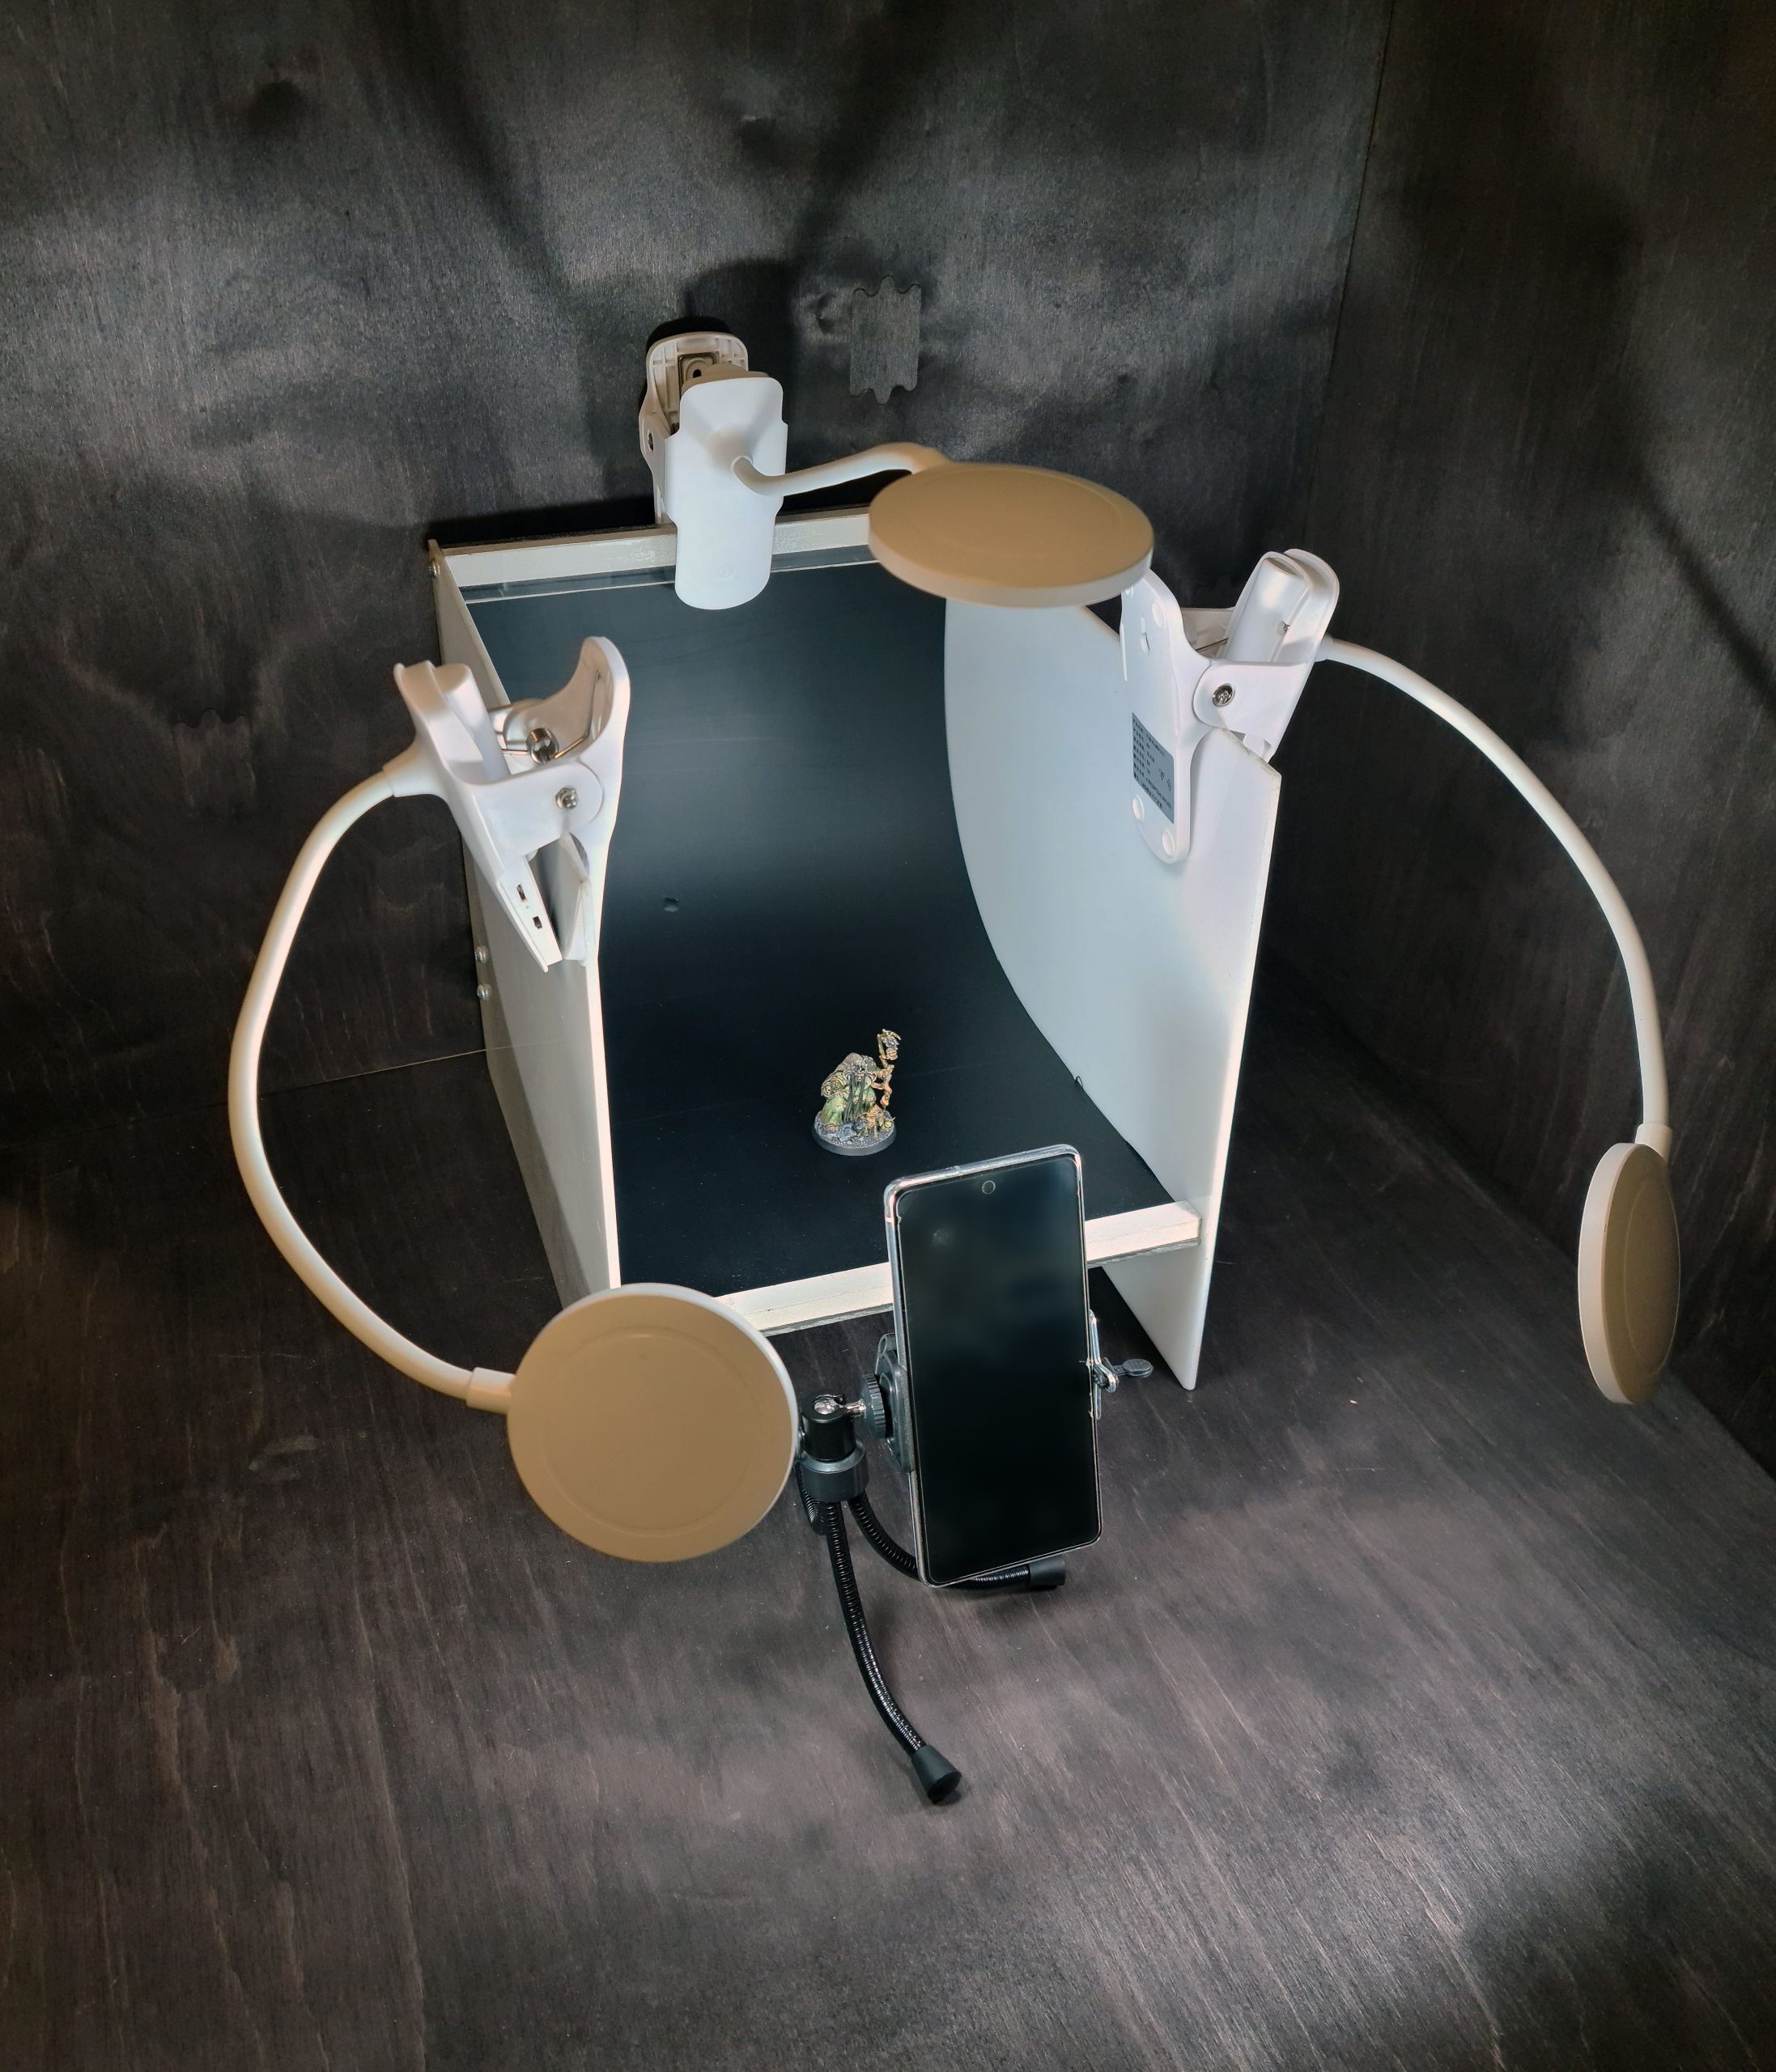
Desk Lamp
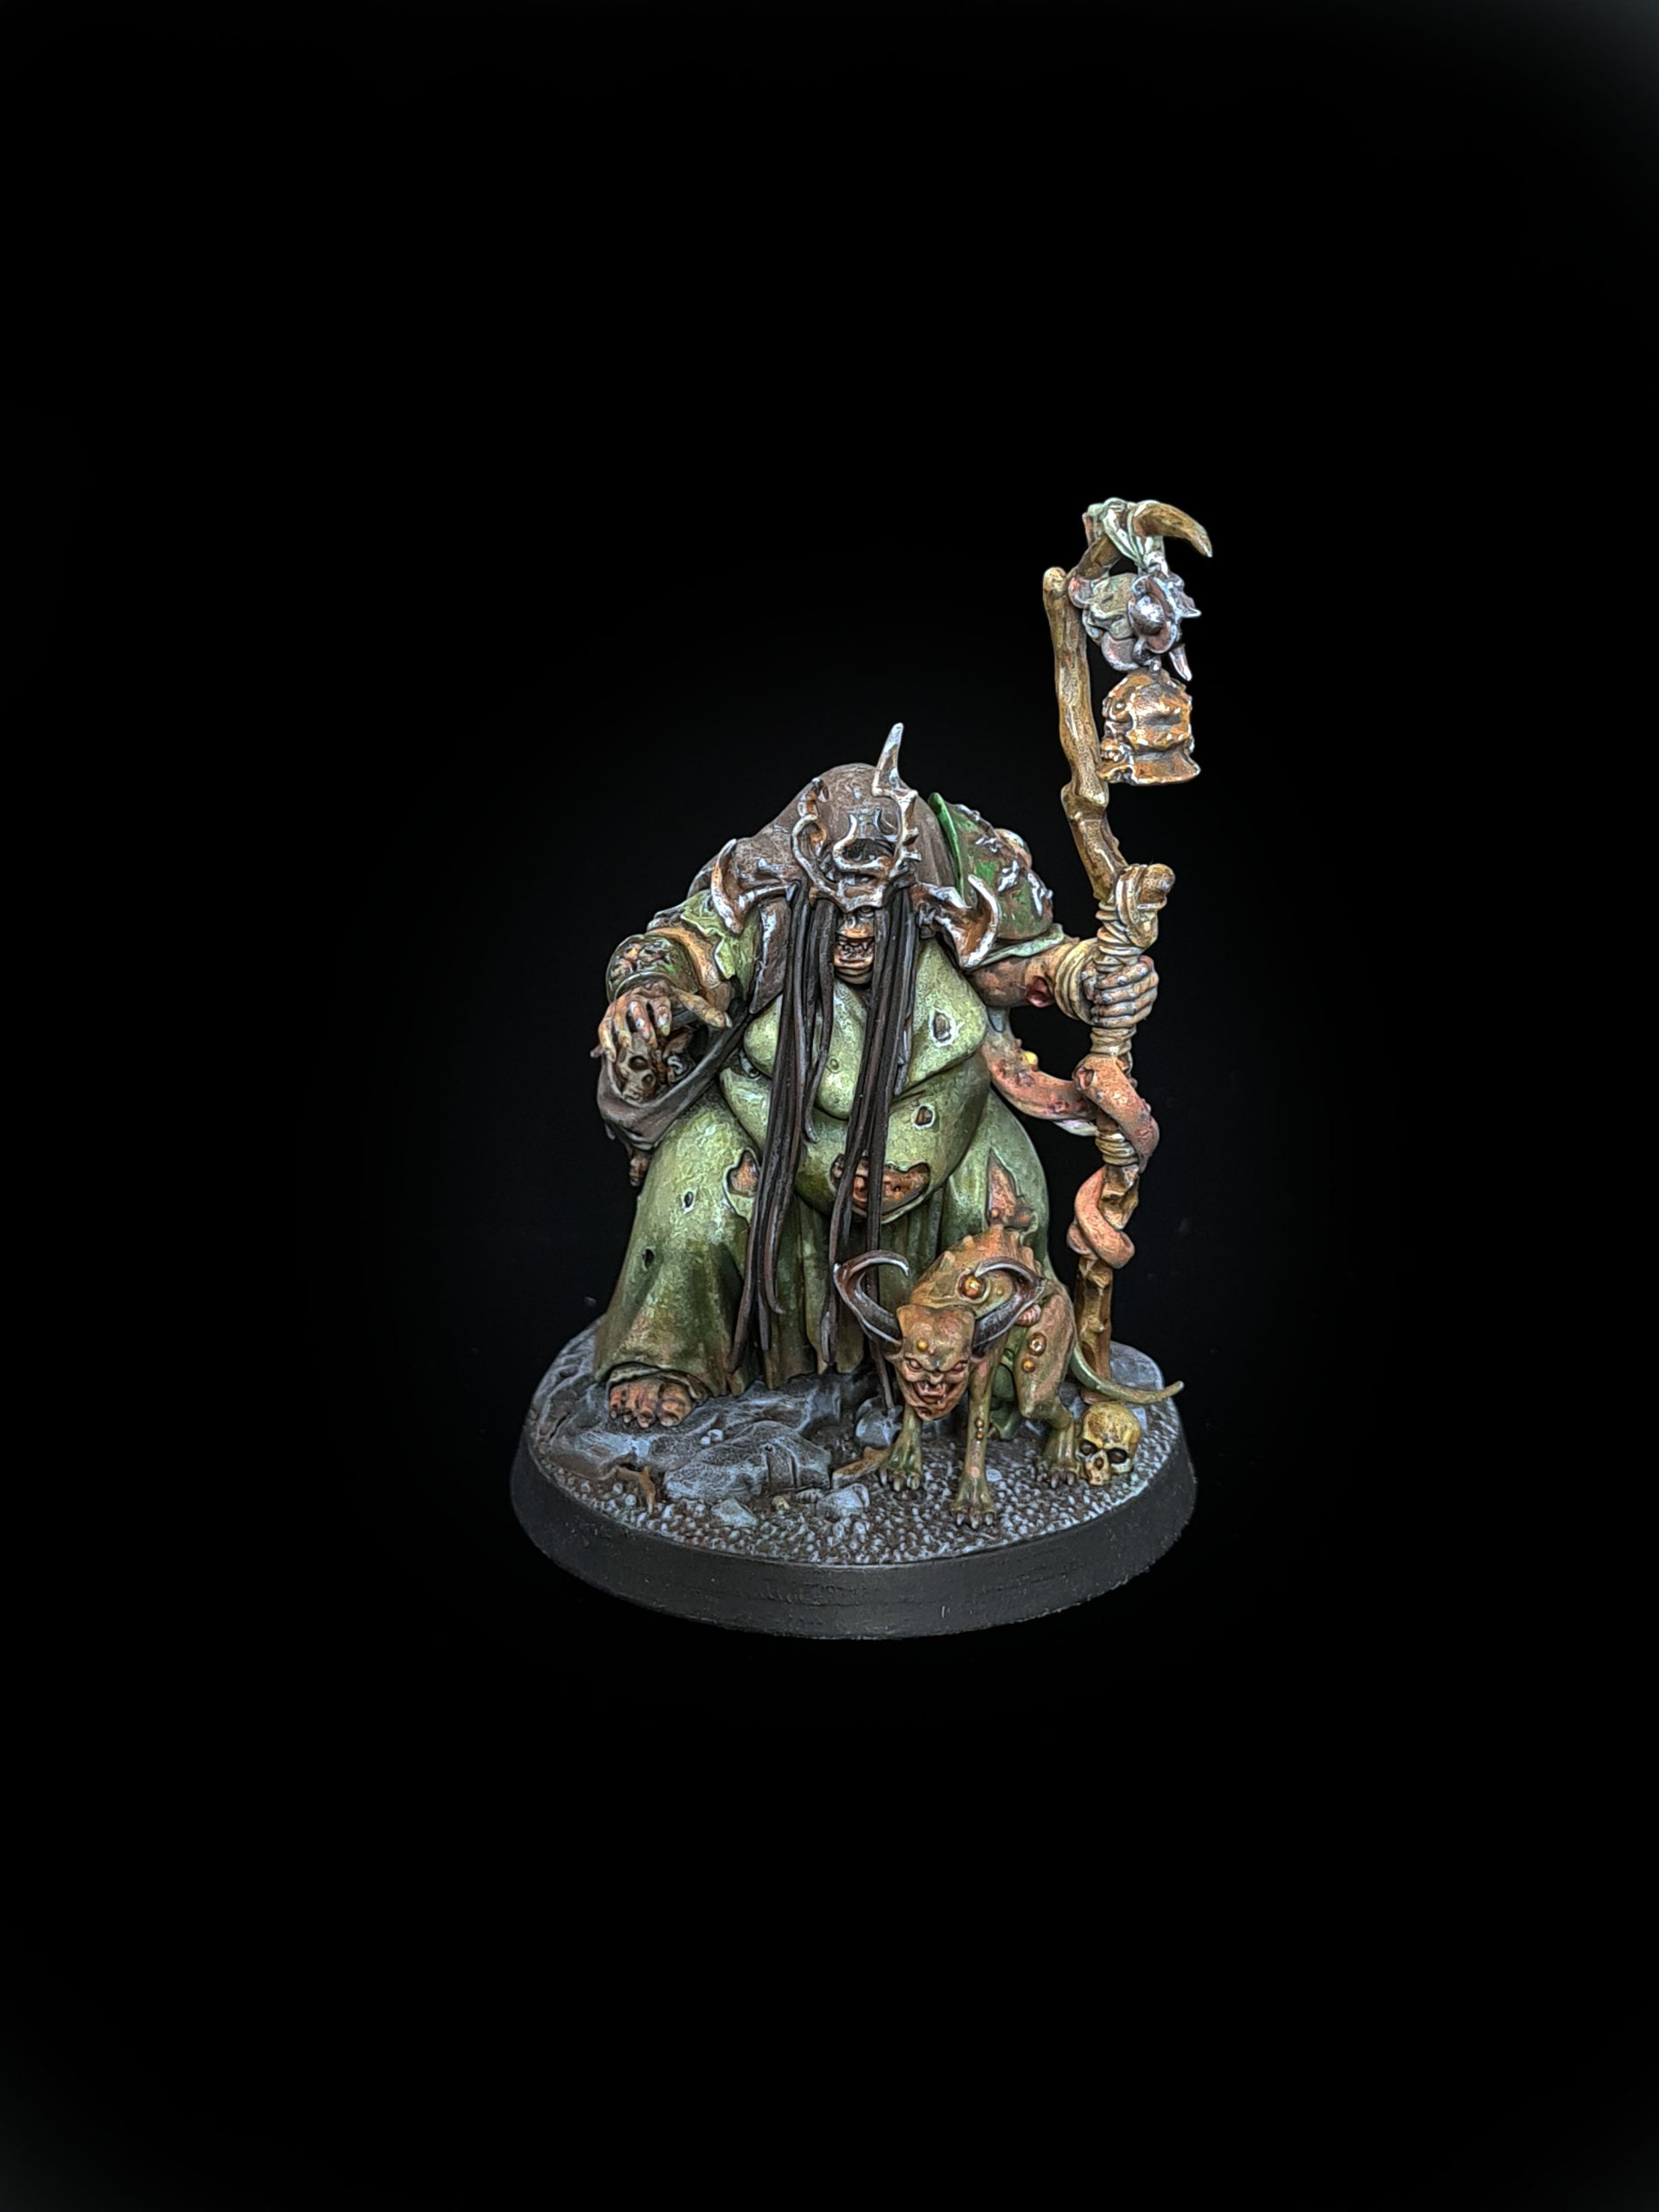
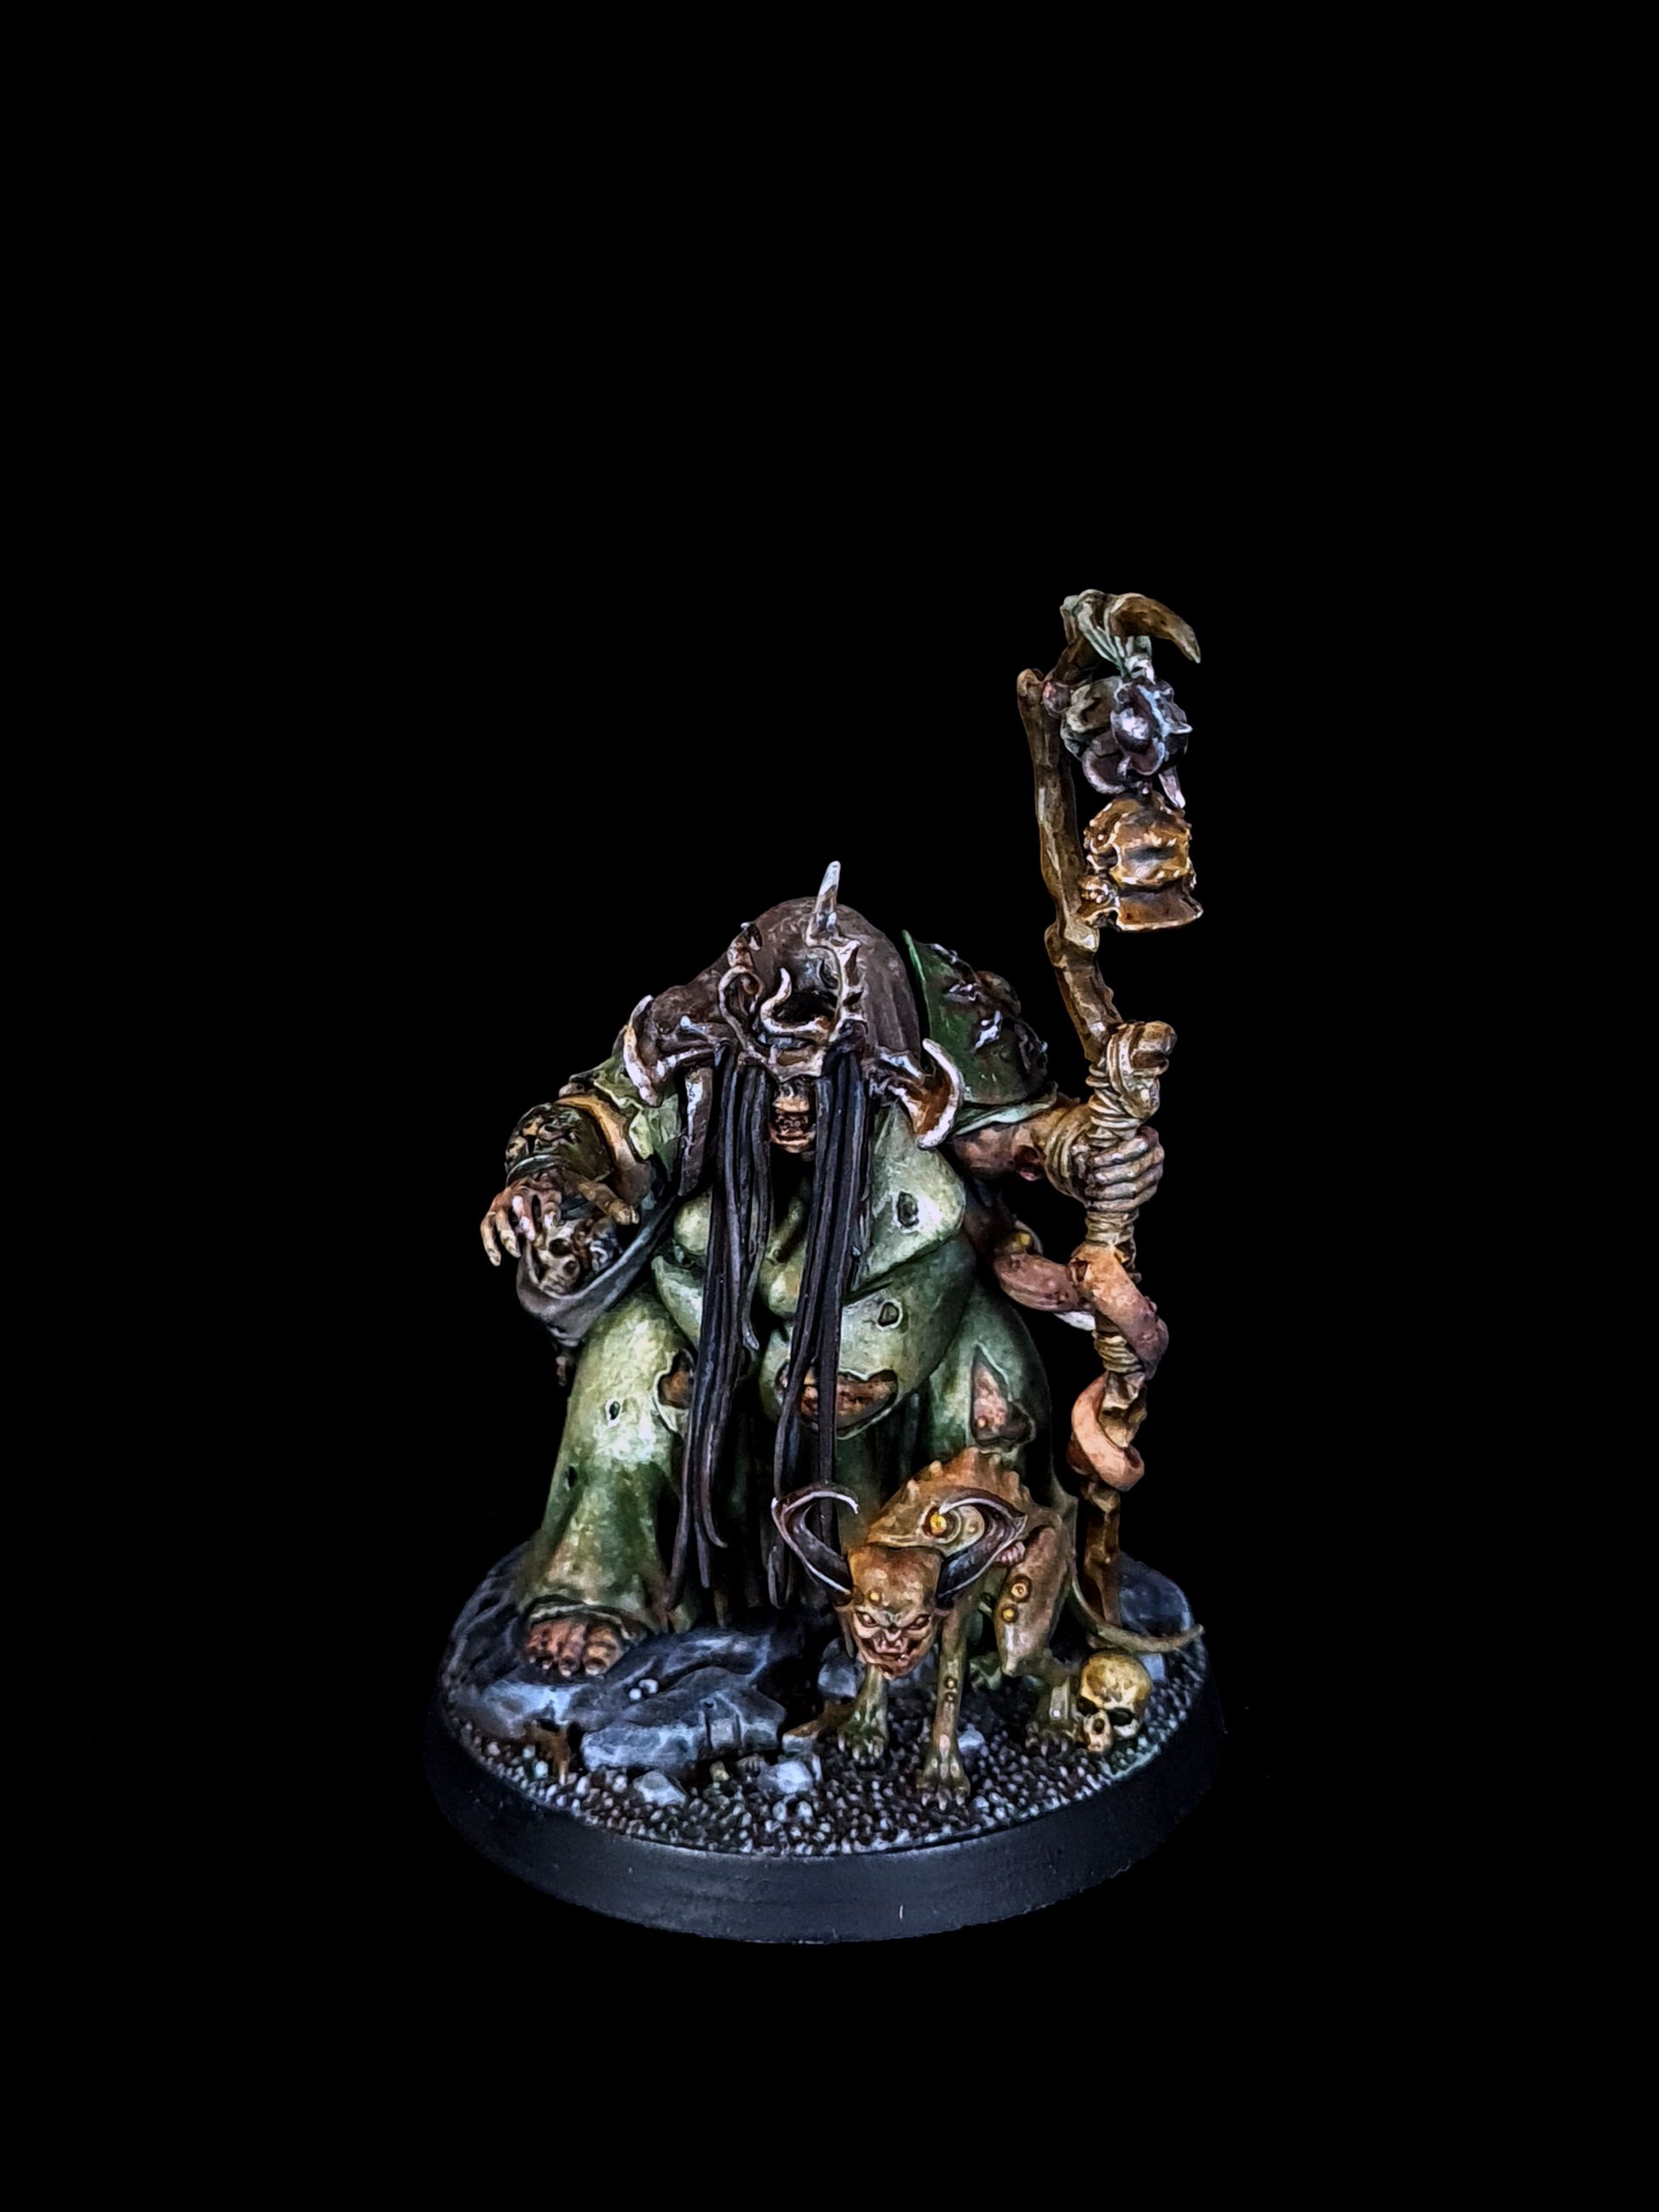
We started by testing a single lamp. It used an 800 lumen 5000k bulb. Finding the correct angle took some time. To eliminate unwanted shadows the light was pointing slightly above the model. This created more scattered even light hitting the model.
The end image turned out dark. Because of a single light source, all the shadows were naturally accentuated. This works great for If you’re looking to take grim, dark, atmospheric photos.
Ring light
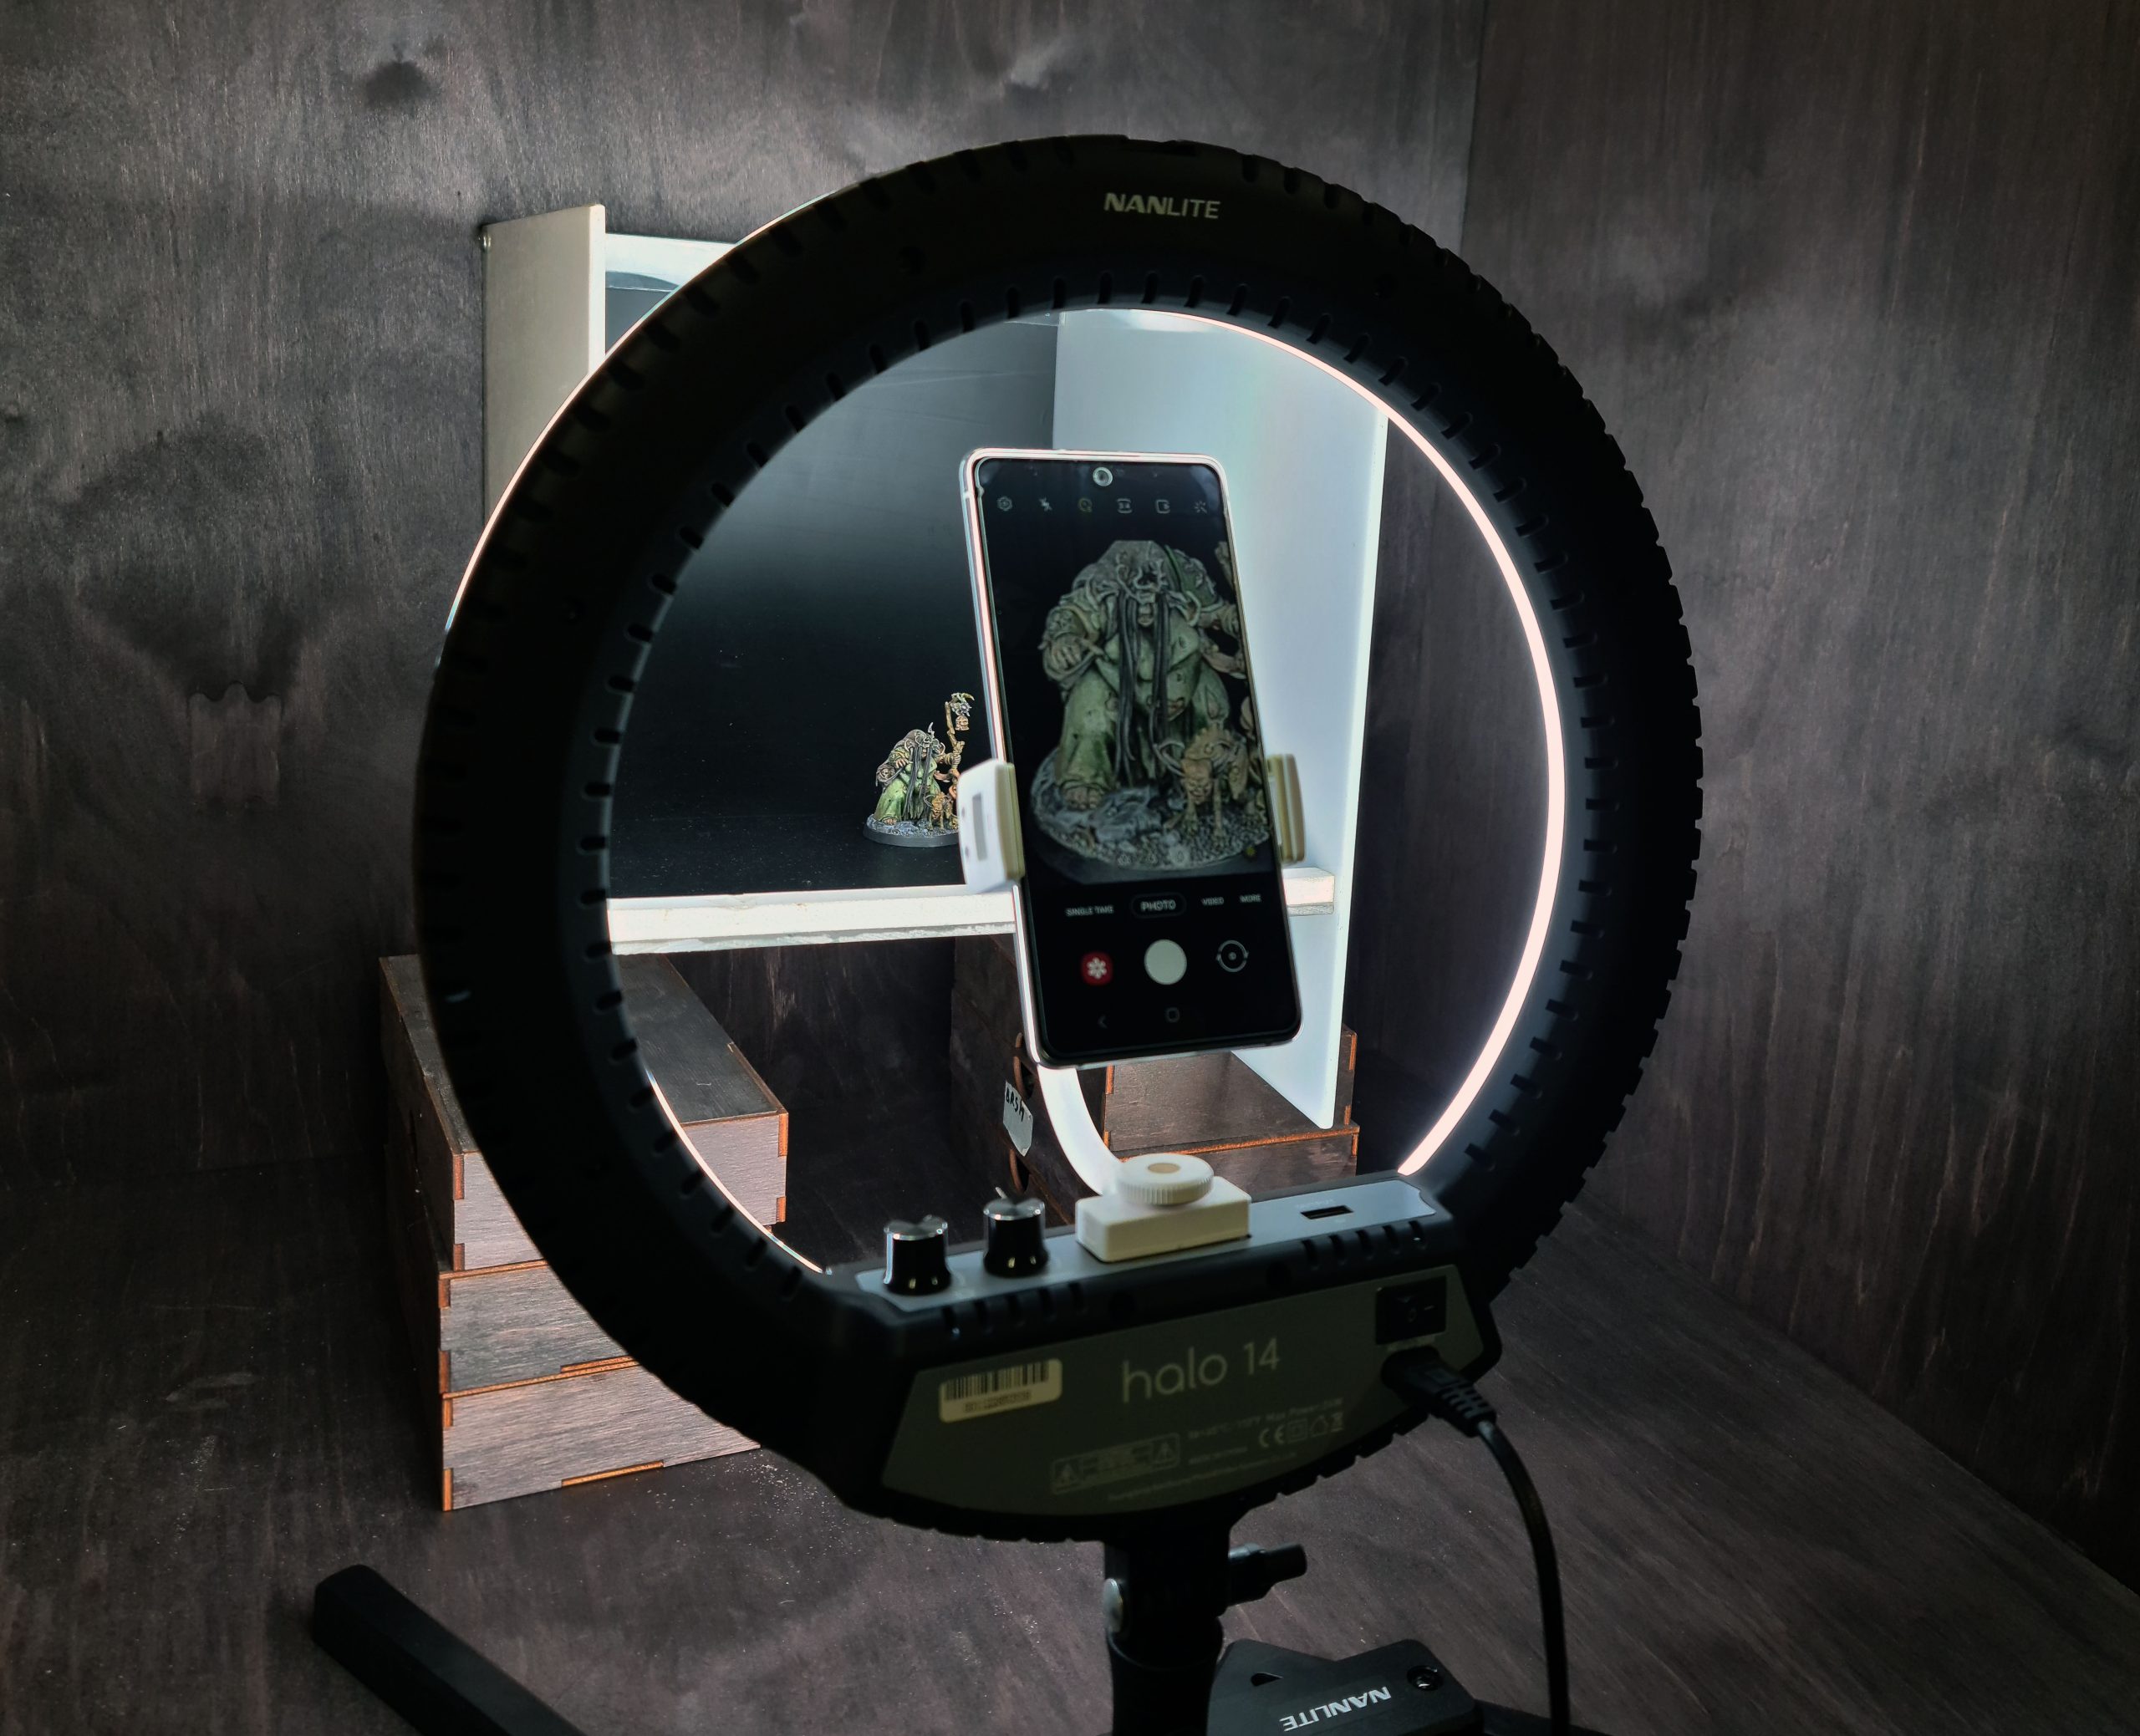
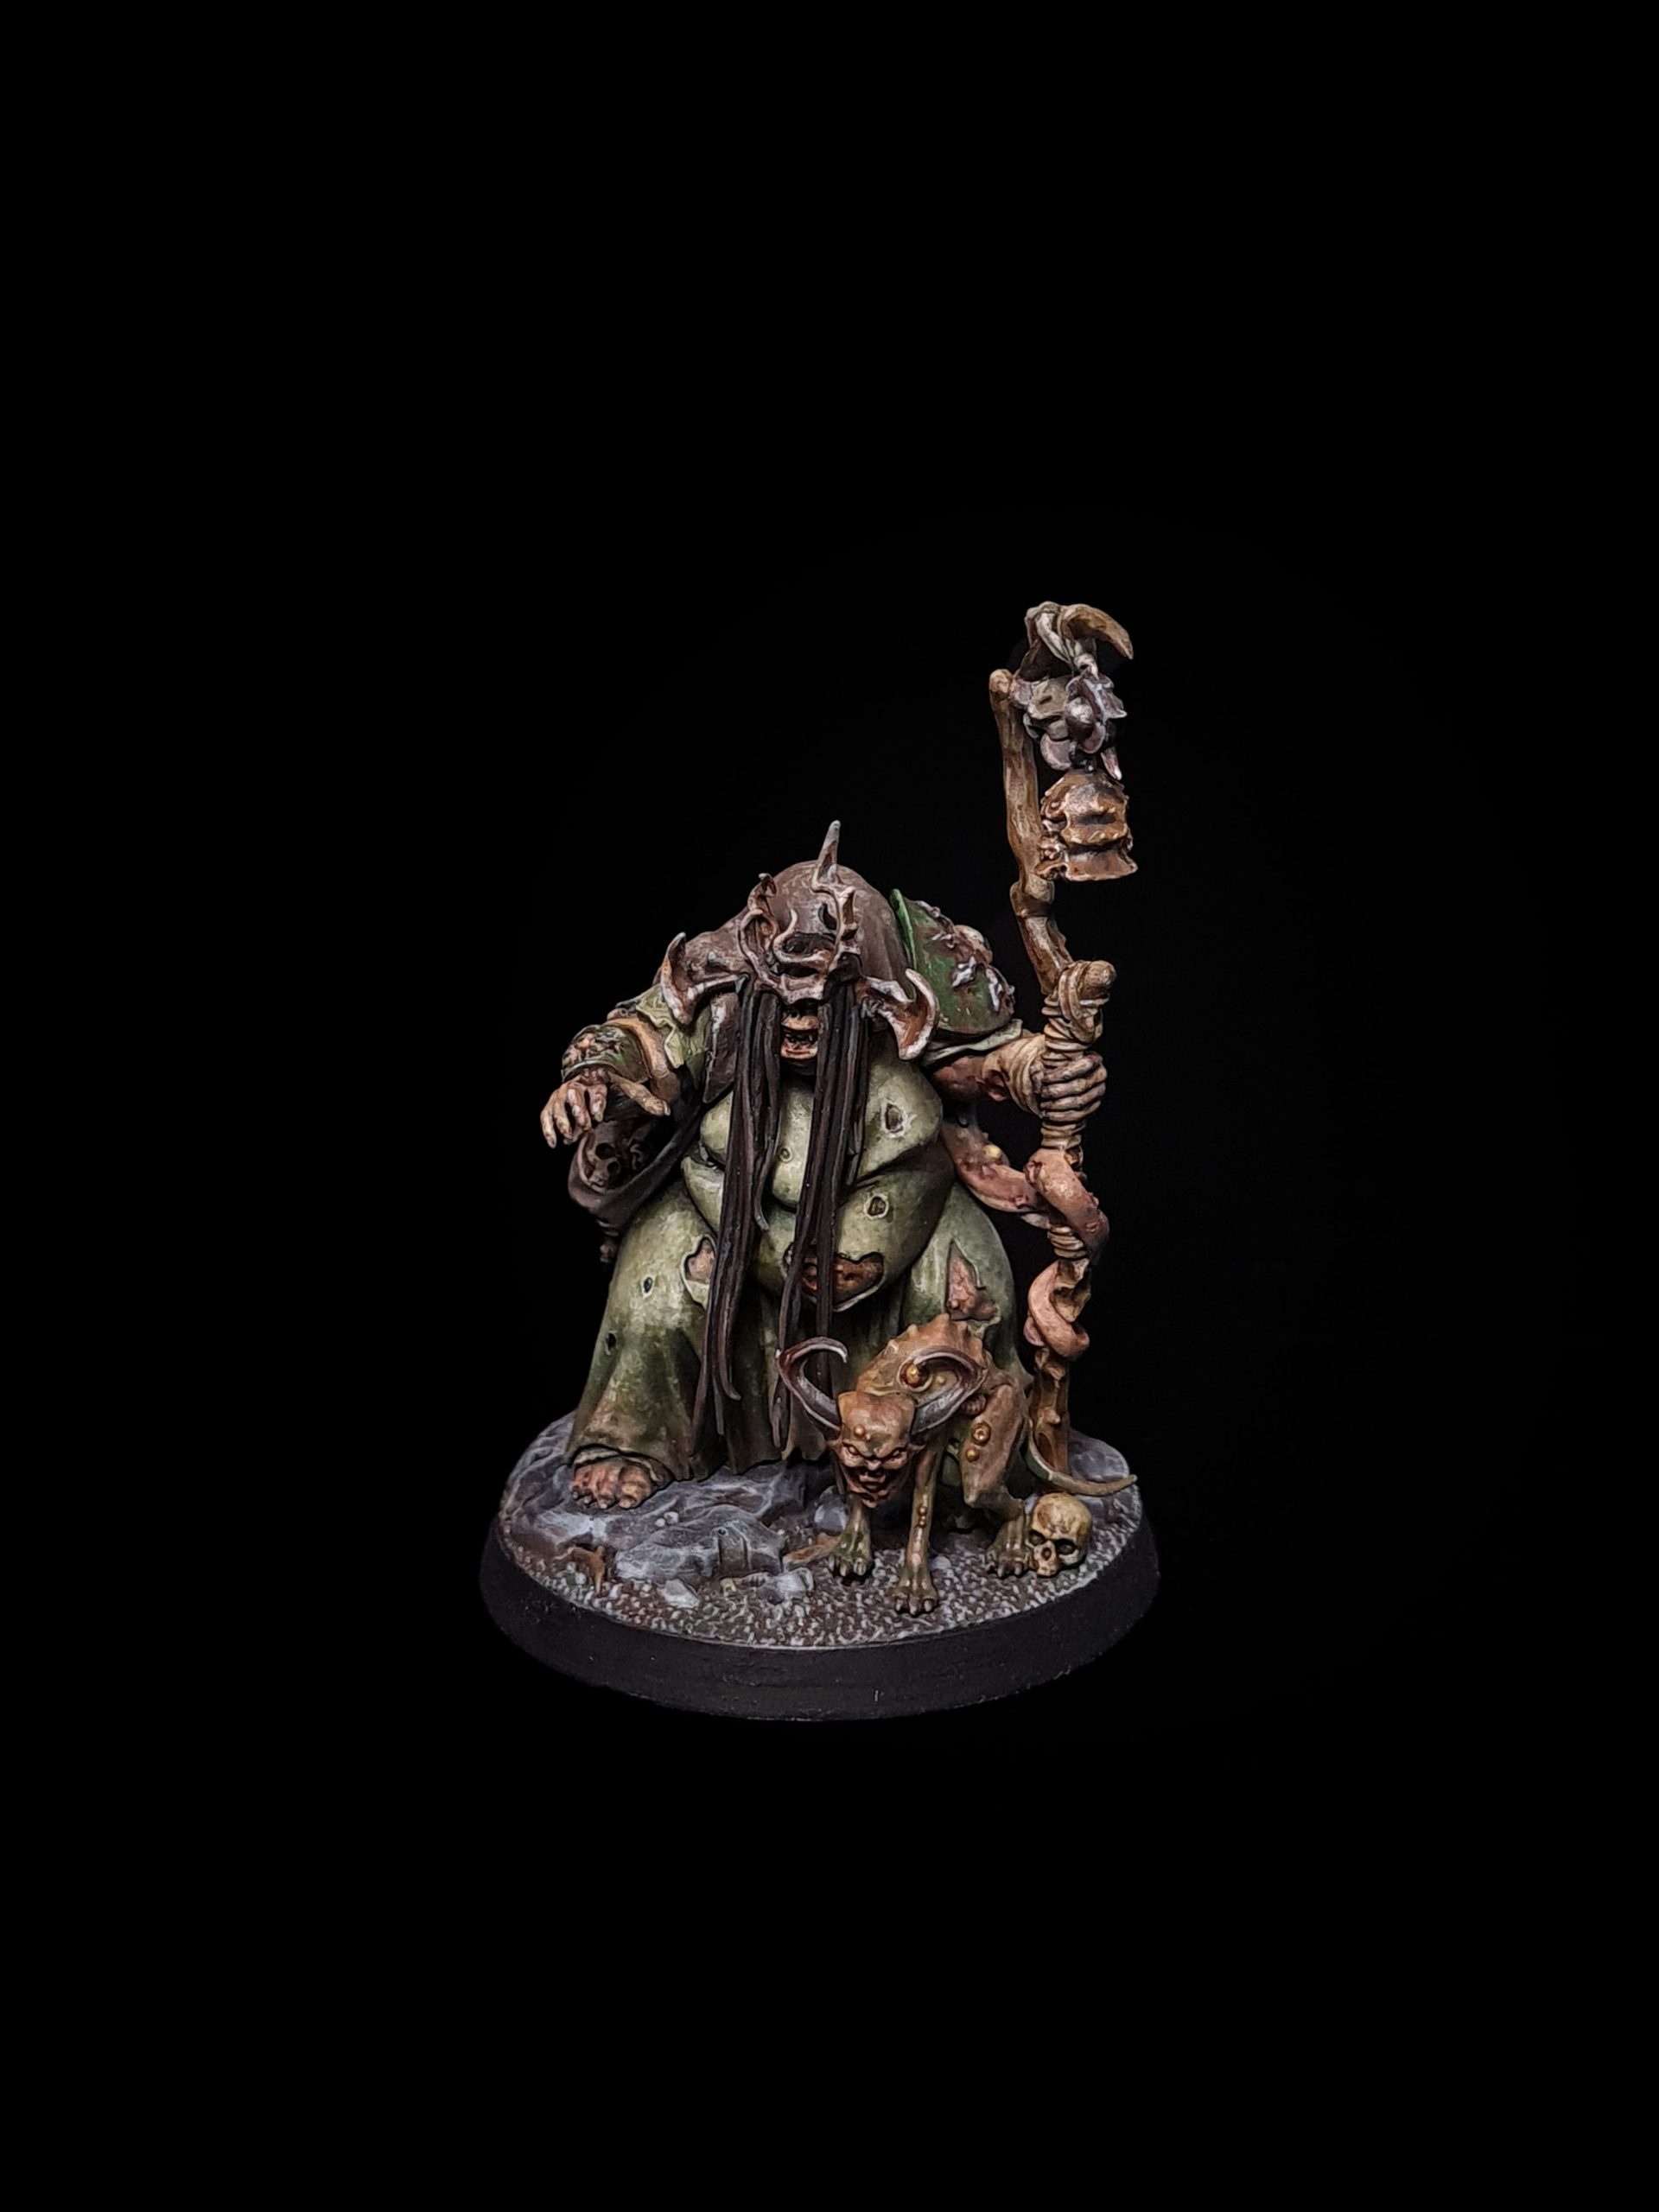
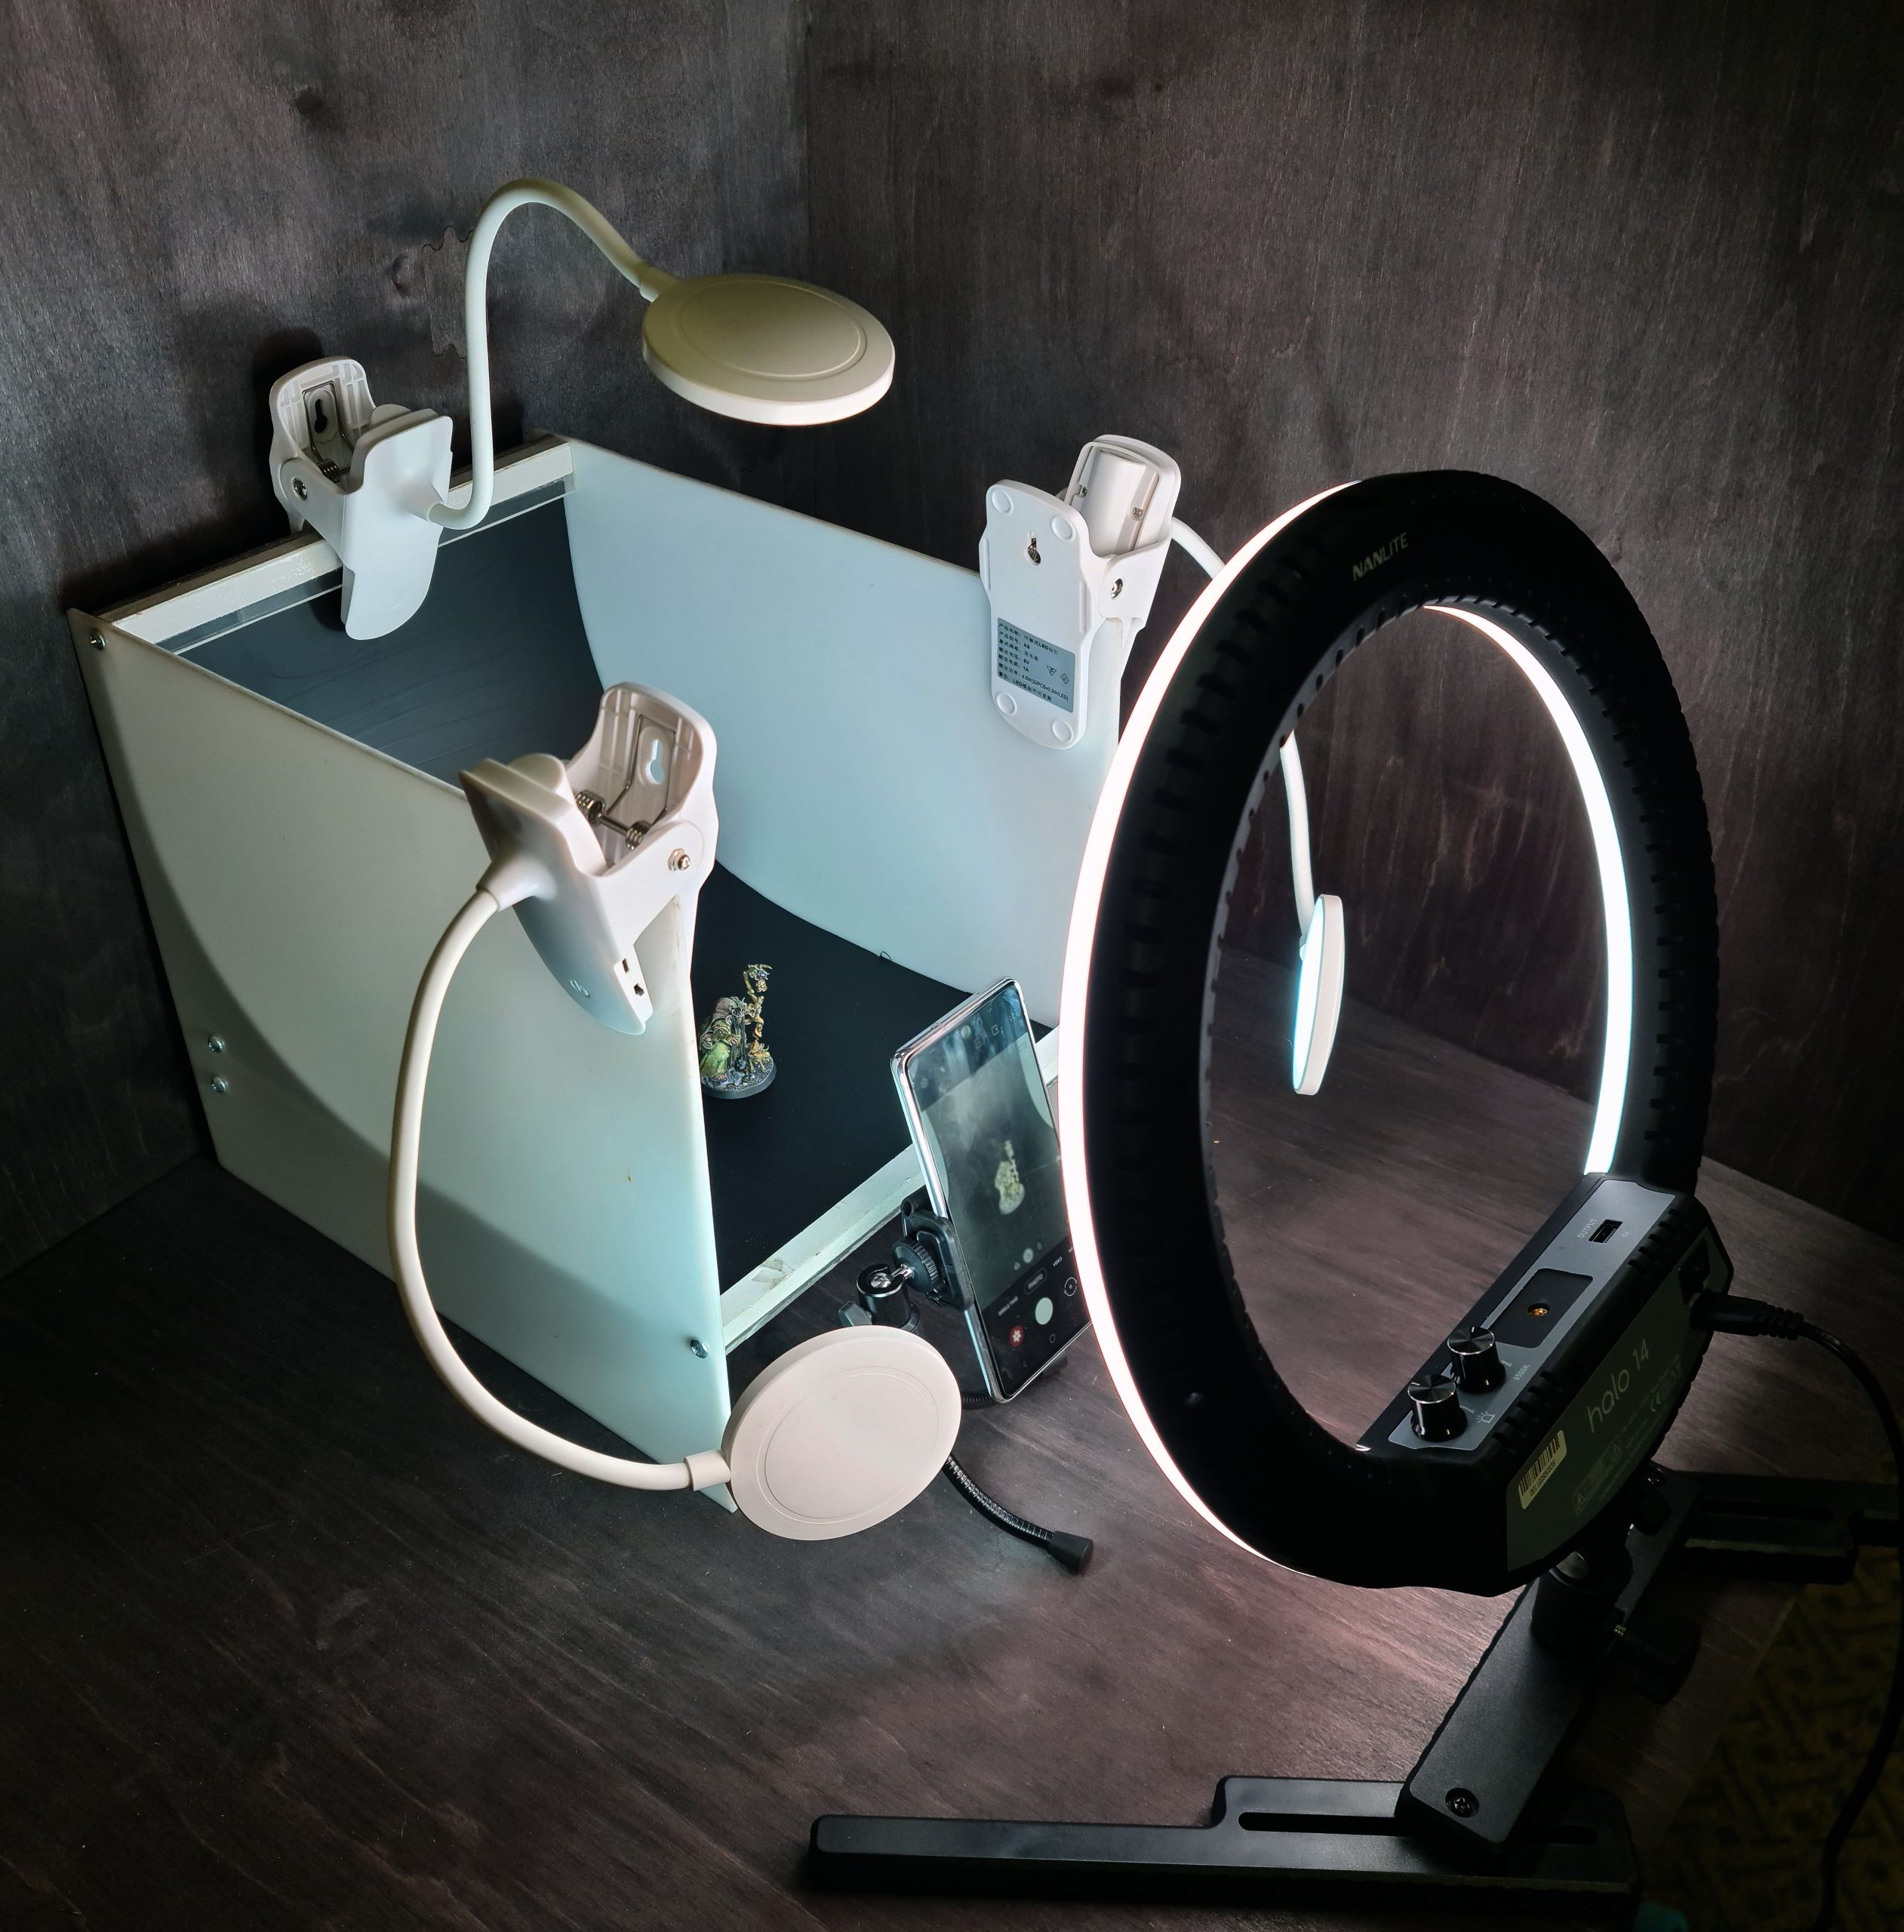
For our second test, we used a selfie ring light. The one we had is a more professional variant that allows for brightness and color adjustment. The biggest issue here was the 14-inch (35 cm) size. It’s perfect for creating a lot of directional light. The light itself doesn’t require any special placement – just point it at the model and shoot. However, we did end up lifting the entire lightbox to find a better angle for the camera.

The image speaks for itself. The colors look more vibrant, details are easier to see. If your paint style uses a lot of vibrant colors a ring light is a solid choice.
LED panel
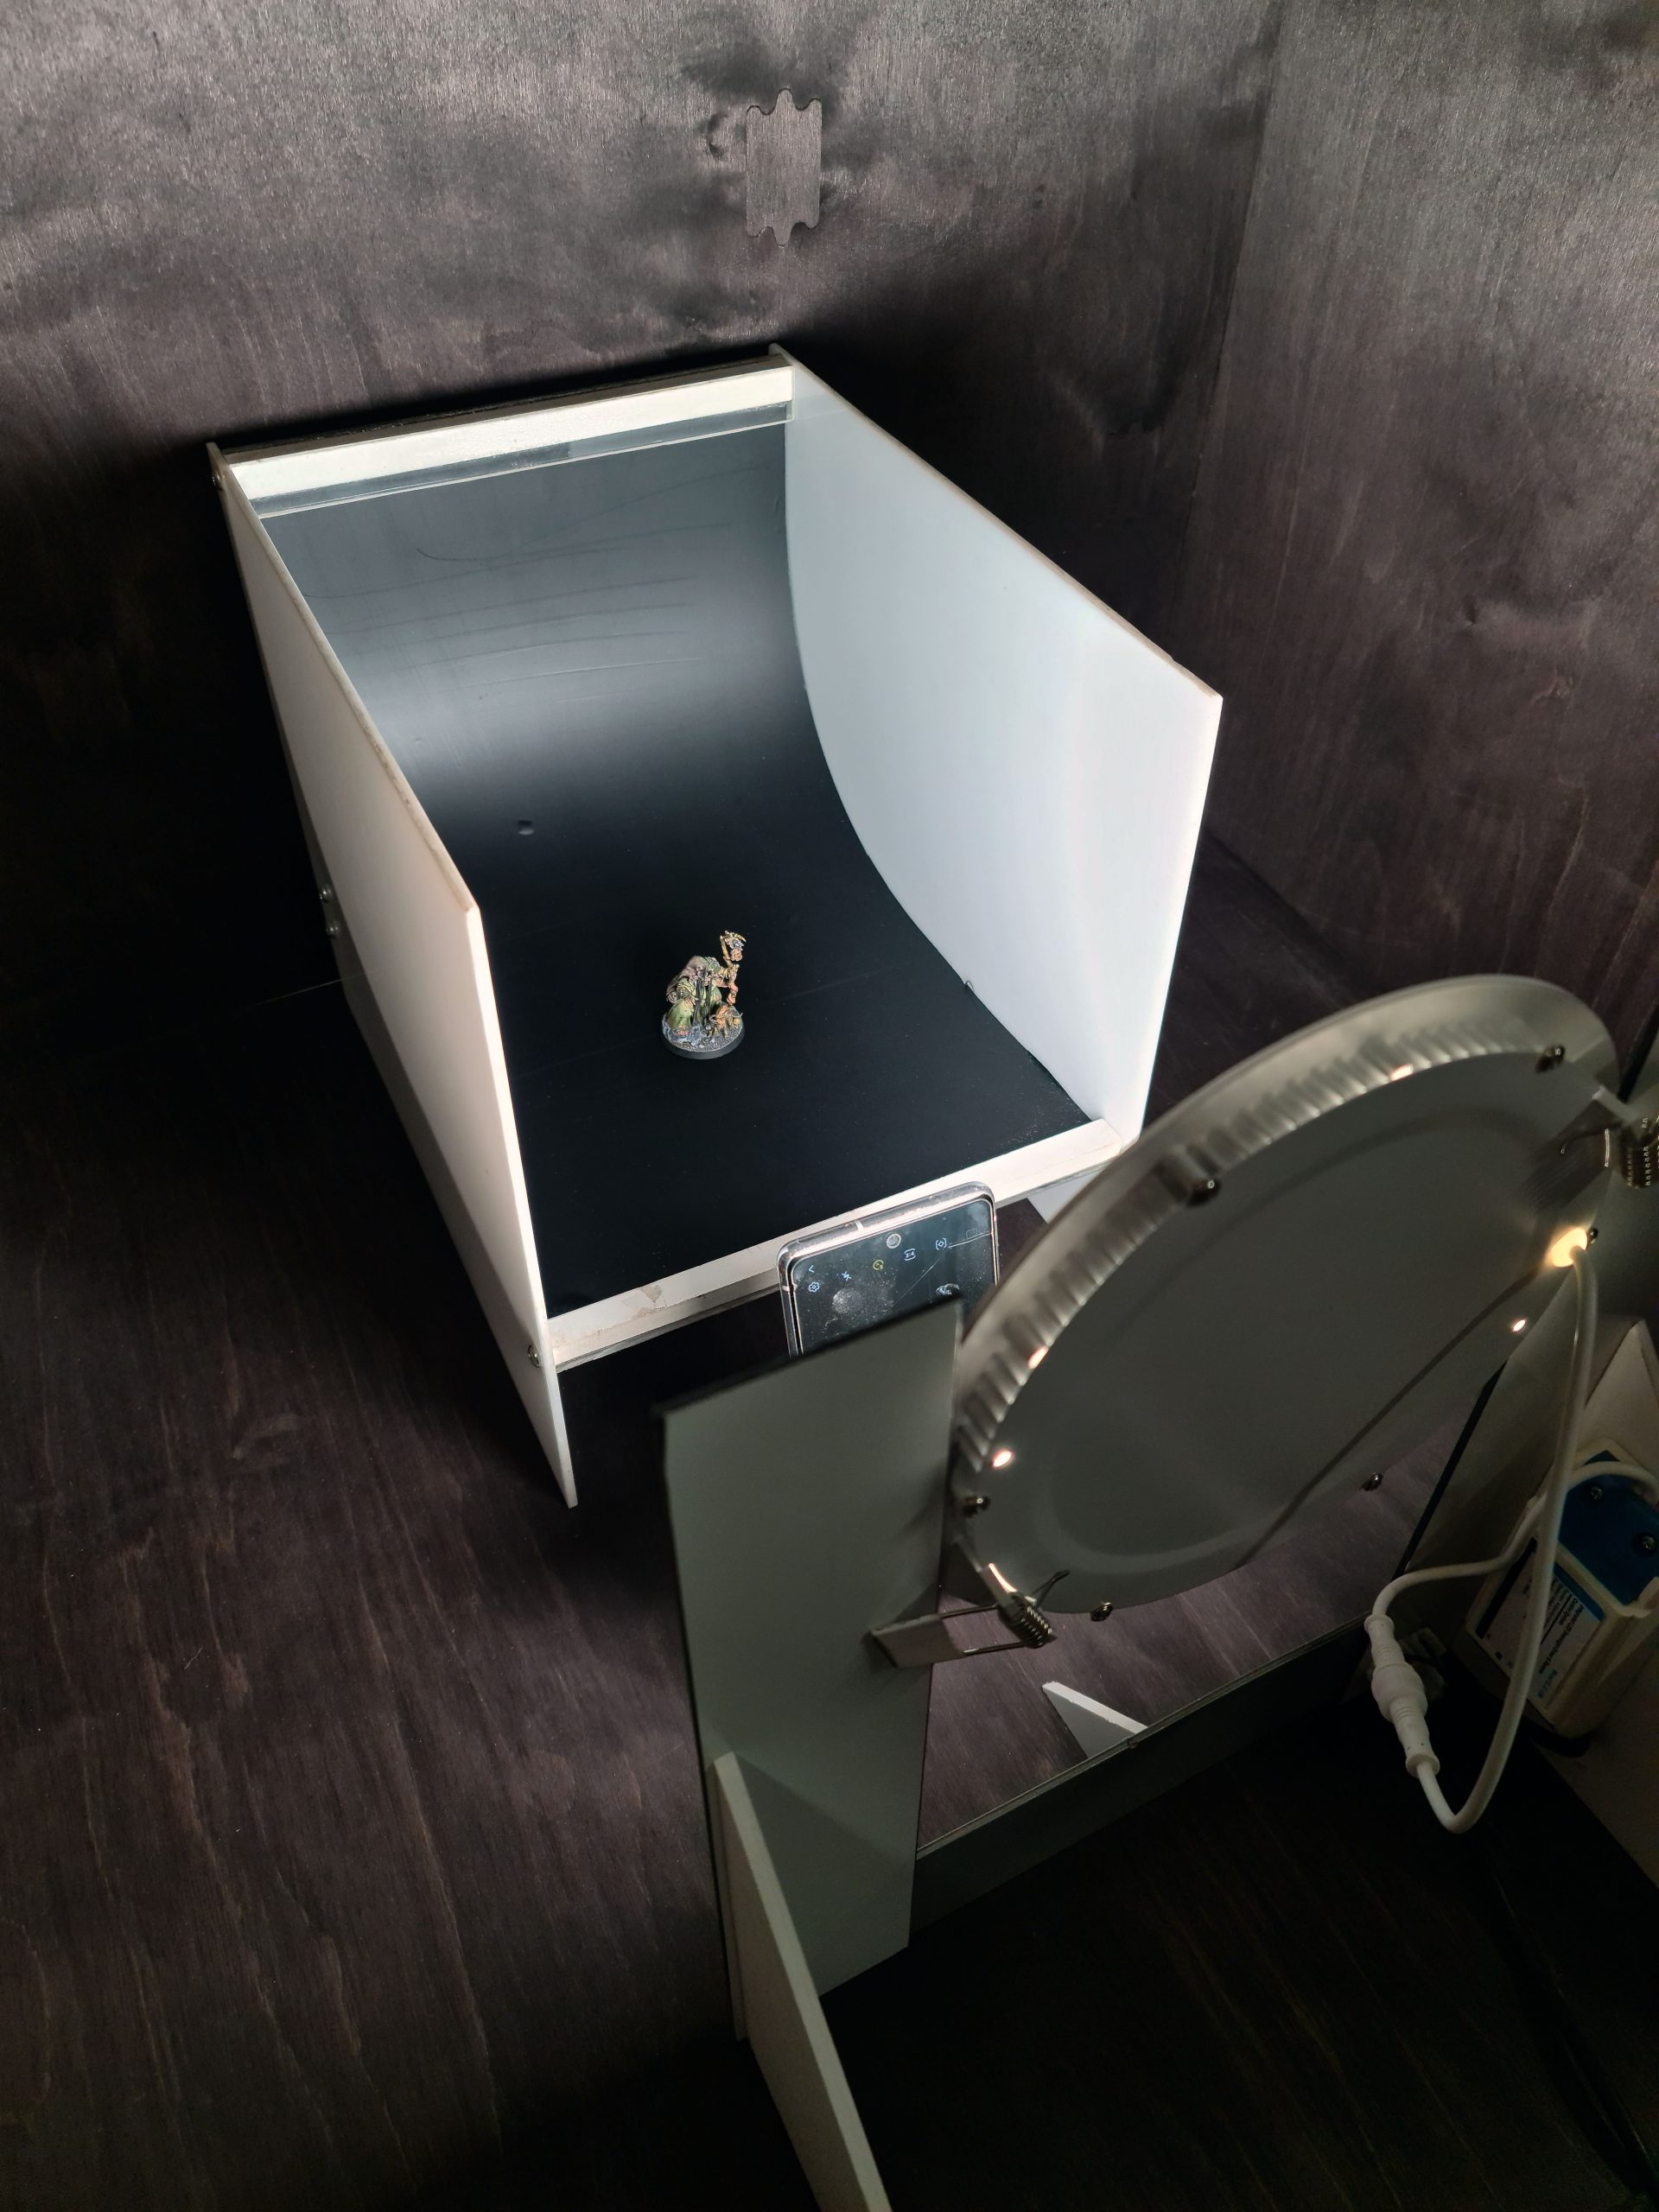
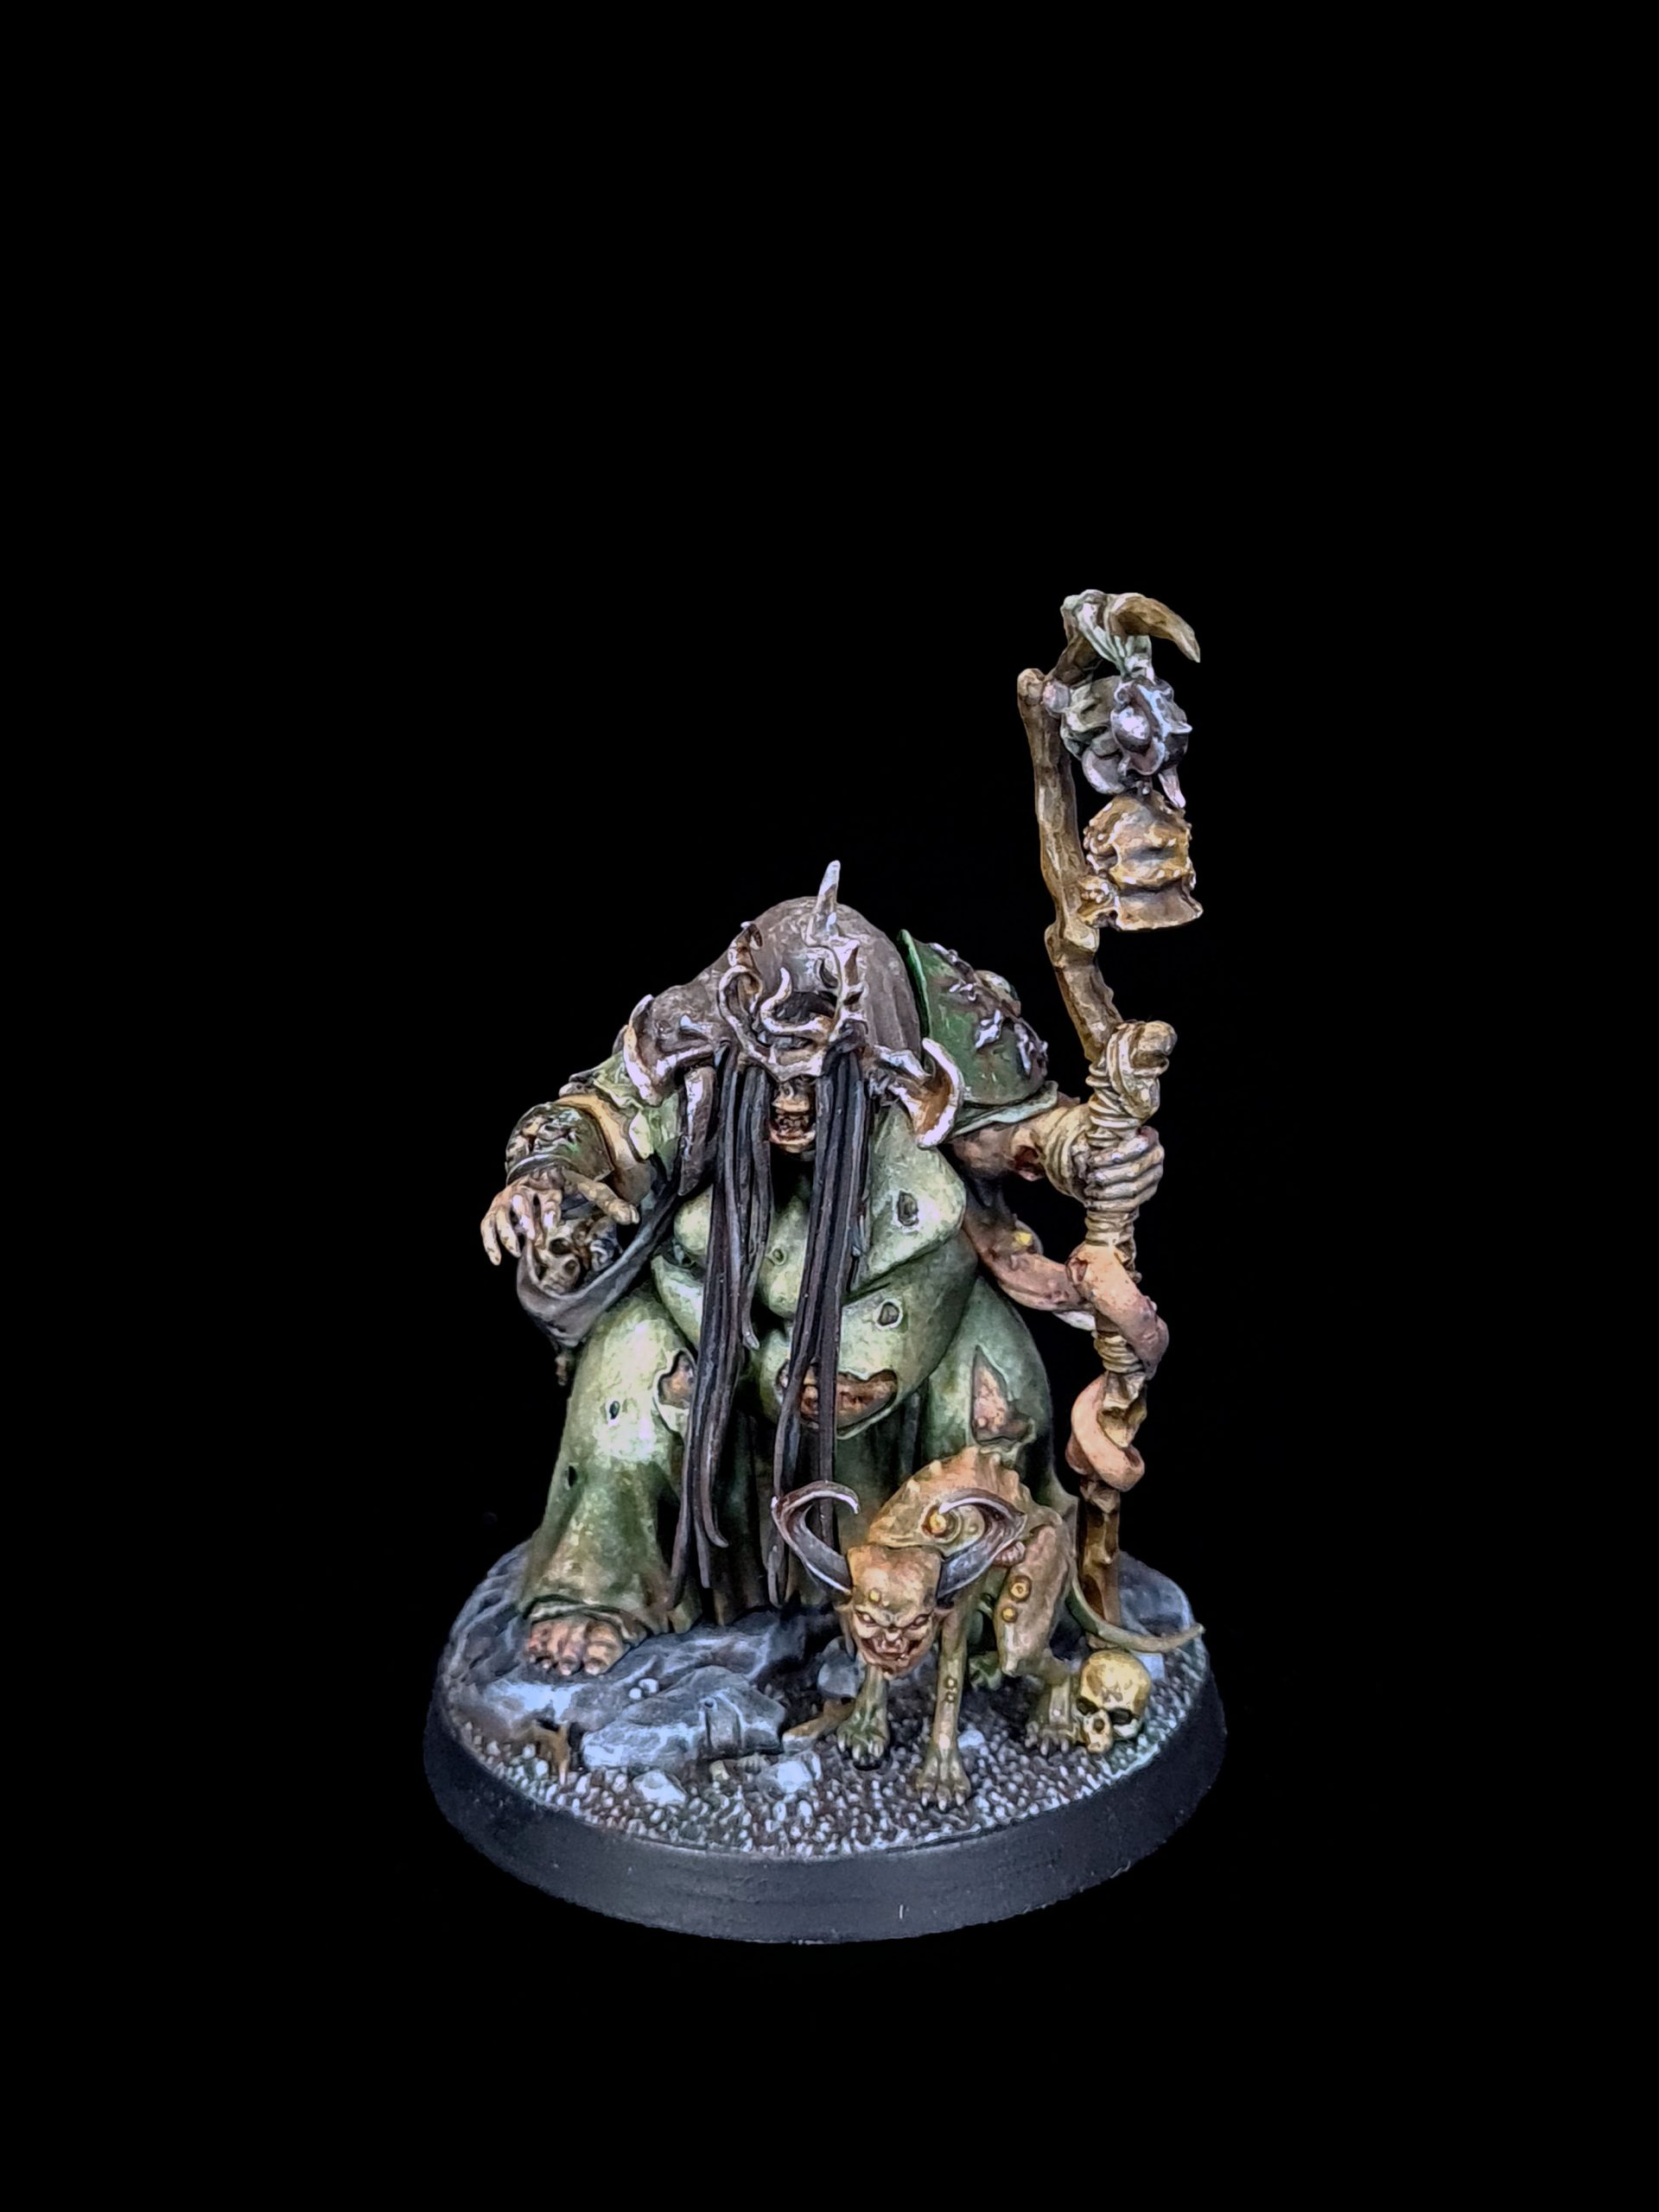
For our last example of a single light setup, a LED panel with a custom stand was used. LED panels are often used as ceiling lights in offices. They create a bright scattered light which, in theory, should be similar to a light ring.
The end result is a well-lit model. LED panels are a great alternative to light rings. It’s something that can be used on its own without and produces grat result.
Dual Lights
Our first test proved that more light=better. The next logical move was to test setups with multiple lights.
Two Desk Lamps
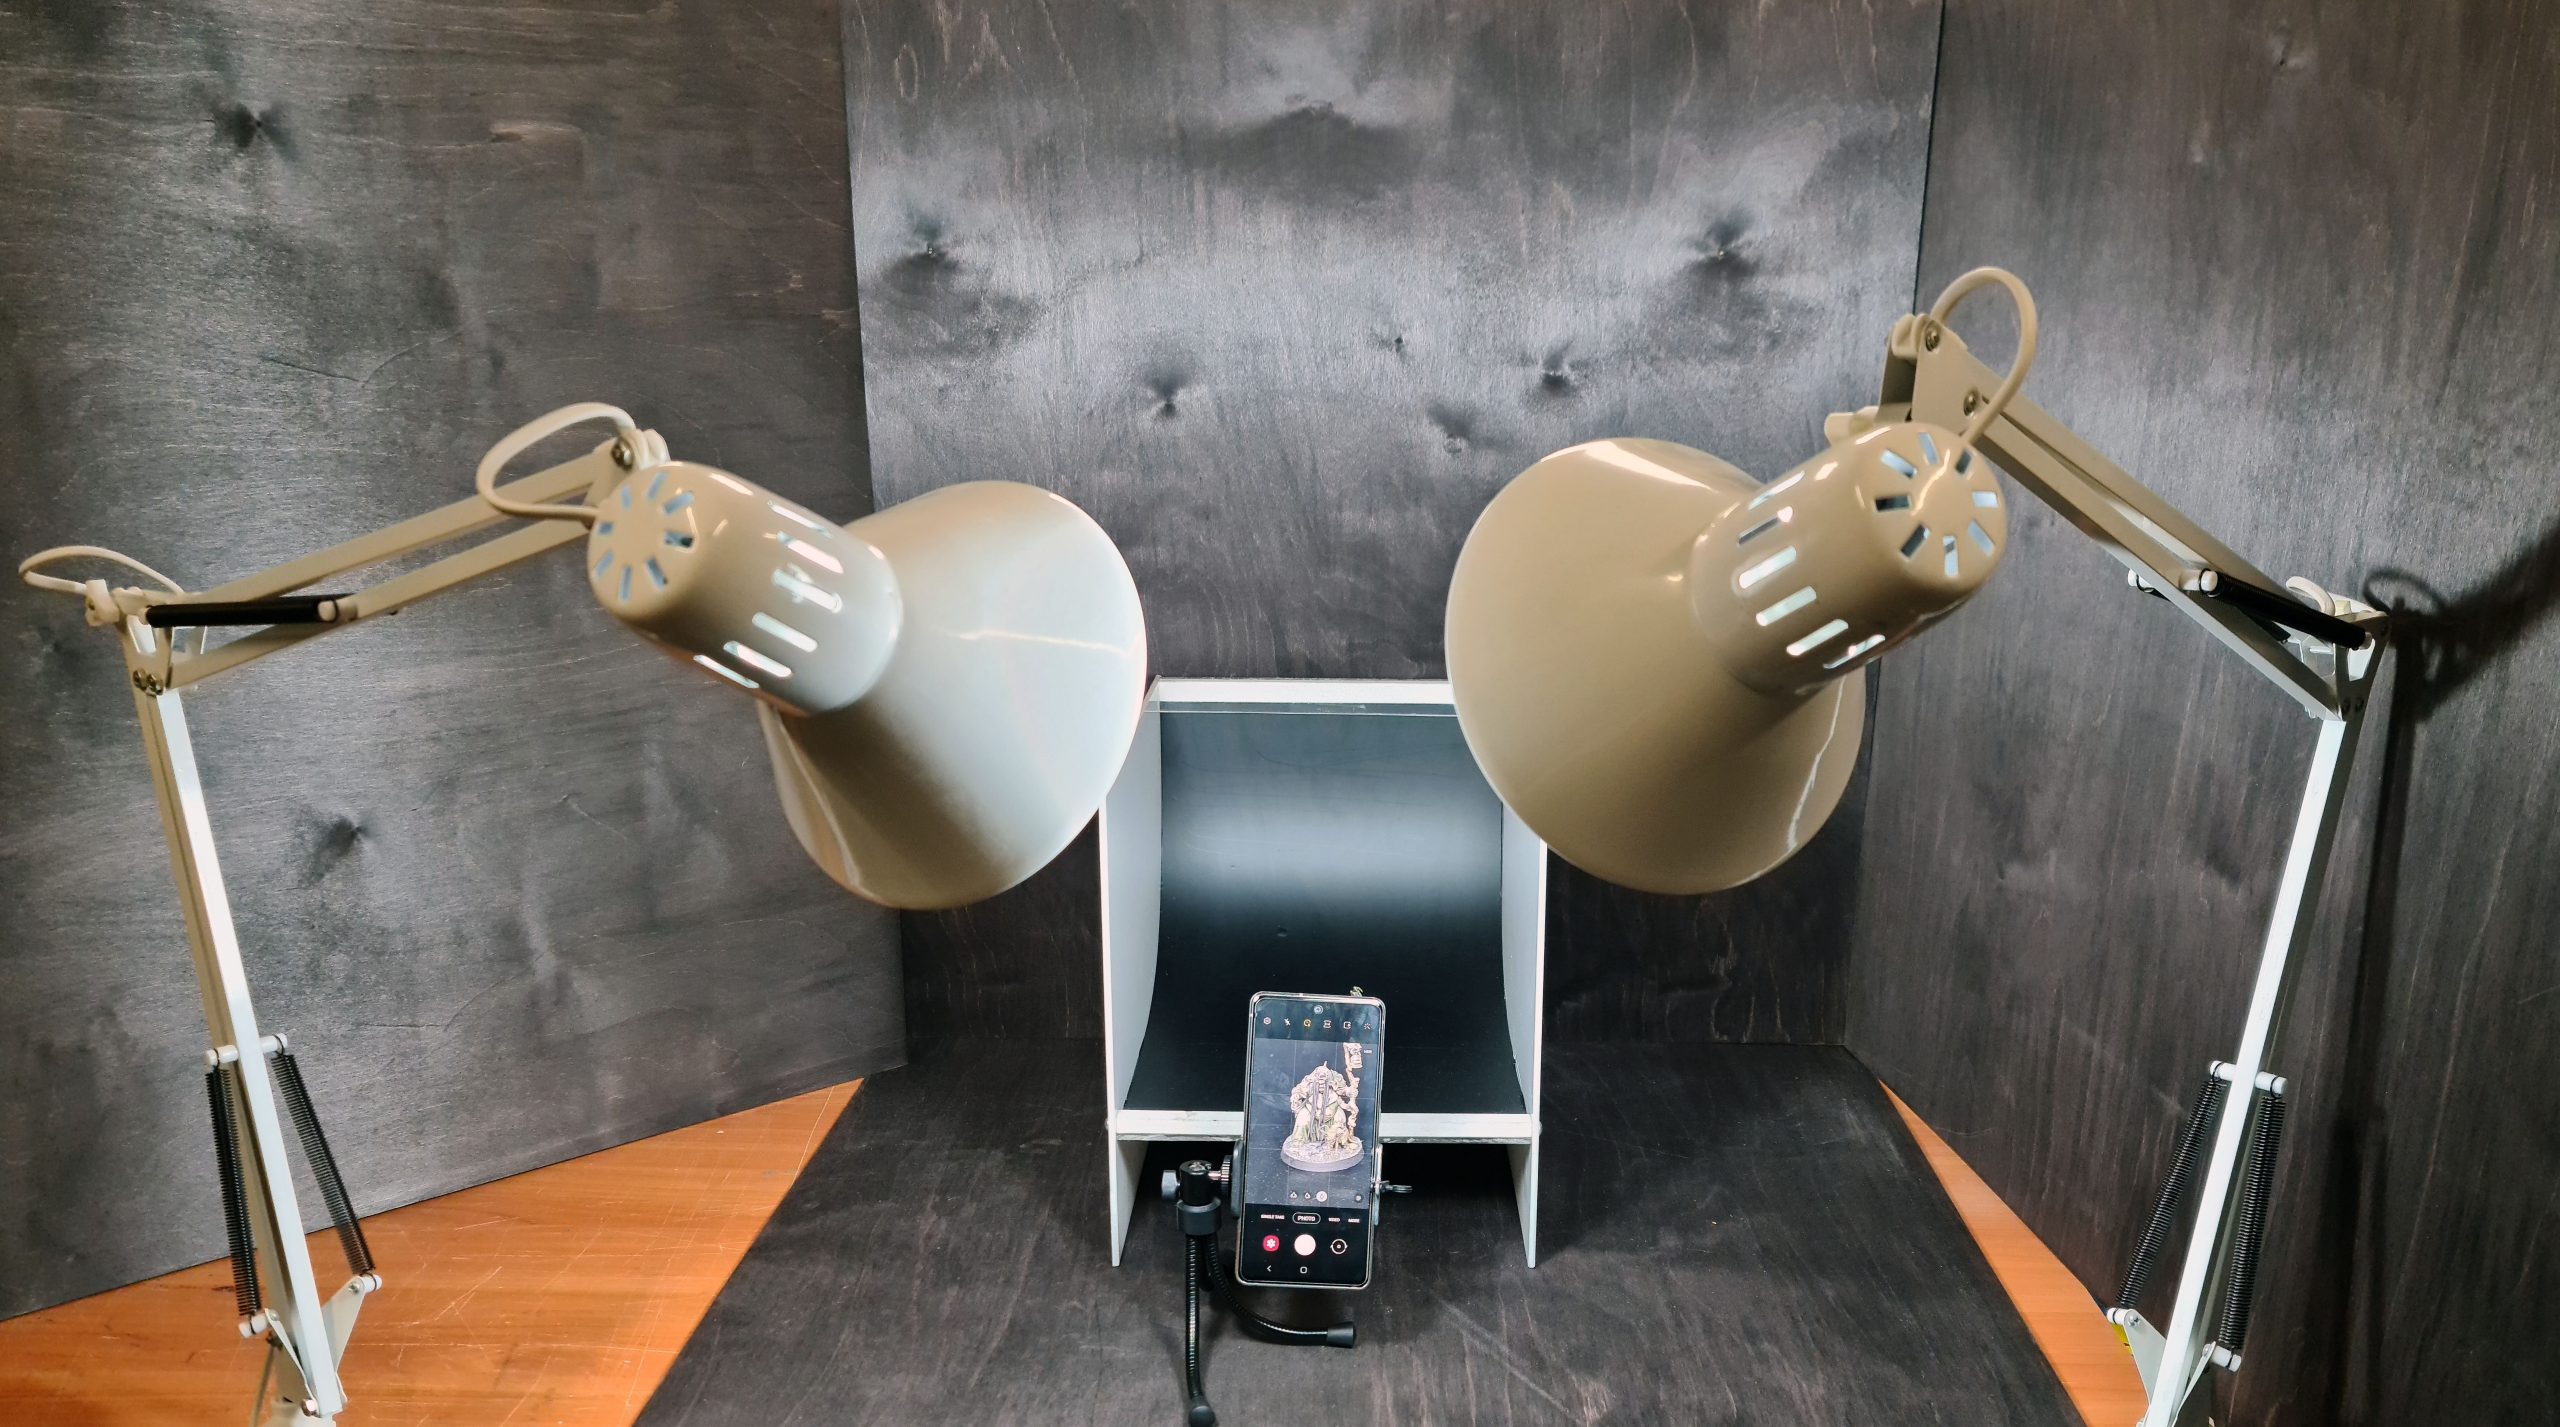
The first test we did was a combination of two desk lamps. We used the same light bulbs as before. Lights were pointed slightly above the model at approximately a 45 degrees angle. This was done to avoid harsh light reflections. Both light sources should meet in the middle. Even, scattered light is what we’re trying to achieve. The only issue with this setup is the amount of space required. We couldn’t fully fit it in our picture area.

Clip-on Lamps
The end result is very close to the light ring. I wouldn’t even be able to tell the difference if I didn’t label the images. All in all, this is a great option to use if you already own two lamps for painting.

Clip-on lamps are easy to get nowadays. Of course, we wanted to test them to see if it’s a viable option. We used a cheap, portable no-name light. Absolutely horrible when used in a single light setup. However, when you use two of them they become usable.
The image turned out ok. The light is too direct and harsh for my taste. This option is perfectly usable. But I recommend using regular table lamps if given the choice.
Multiple Lights
With basic setups tested we decided to run a couple more tests.
We added an extra light to our clip-on lamps. Two lower lamps were on the left and right, directed at the model at 45 degrees. The upper light was shining directly from above. In theory, it should improve the image.
Adding just one light improved the quality immensely. With correct camera settings, this is a perfectly viable option for miniature photography on the go.
For our last test, we combined the best lights we have with the worst lights. Since the ring light is shining only from the front direction clip-on lamps were used for additional light from the sides. This canceled out the downsides of both lights and created the perfect setup.
The end result is an image with enough light coming from all directions.
Conclusions
In this article, we covered the basic miniature photography setups and explored the importance of good lighting. Everything can be summed up in 3 points:
- A tripod helps to make stable consistent stable images.
- A solid color backdrop helps to accentuate the model and makes editing easier.
- Having at least two light sources improves the image quality tremendously.
We hope you found this information useful and maybe discovered something new along the way. In our next article, we will cover camera settings on phones that can help you improve your photos even more.