Photography
Miniature Photography with a Phone
Oct
Miniature Photography with A Phone
by Roman of Frontier Wargaming

In our day and age, a phone is the first thing we use for taking photos. It does a great job photographing most things even at default settings. But miniature photography can be tricky. We already covered how your set-up impacts photos. This time we will go into your phone’s camera settings and try to figure out how to change them for the better.
Camera Settings for Miniature Photography
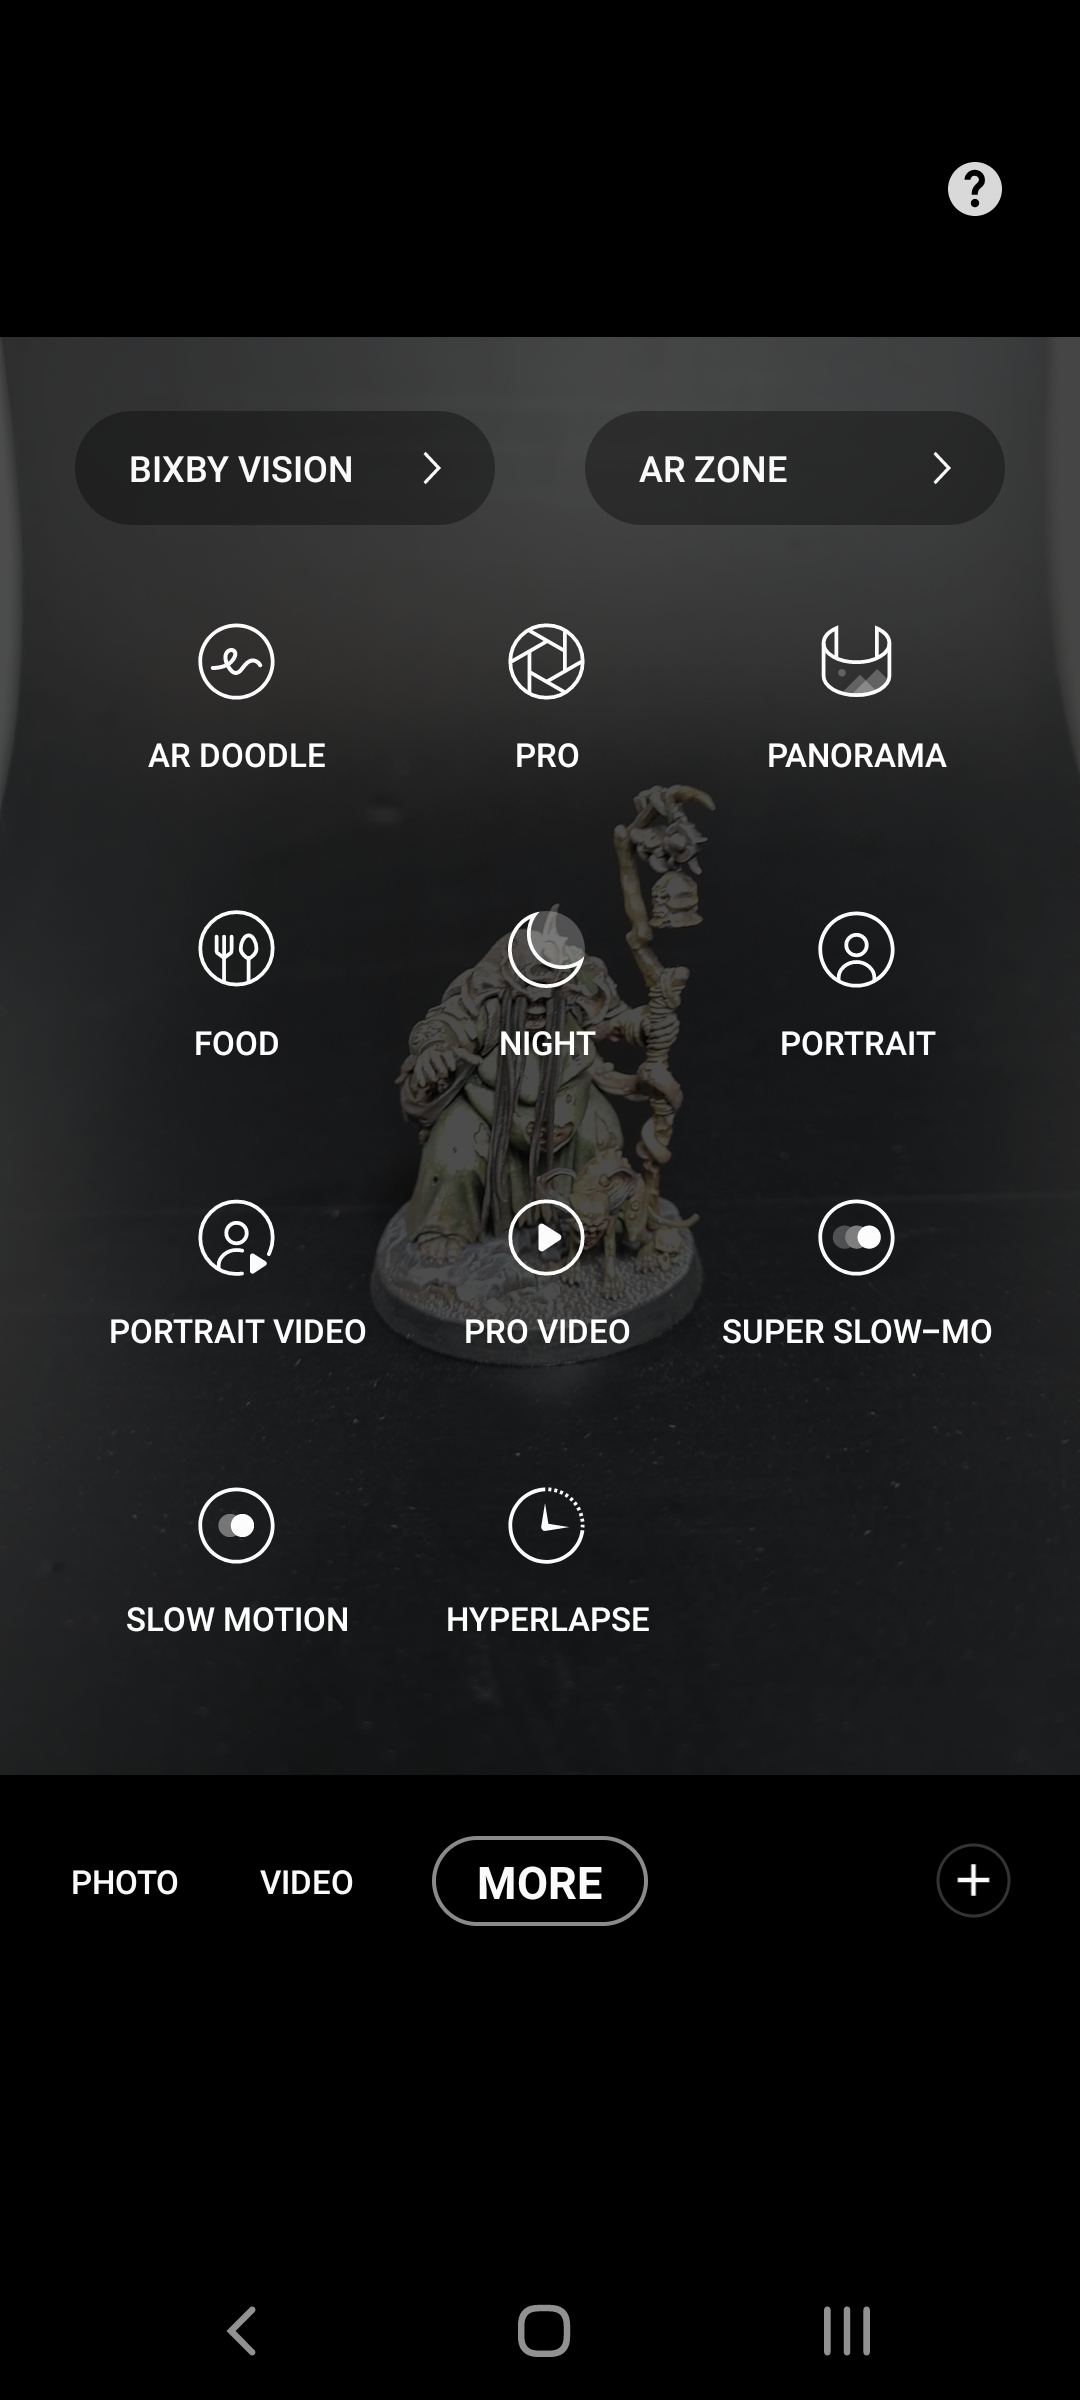
We need to keep in mind that not all phone cameras are made the same. Depending on your phone model and age camera quality will vary drastically. Settings and features can also vary a lot. We will use Samsung S20FE and A8 phones for demonstration purposes. Most phones have advanced camera options available under the “pro” or “expert” mode. These modes allow you to control your phone camera manually.
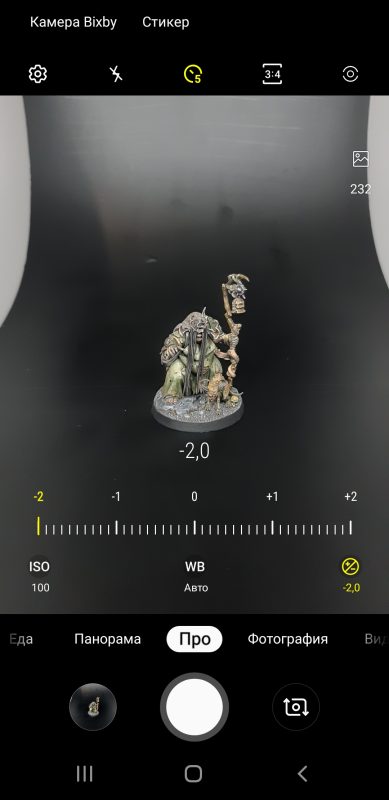
Basic Camera Settings

PRO Camera Settings
Pro settings allow you to manually adjust your camera. Getting used to them does take some practice. We will cover pro settings available on a higher-end device. Some phones may not have them and others can access them with third-party apps.
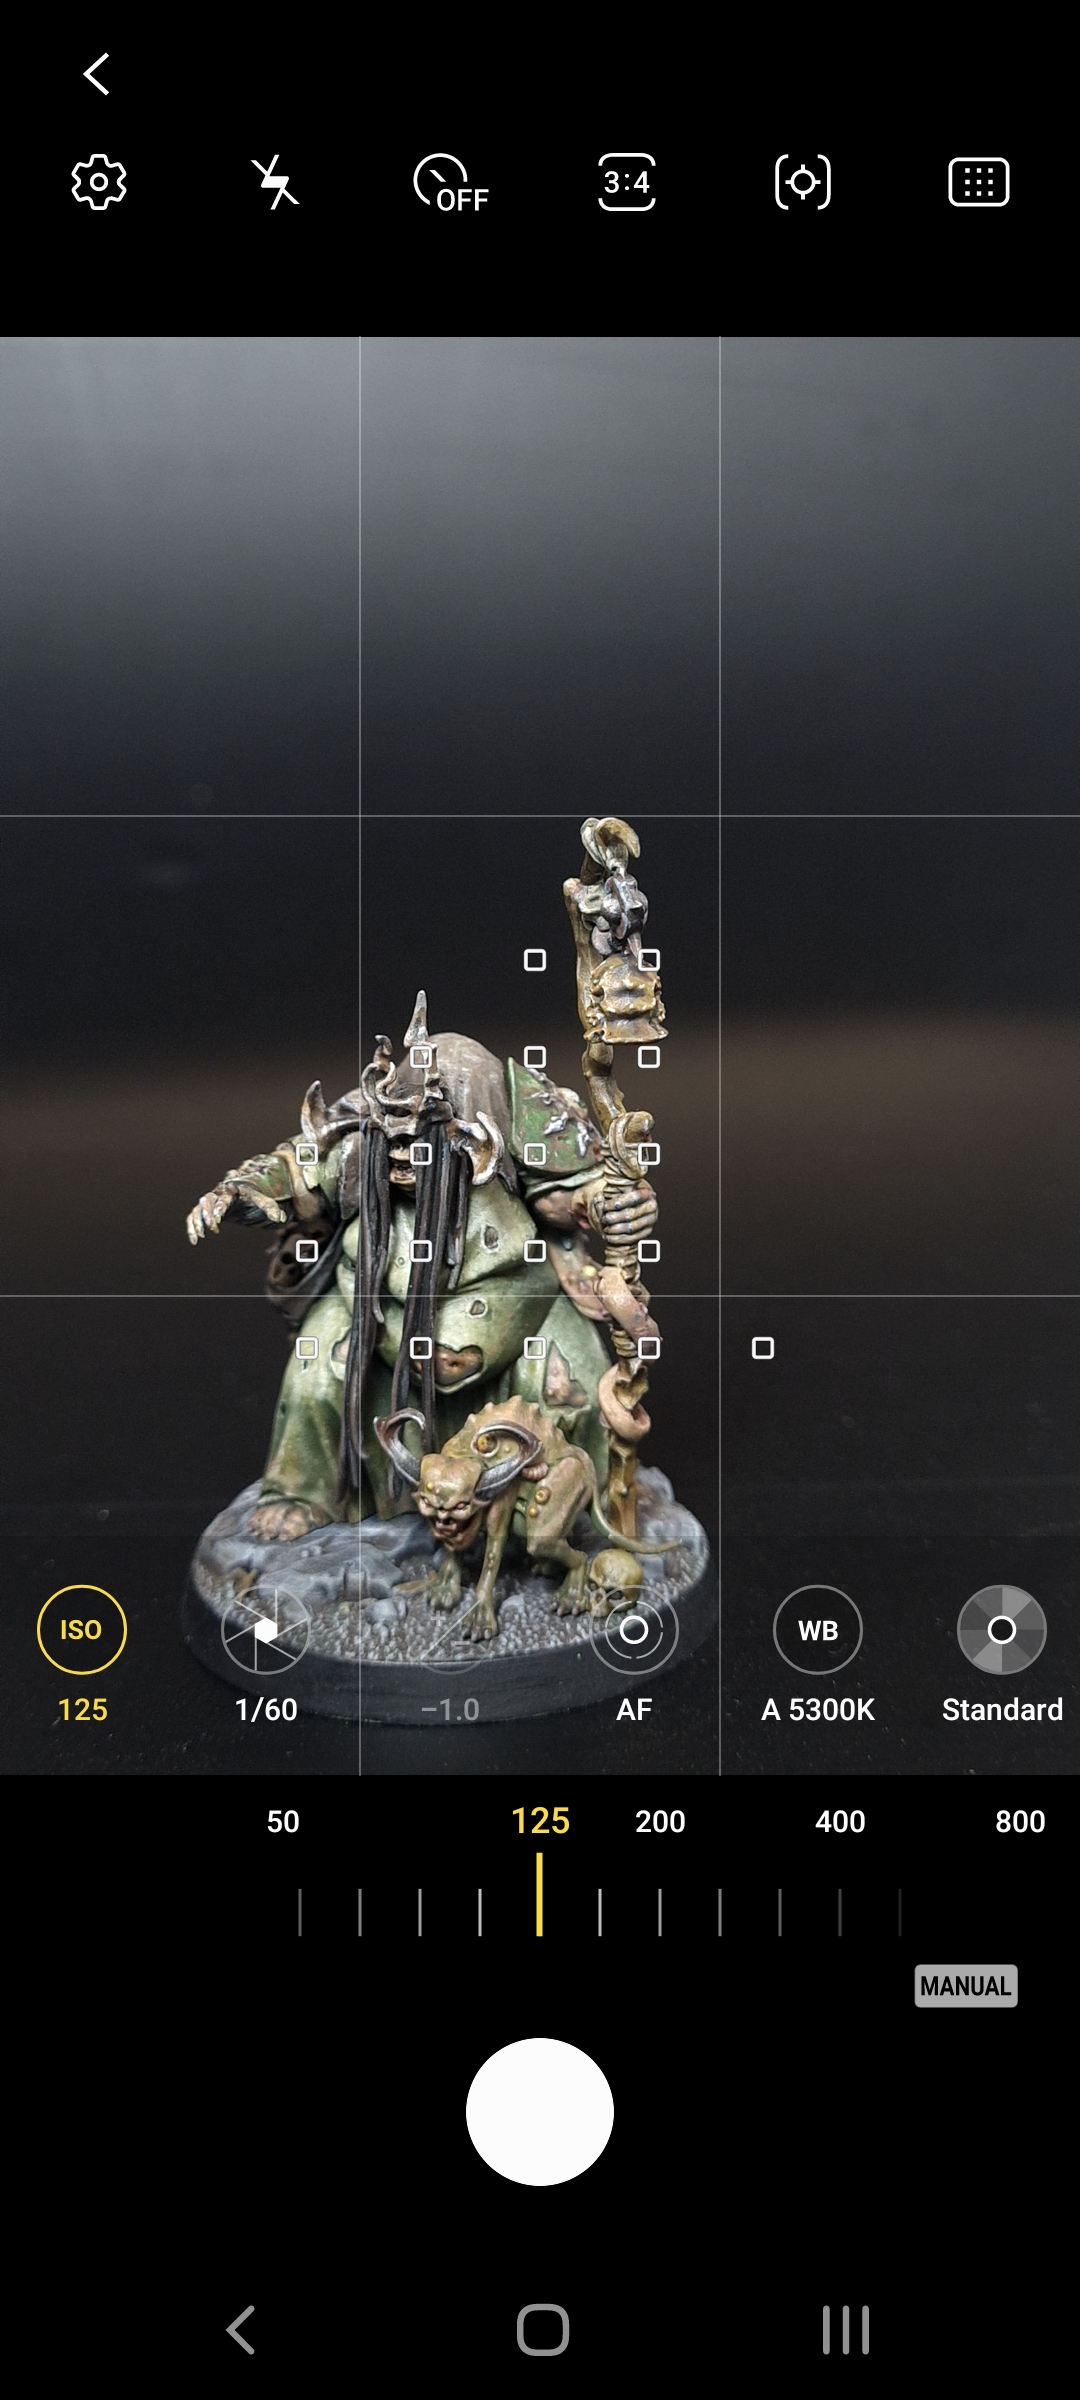
ISO is your camera sensor’s light-sensitivity setting. The lower it is set, the less light your camera will detect. The higher it is set, the more light it will detect. If your image is too bright and creates light blurs, lower ISO to remove them. If your image is too dark, up the ISO to brighten it. This function changes the camera sensor’s light sensitivity without affecting shutter speed. I had to set ISO to 100 when using dark backgrounds. For white background, ISO was set to 250.
Shutter Speed (S). It controls the speed of your shutter. The faster the shutter speed, the shorter the time the image sensor is exposed to light. The slower the shutter speed, the longer the time the image sensor is exposed to light. I mostly use this setting to remove light flickering caused by some lamps and to adjust the initial brightness of the photo. Hence, this setting goes hand in hand with ISO. I usually first adjust the shutter speed so it matches the lamp and no flickering is present on the image. Then I fine-tune brightness with ISO setting. This setting was missing on most budget phones that I tested.

+/- Exposure Is another setting controlling your brightness. While ISO and Shutter speed control how your camera deals with lights on a physical level. Exposure controls your photo brightness on the program level. It is similar to adjusting brightness in photoshop. In my case, this setting gets disabled when I’m changing shutter speed or ISO. If you are happy with default camera settings and need to do a small adjustment to brightness, this is the setting to use. Exposure is often used to substitute shutter speed and ISO options on midrange and budget phones.
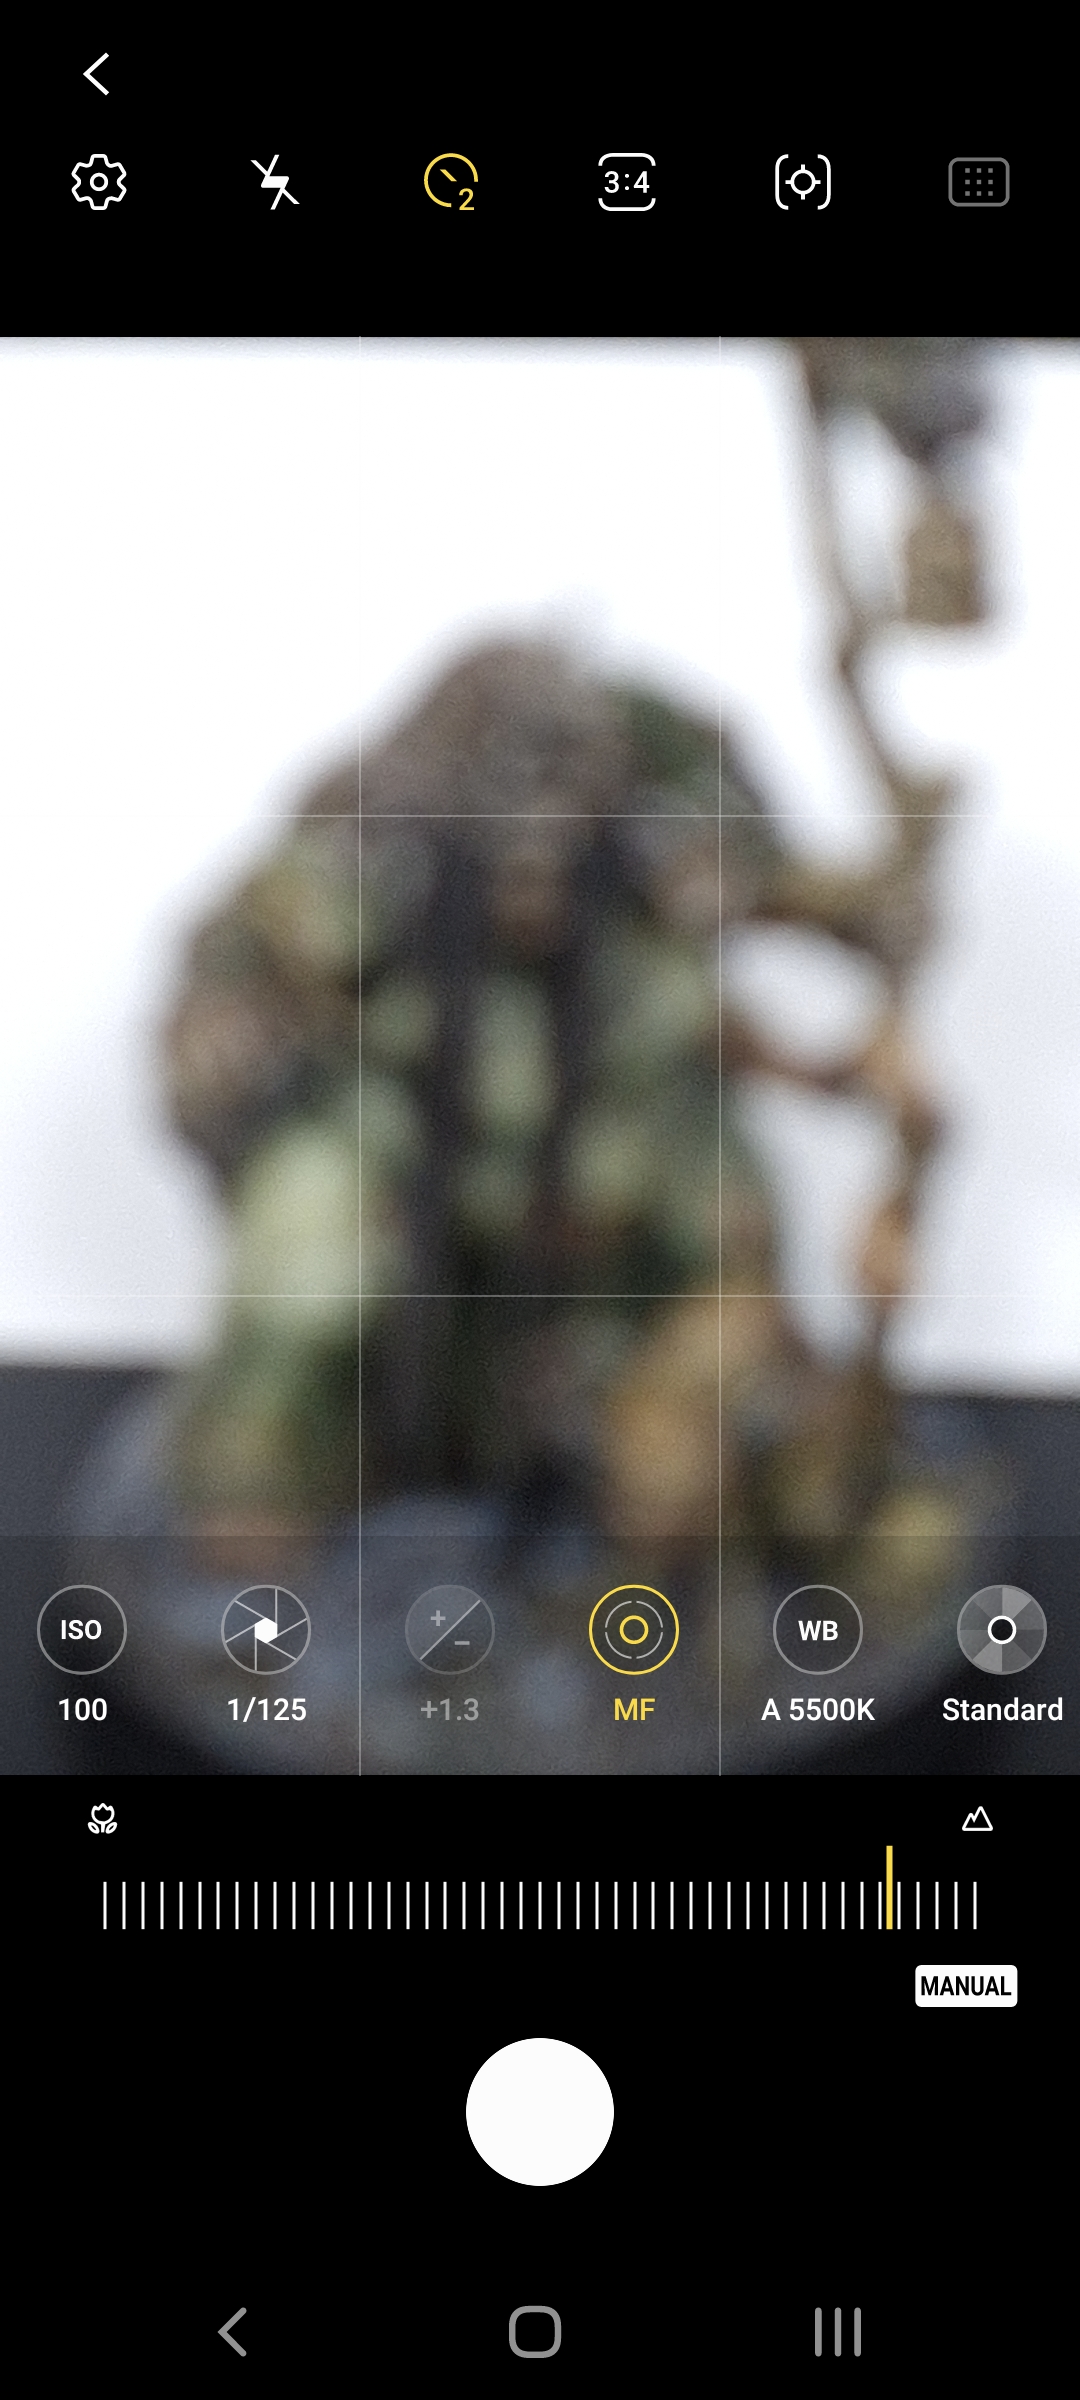
Manual Focus (MF). It allows you to focus your camera manually. Budget phones often lack this function by default. It can still be accessed by some third-party apps.

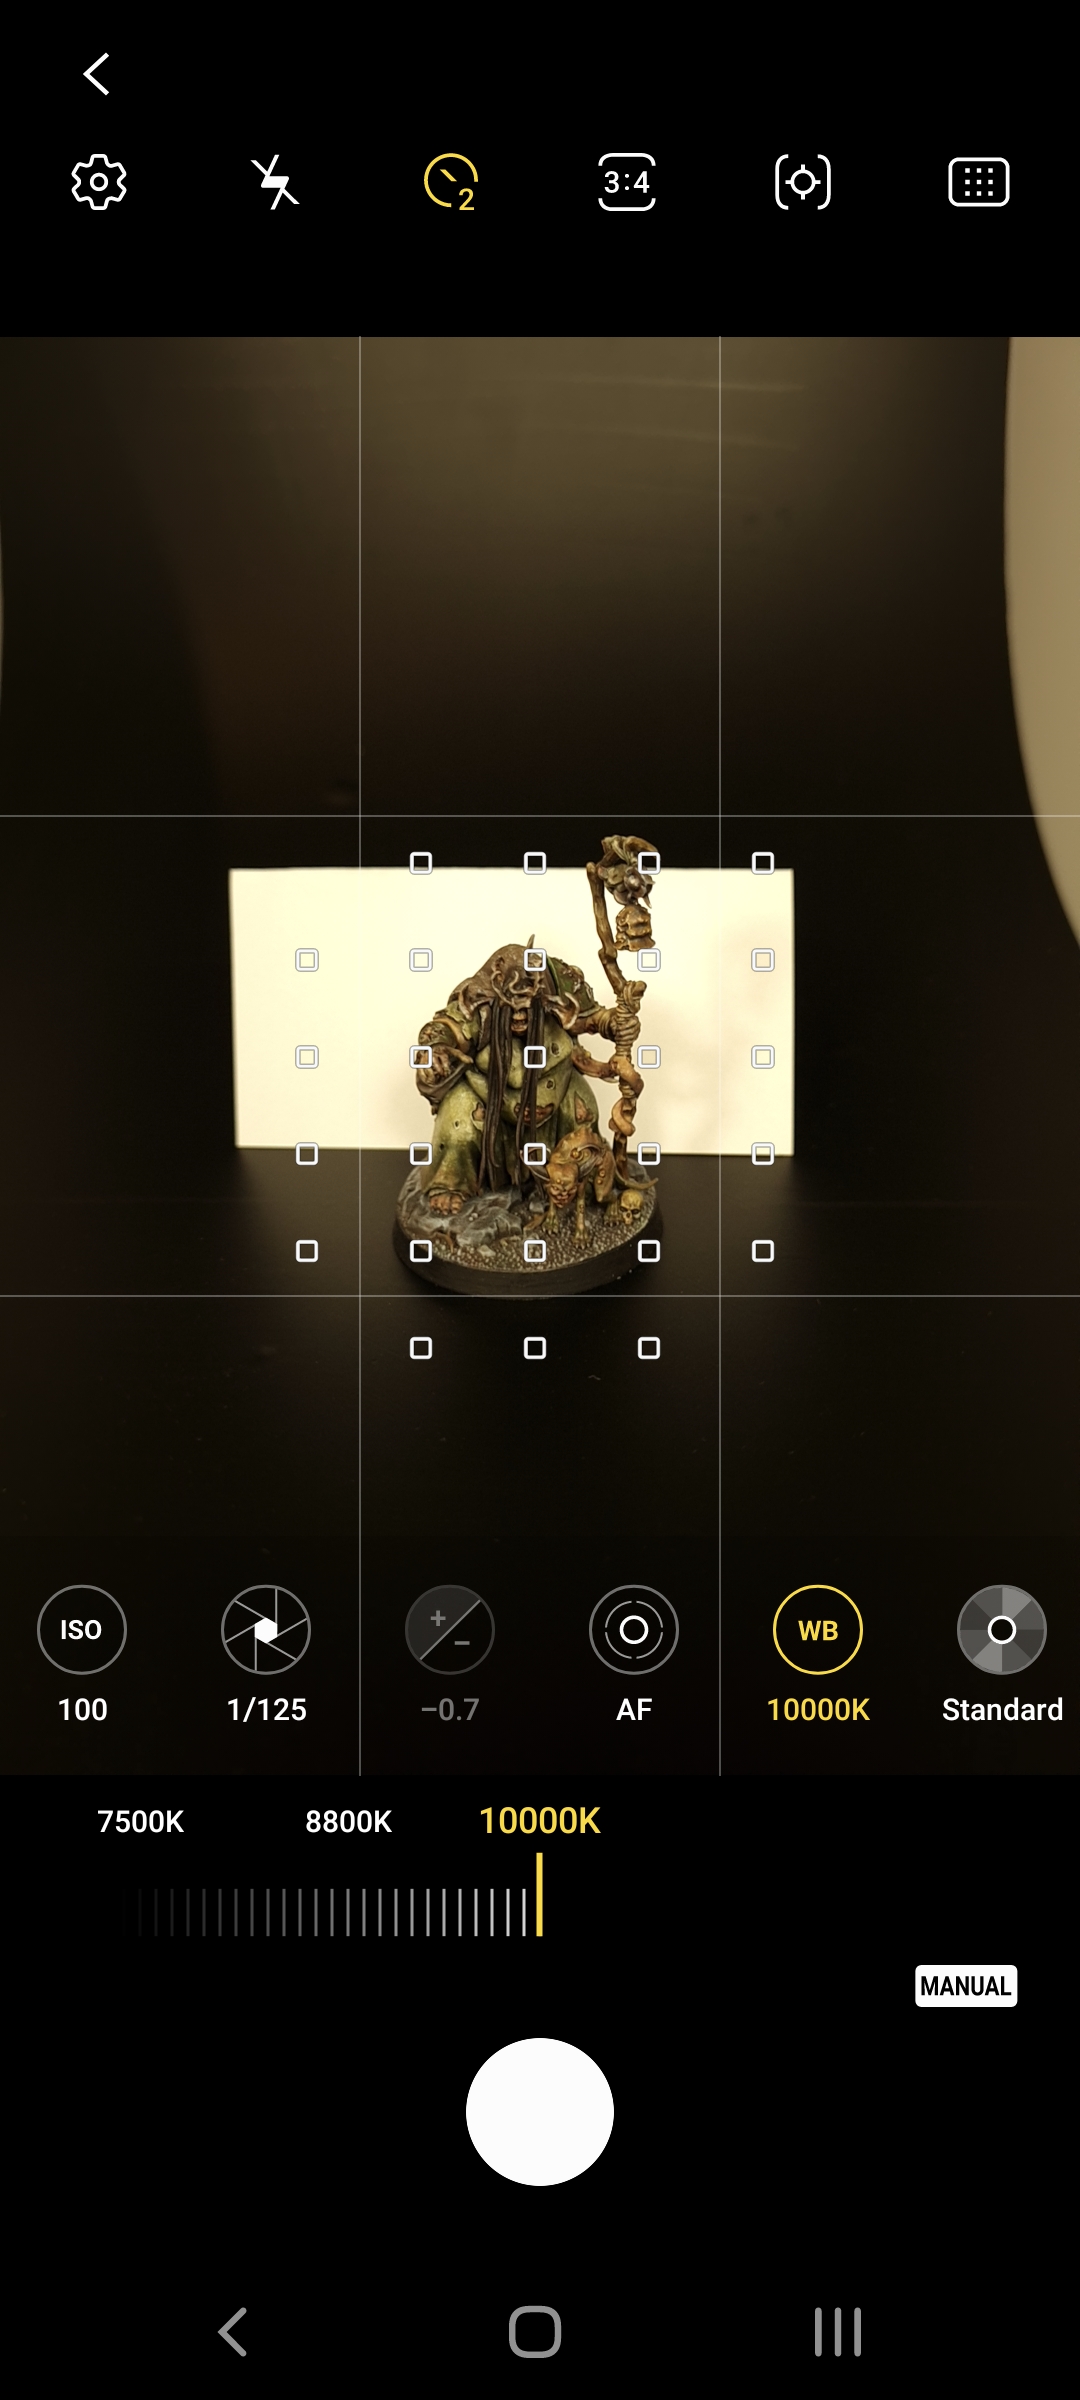
White Balance (WB). This is one of the more important settings. It adjusts the color balance to match the lights you’re using. For example, if you’re using a 4500k bulb your camera will add more blue to the image to balance out the yellow from the bulb. If you’re light is on the blue side of the spectrum, more yellow will be added to balance out the color. The end result should be a neutral color without any color tints. This setting is present on all cameras I have tested.
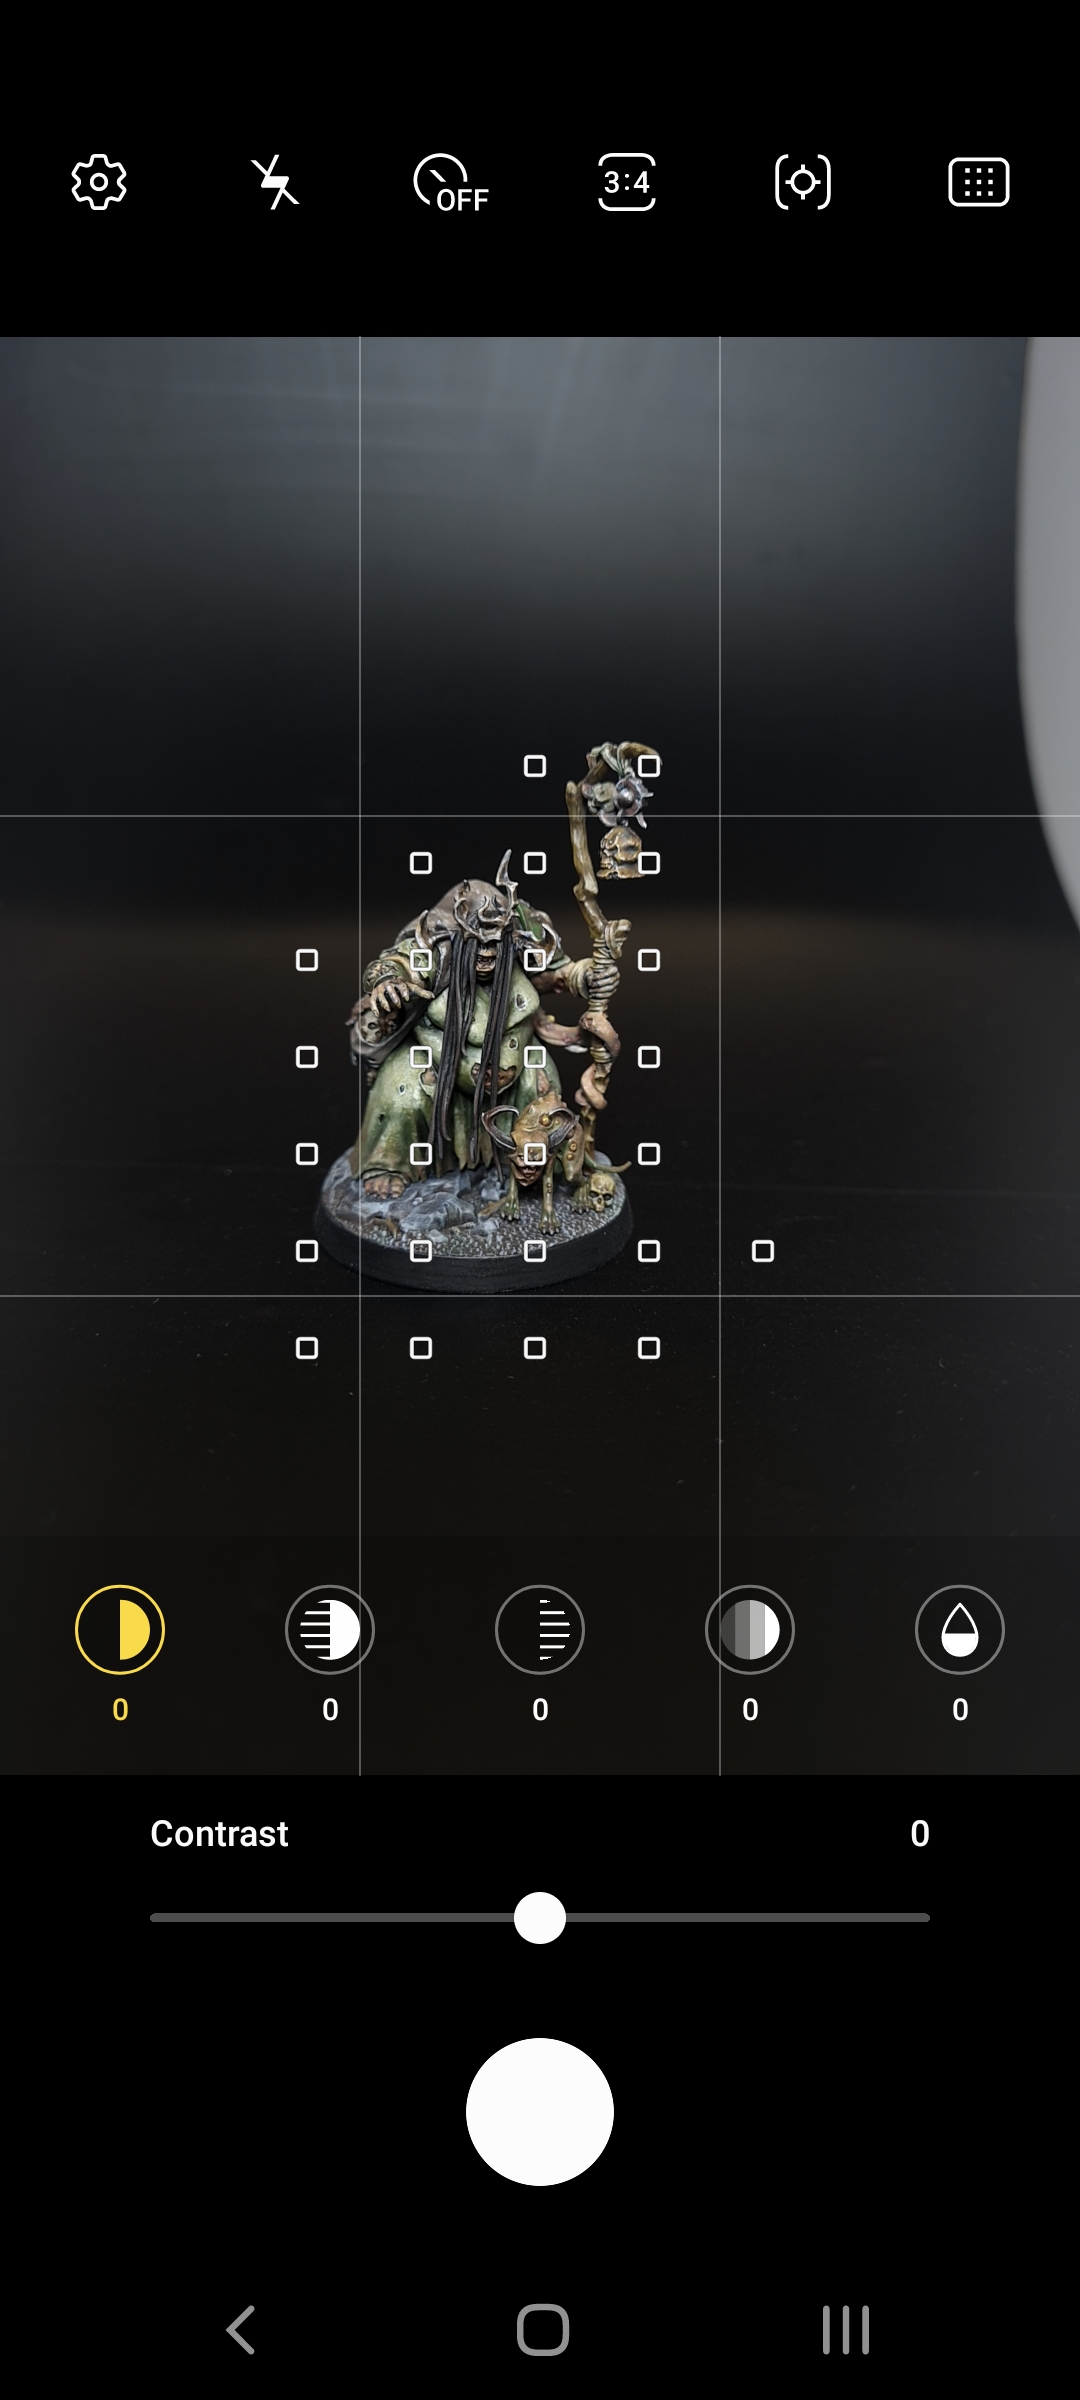
Other Settings. Some cameras allow adjusting contrast, highlights, shadows, saturation, and color tint. those are great options to have for fine-tuning your image. But it can be done after the fact in most image editing software.
Comparing Camera Settings for Better Miniature Photography
Now that we have a basic understanding of camera settings. It’s time to practice. For practice purposes, I used several phones to take a series of photos. We will be comparing images taken with the default setting to images taken in PRO mode. Additionally, we will test them with both dark and light backgrounds.
Preparation was done in 4 steps:
1)Set up lights and photo area.
2)Turn up screen brightness.
3)Turn off flash. Flash will ruin your photo by introducing another light source that we didn’t adjust for.
4)Take a piece of white paper for color and brightness adjustment.
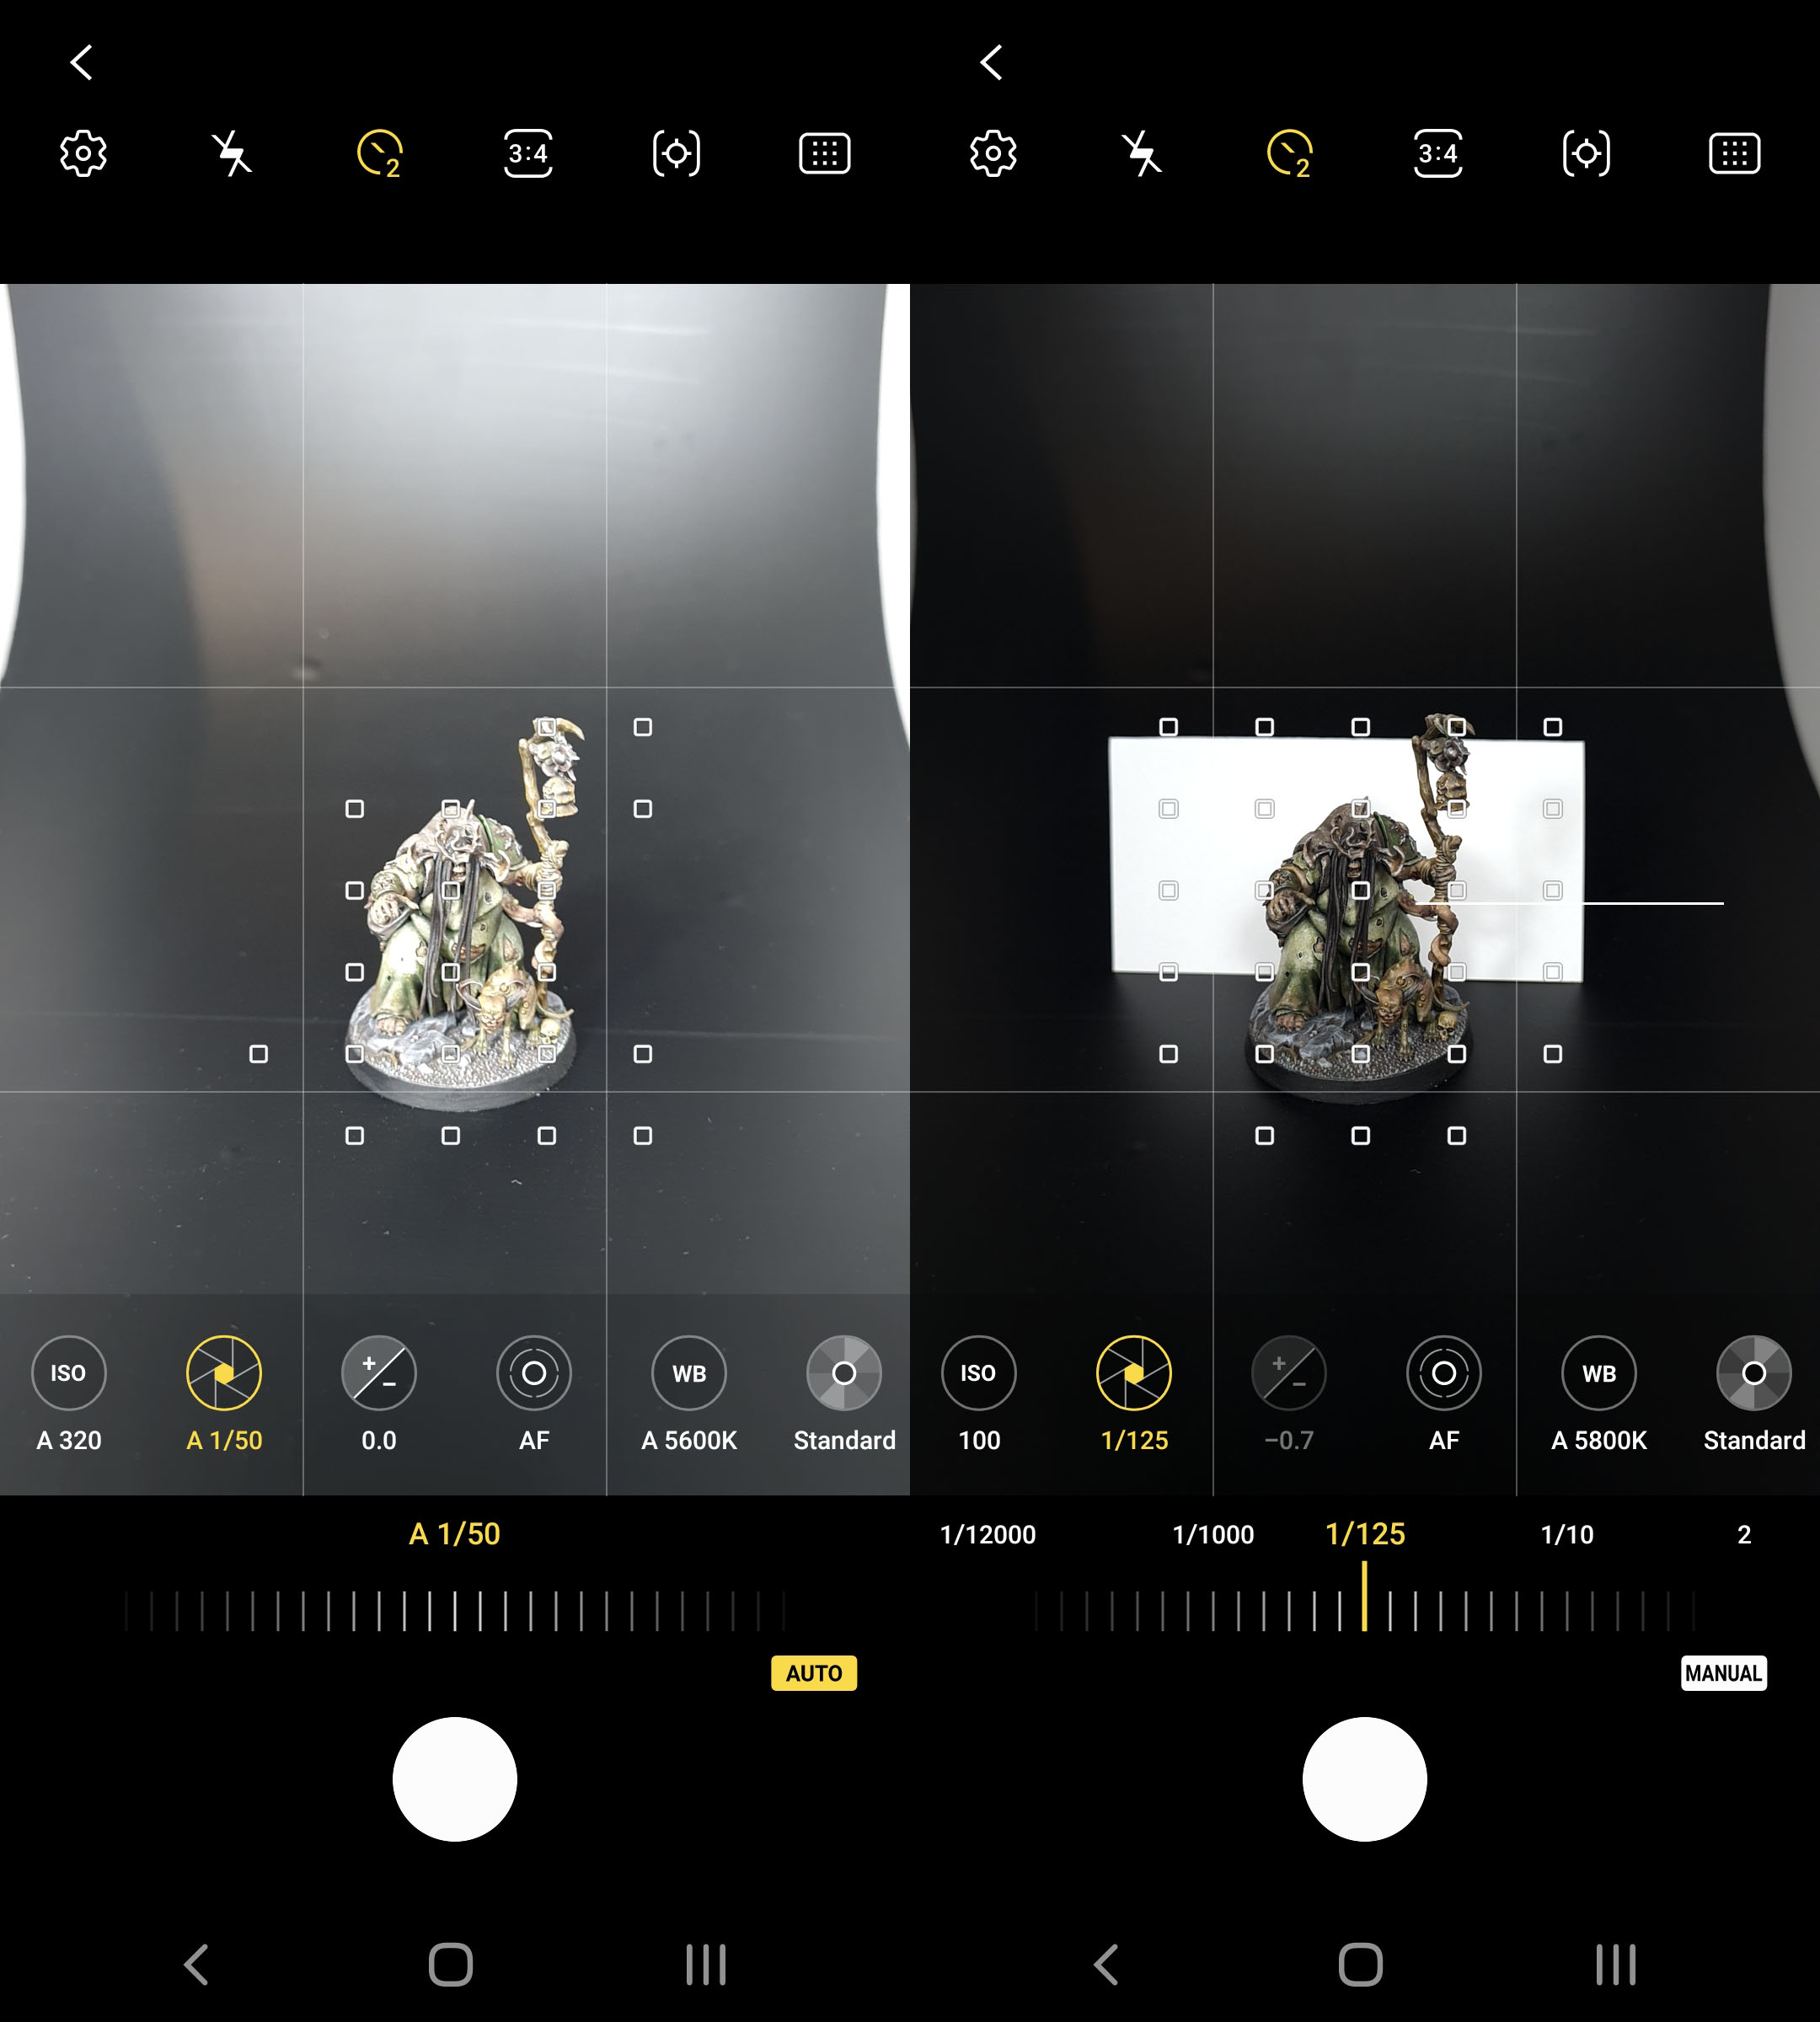
Auto Settings With Dark Background

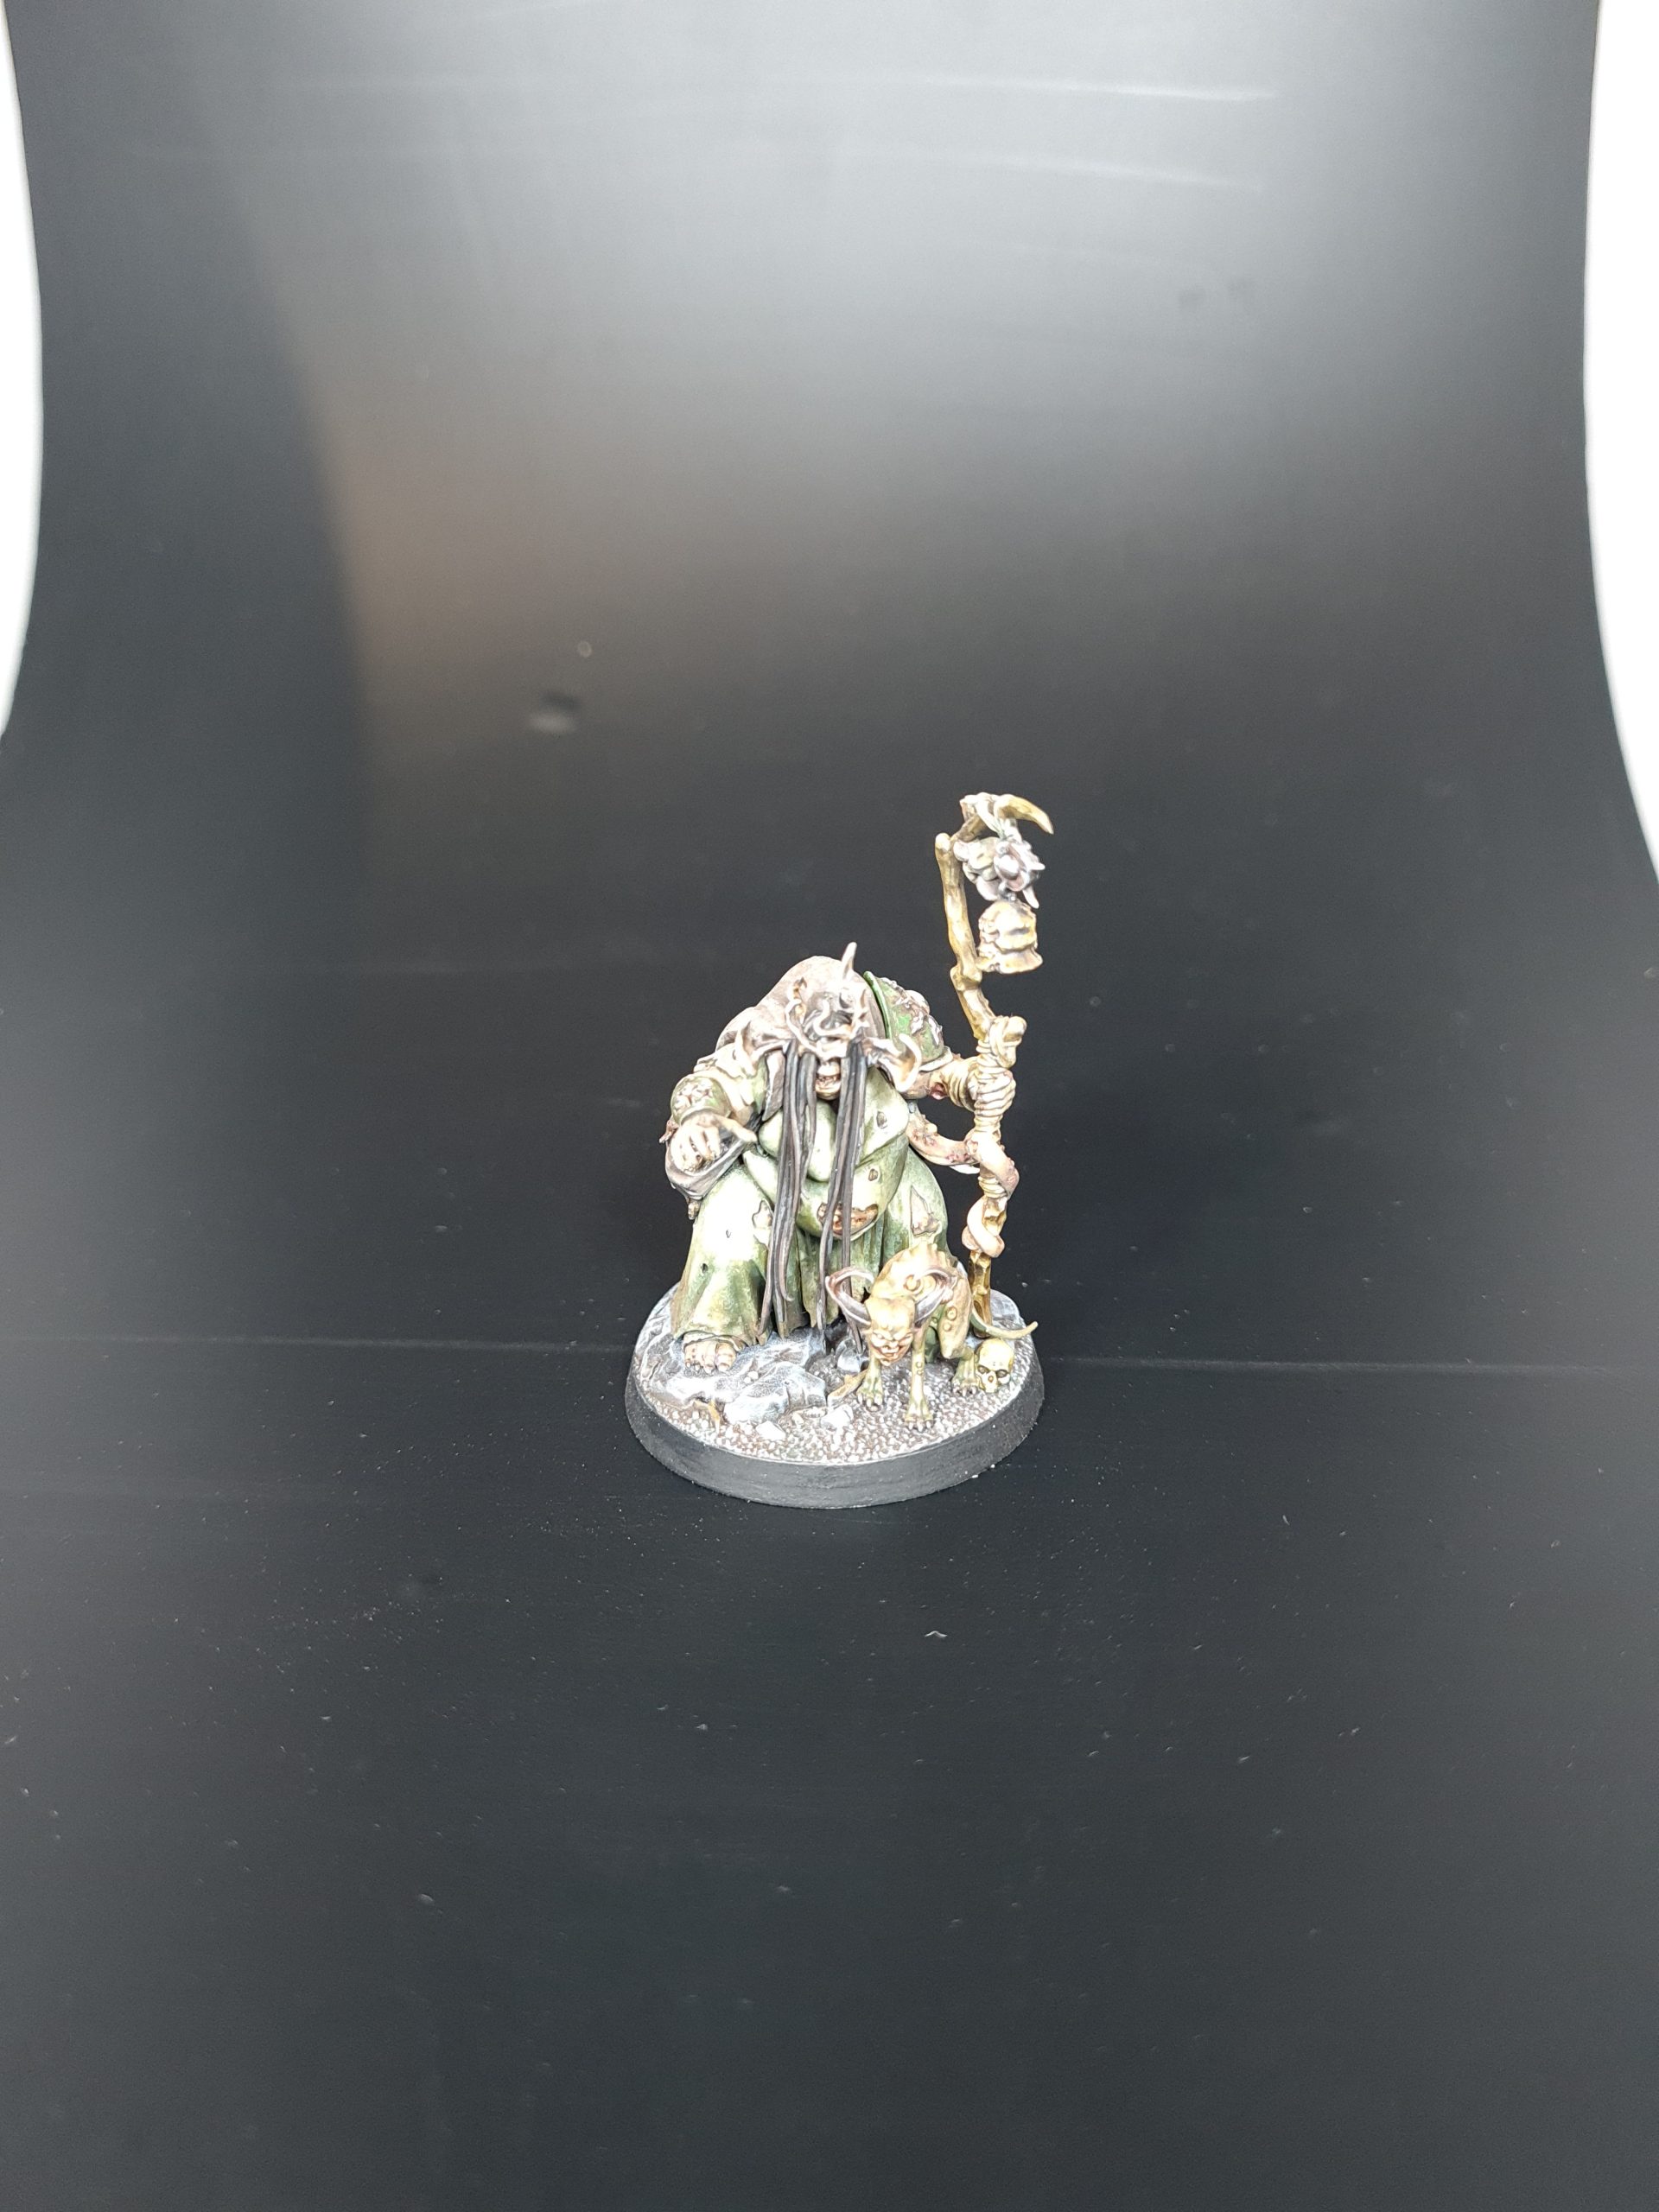
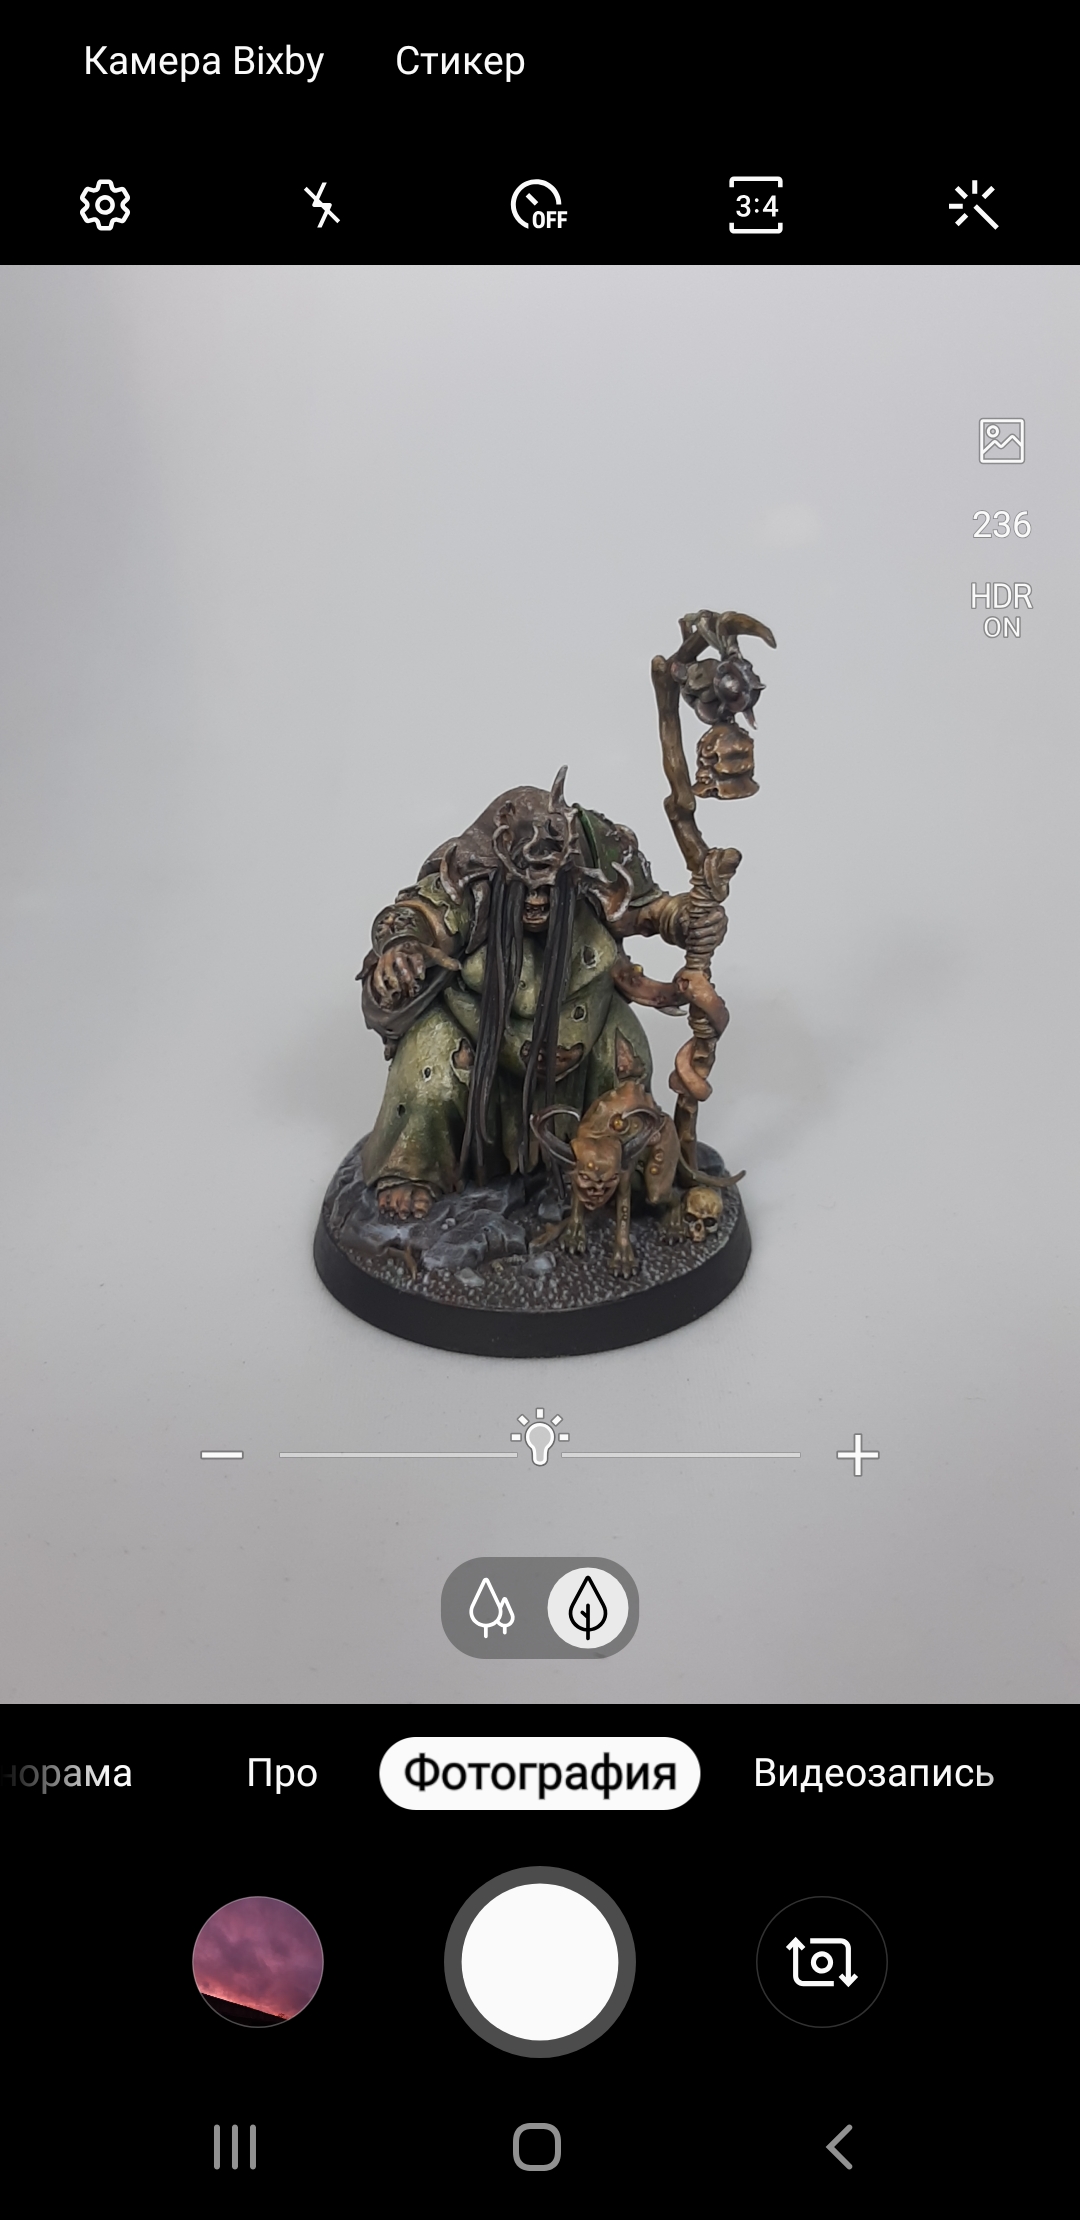
With our area set up, we can start taking pictures. In our first example, we will use my daily phone Samsung S20FE. We did our first photo with default settings.


The camera did an “ok” job. A piece of white paper was used to balance out the exposure. I simply tried to match what I see on paper with what I see on the screen. The image looked good. When I removed the paper it offset the exposure settings. That is why the end result is a little overexposed. Another thing I overlooked was dust. Turns out the paper towels I used for wiping leave small debris behind. For future cleaning, I will use microcloth.
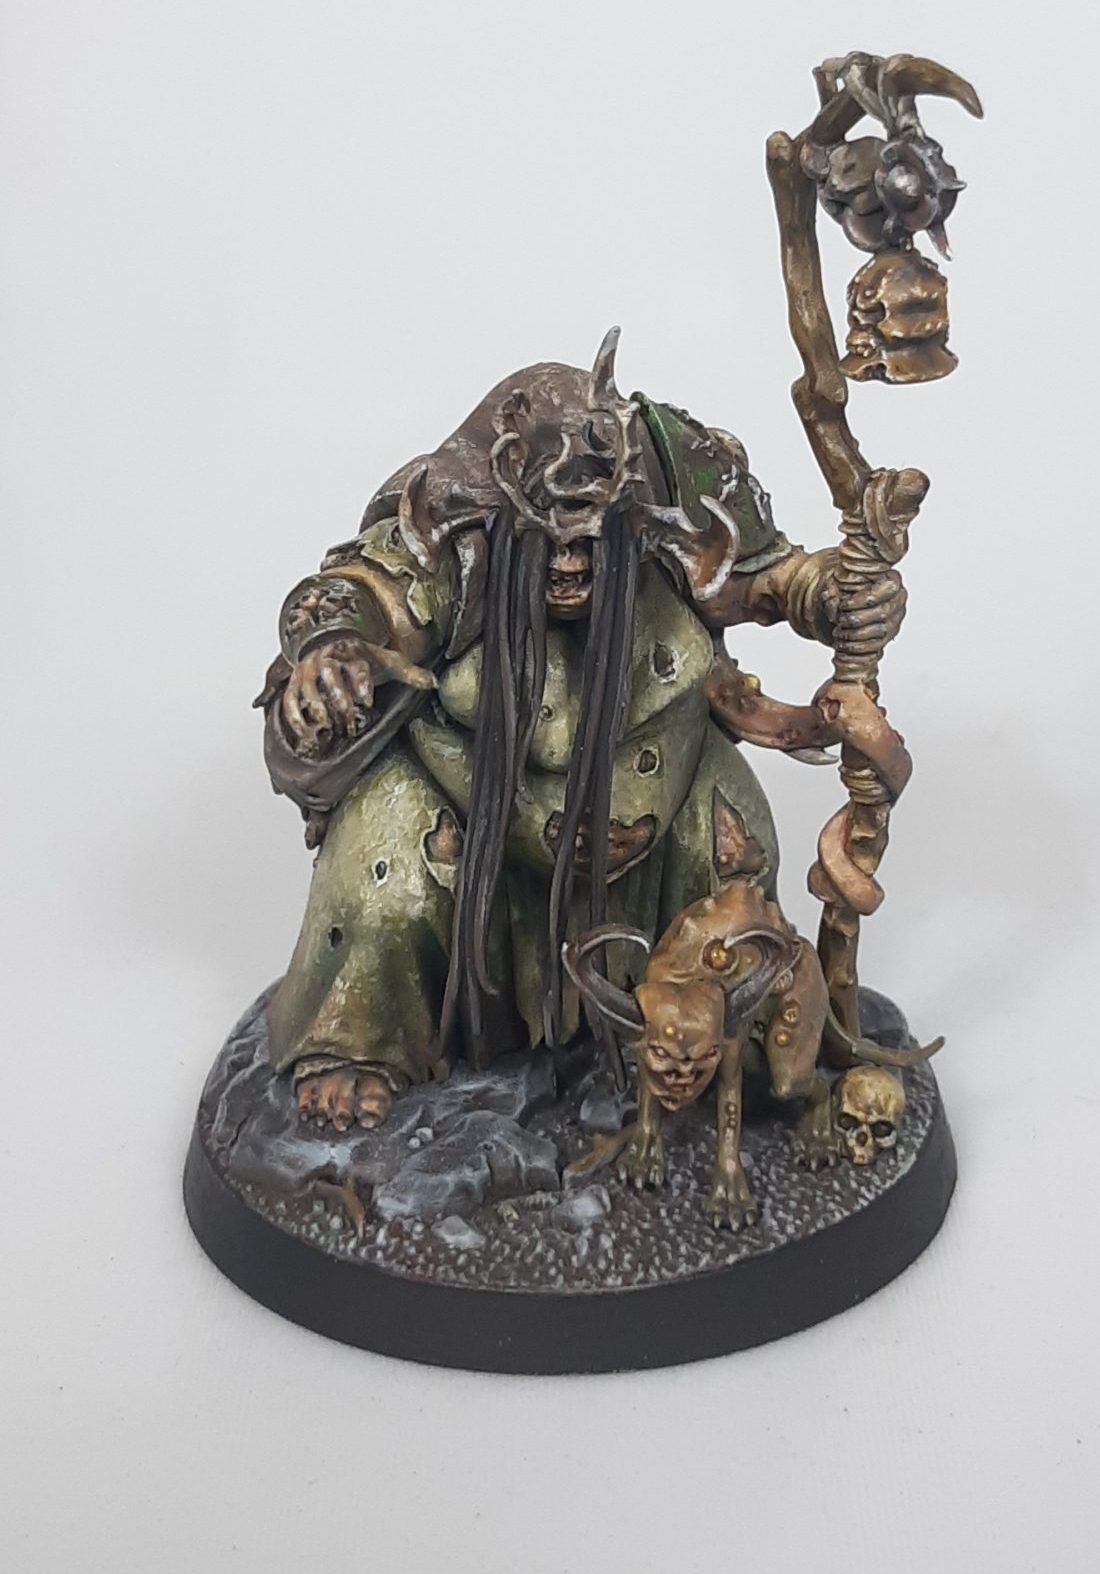
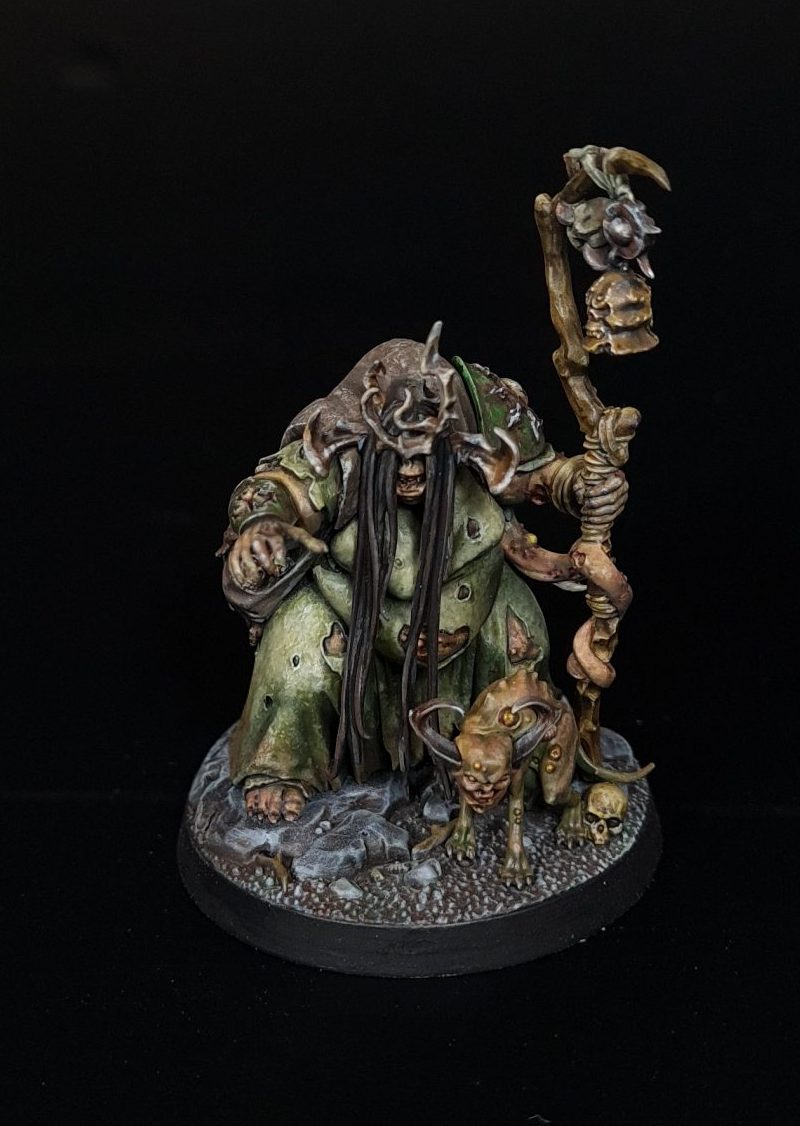
PRO Settings With Dark Background

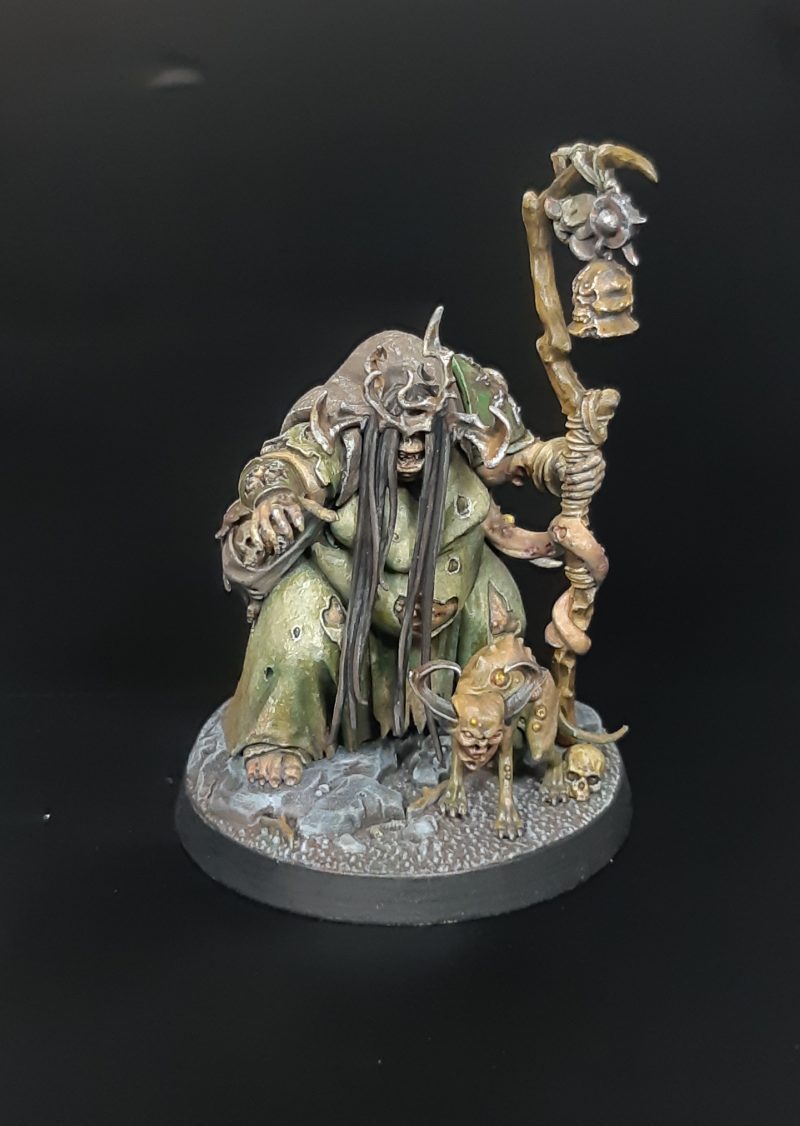
We now know how the camera fairs in default mode. Let’s try to take a better picture in PRO mode. The first thing I saw in pro mode is that the camera is overexposed. I reduced exposure by adjusting the shutter speed. Just like in the default settings we used a piece of white paper to try and match what we see in real life with what we see on the screen. ISO was left at 125. After removing the paper image brightness settings were unaffected.
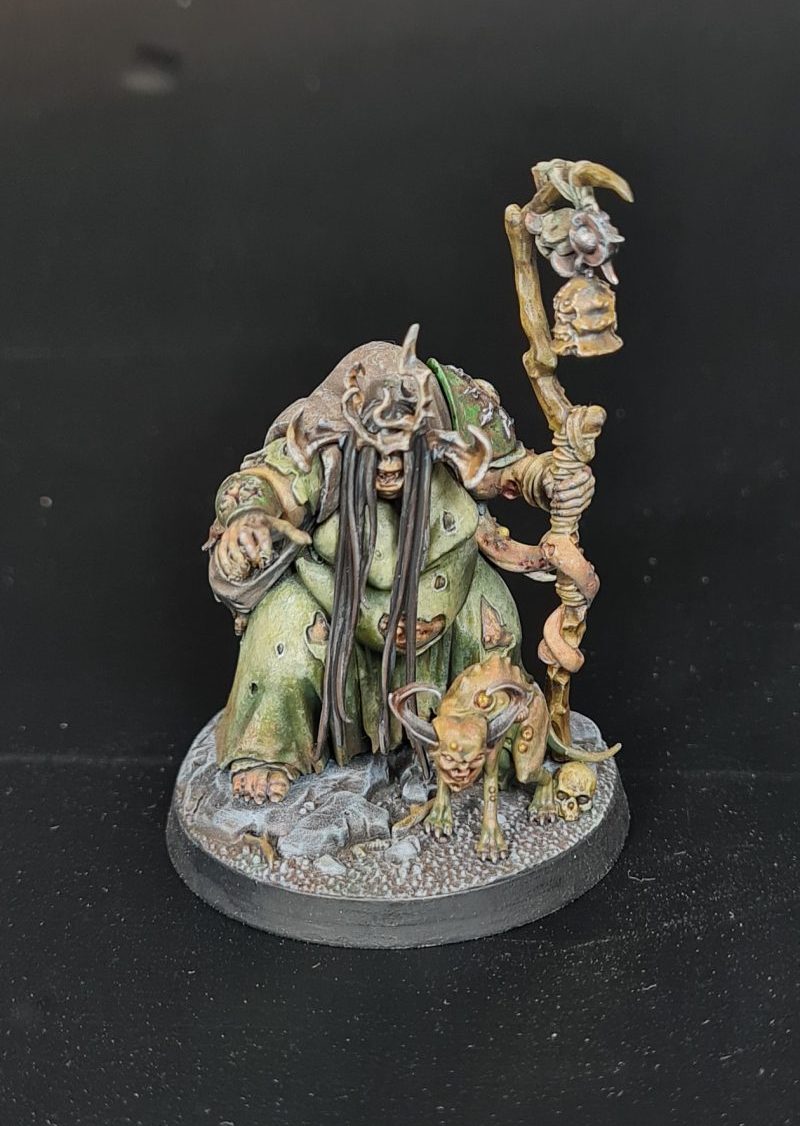

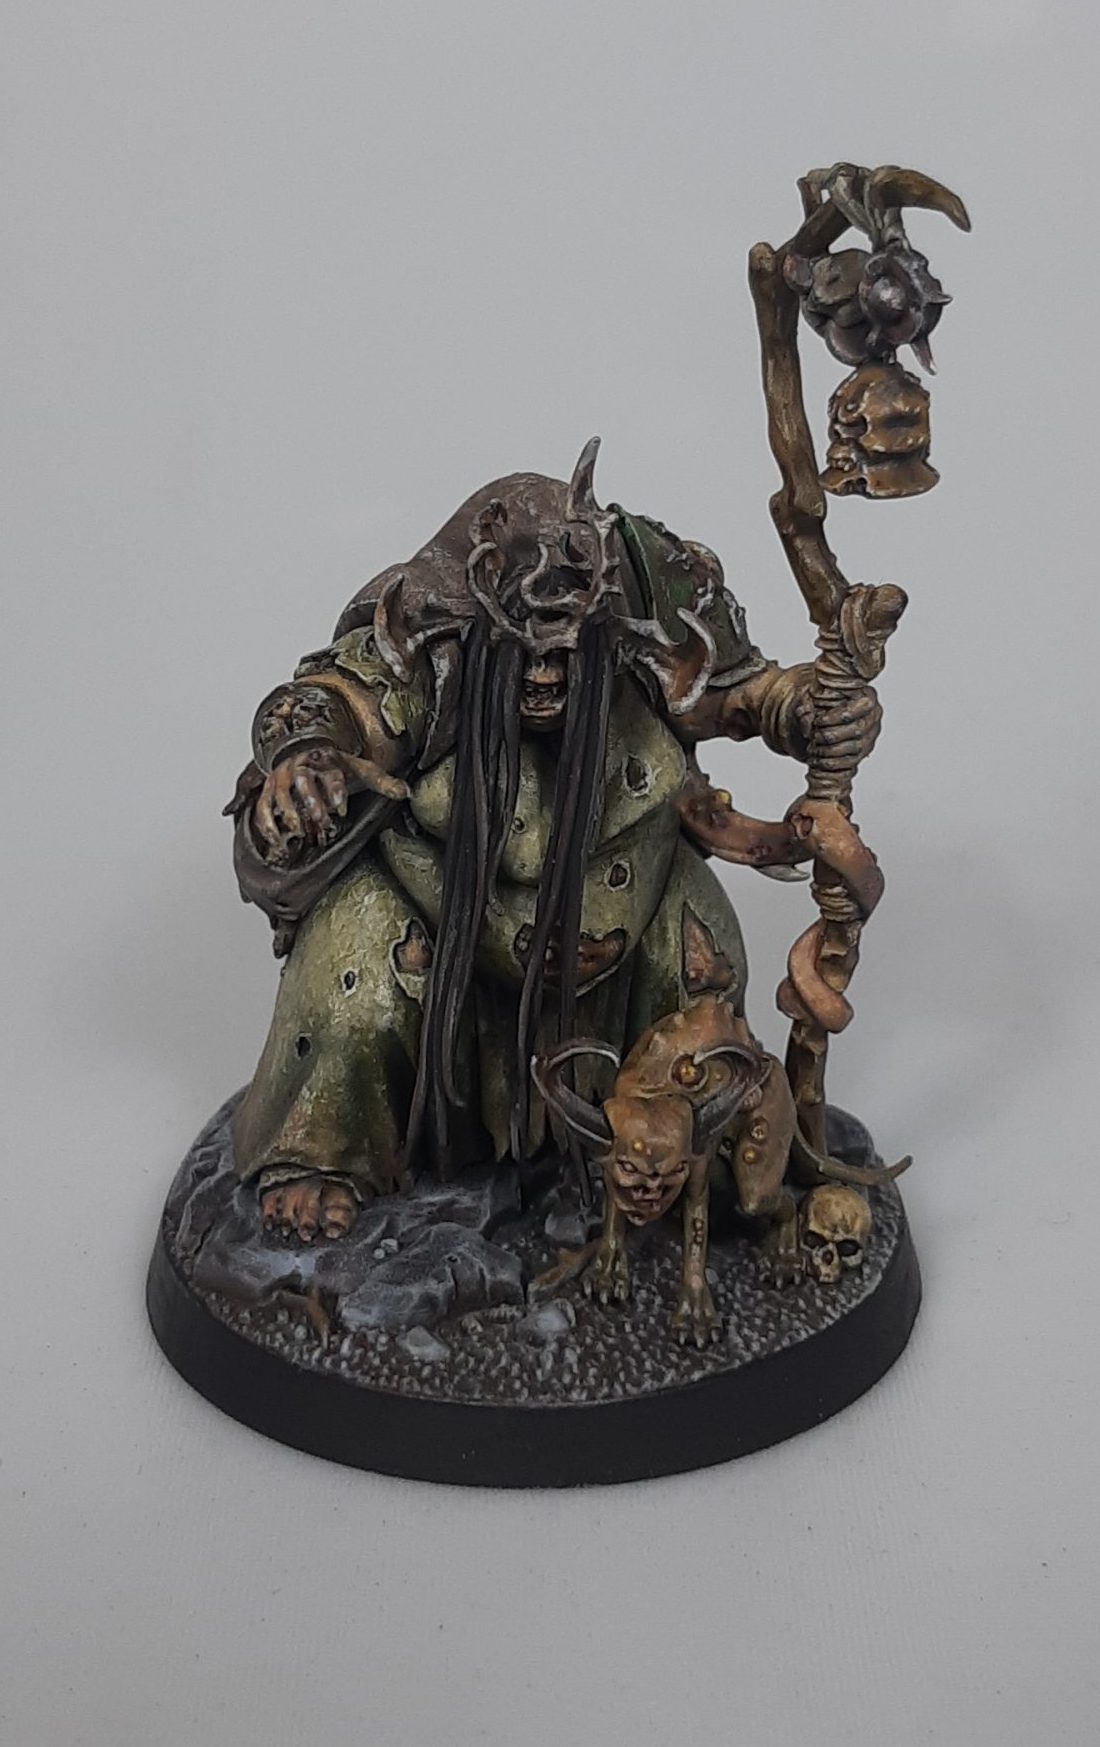
When comparing both images it’s hard to believe that they were taken on the same phone. These images did not receive any editing aside from being cropped. In pro, mode black is more vibrant. Colors are stand out more while looking just like in real life. The dust also became barely visible. But nothing that can’t be easily fixed later.
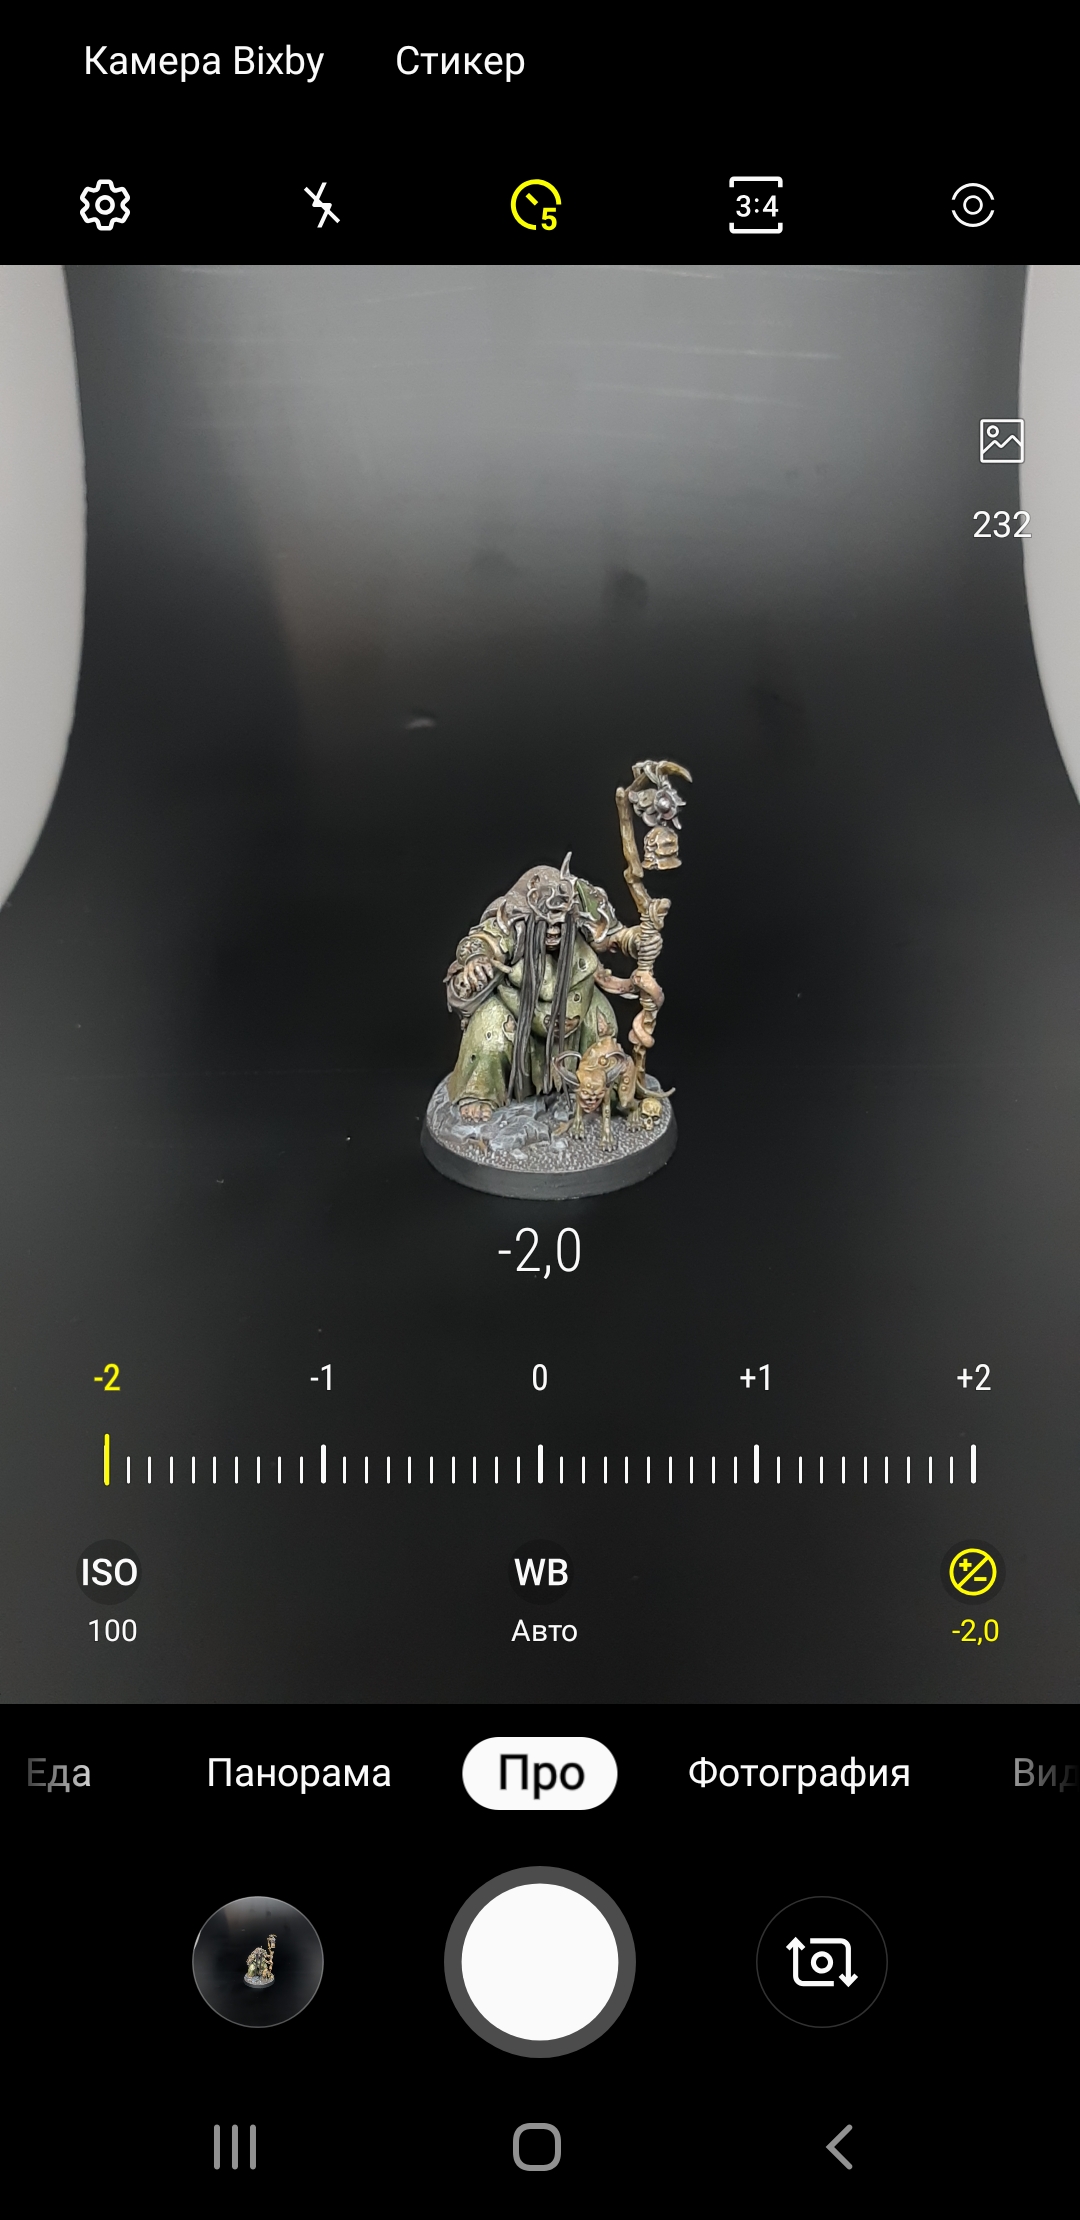
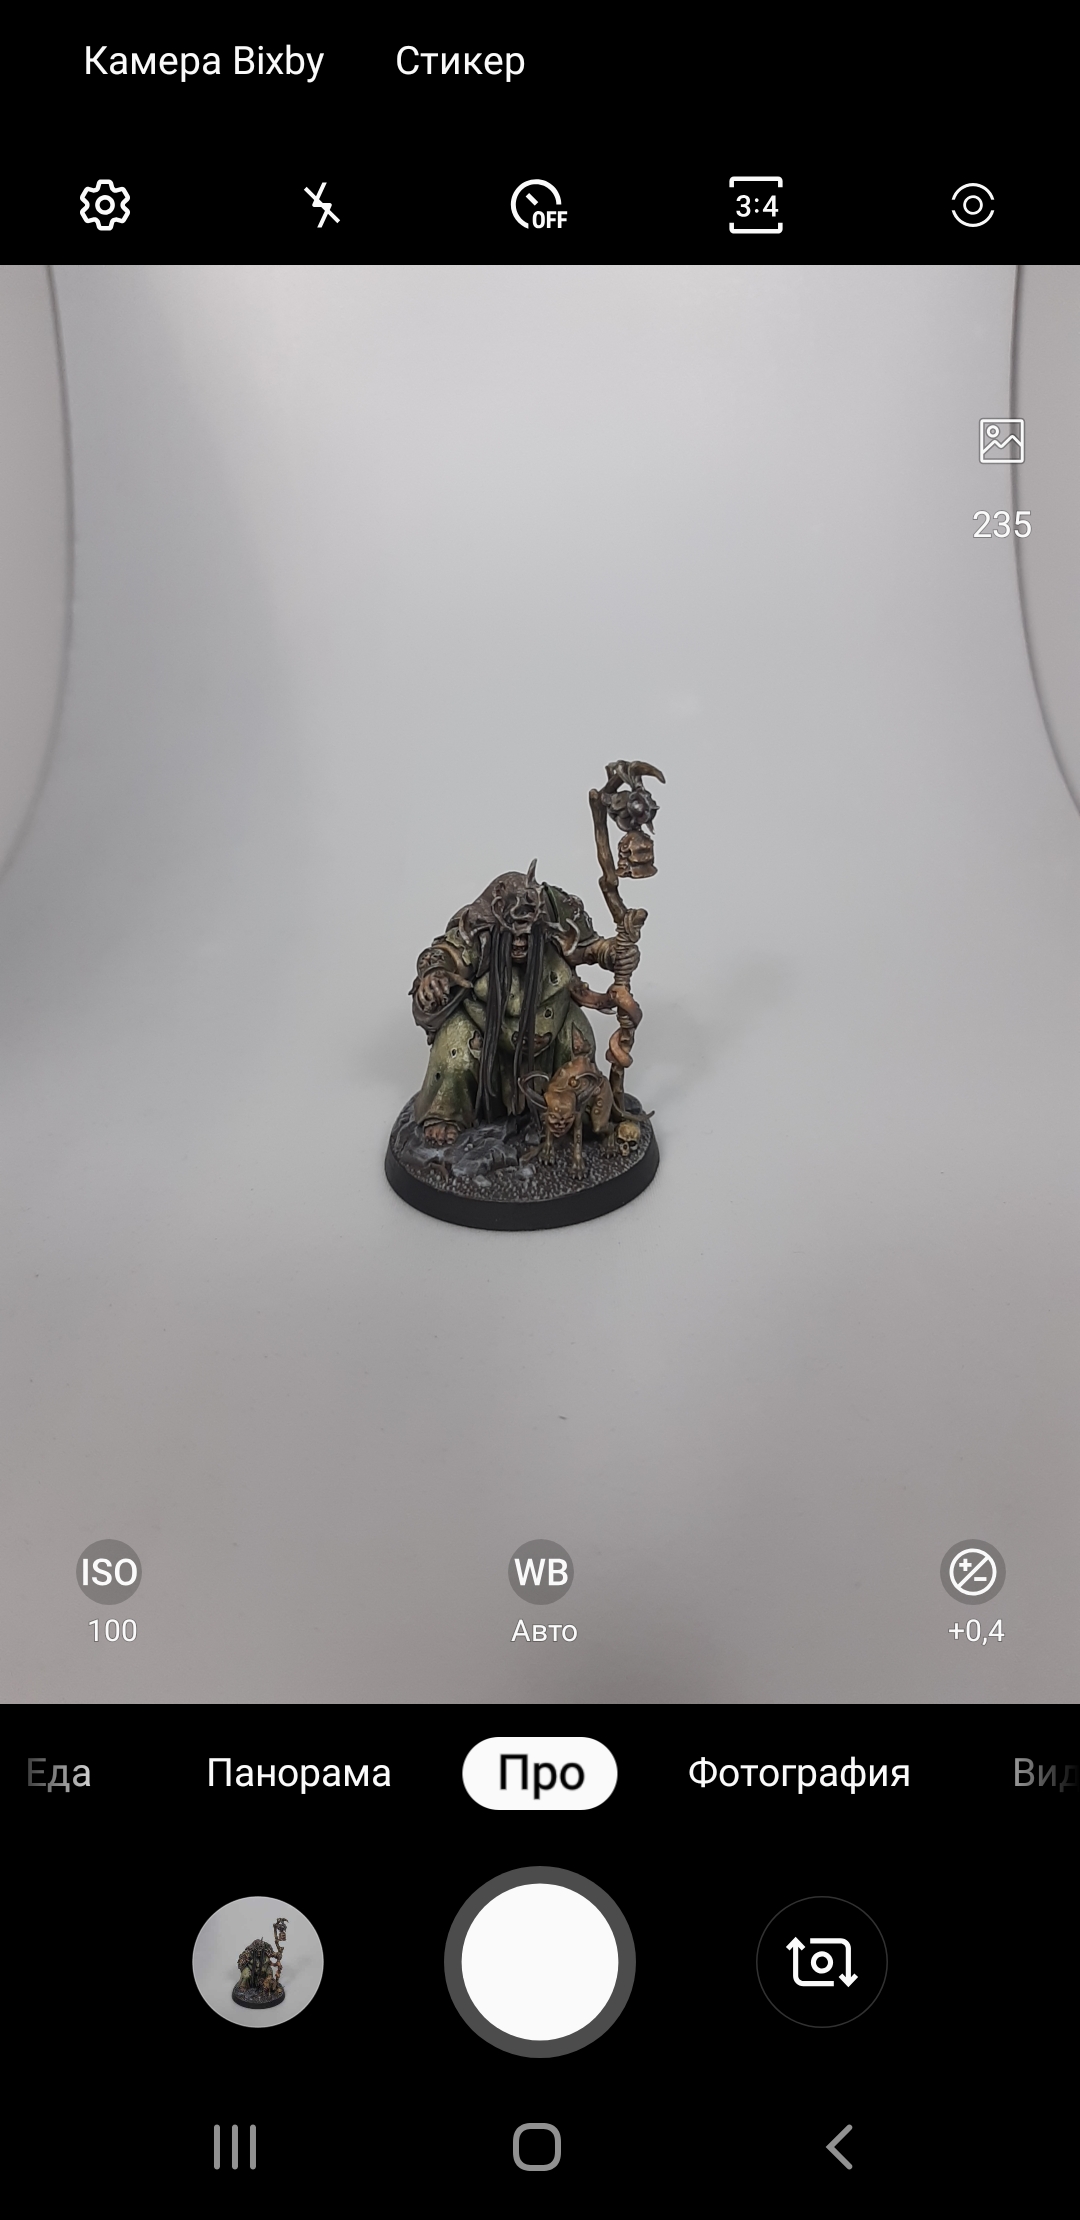
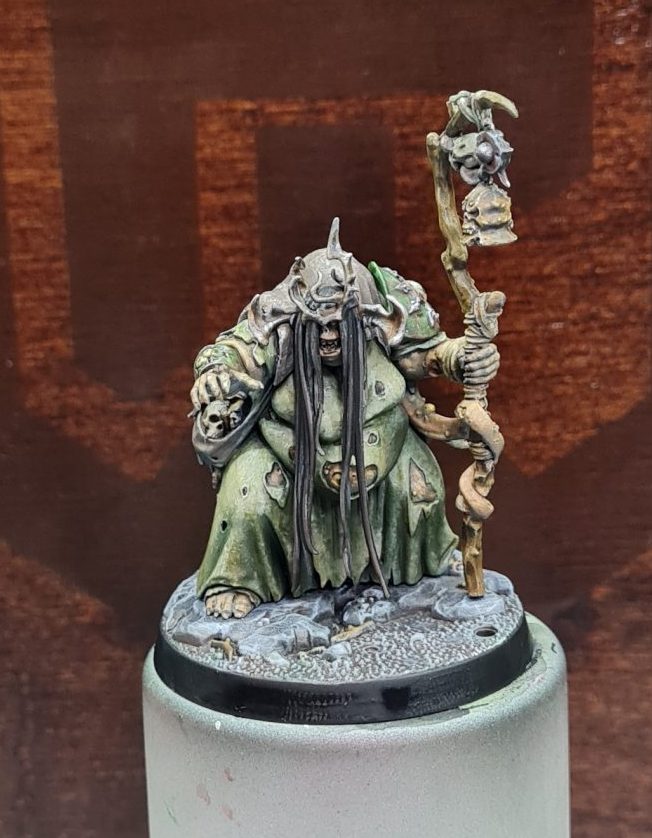
White Background Test
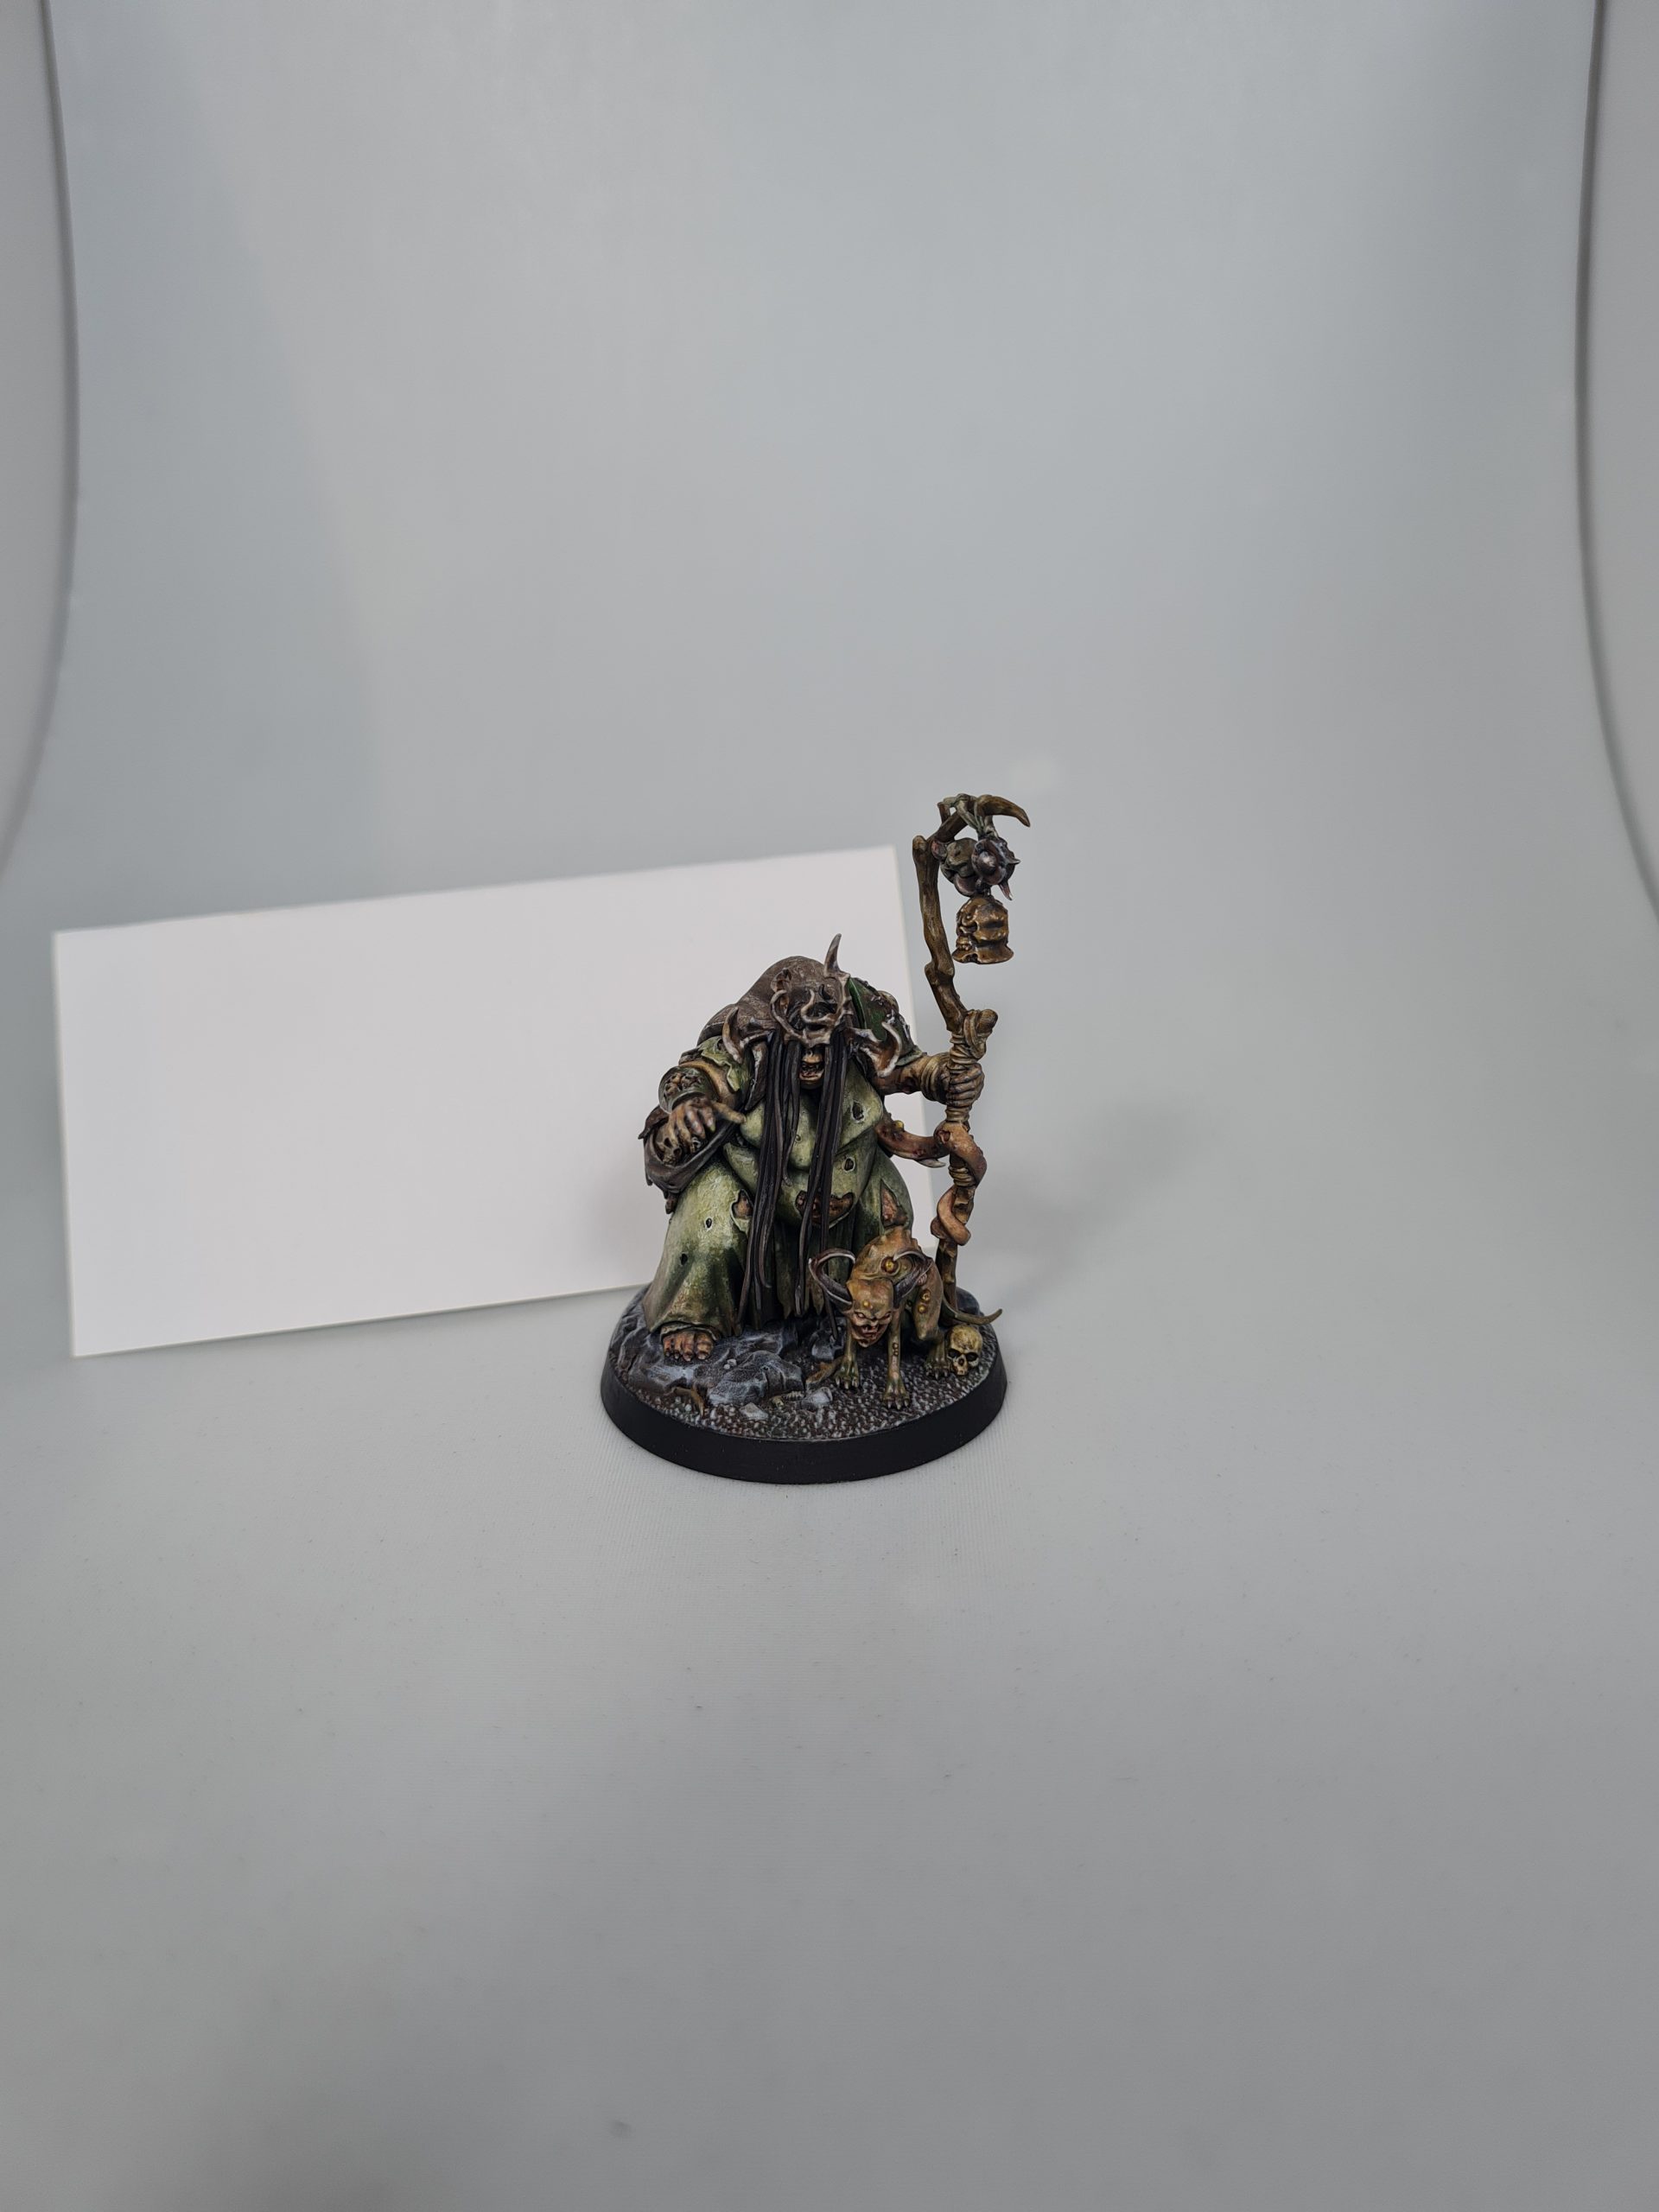
Using a lighter background wasn’t much different from using a dark one. Just like with black background, we used a piece of white paper to adjust brightness. As you can see the background used is in an off-white color.
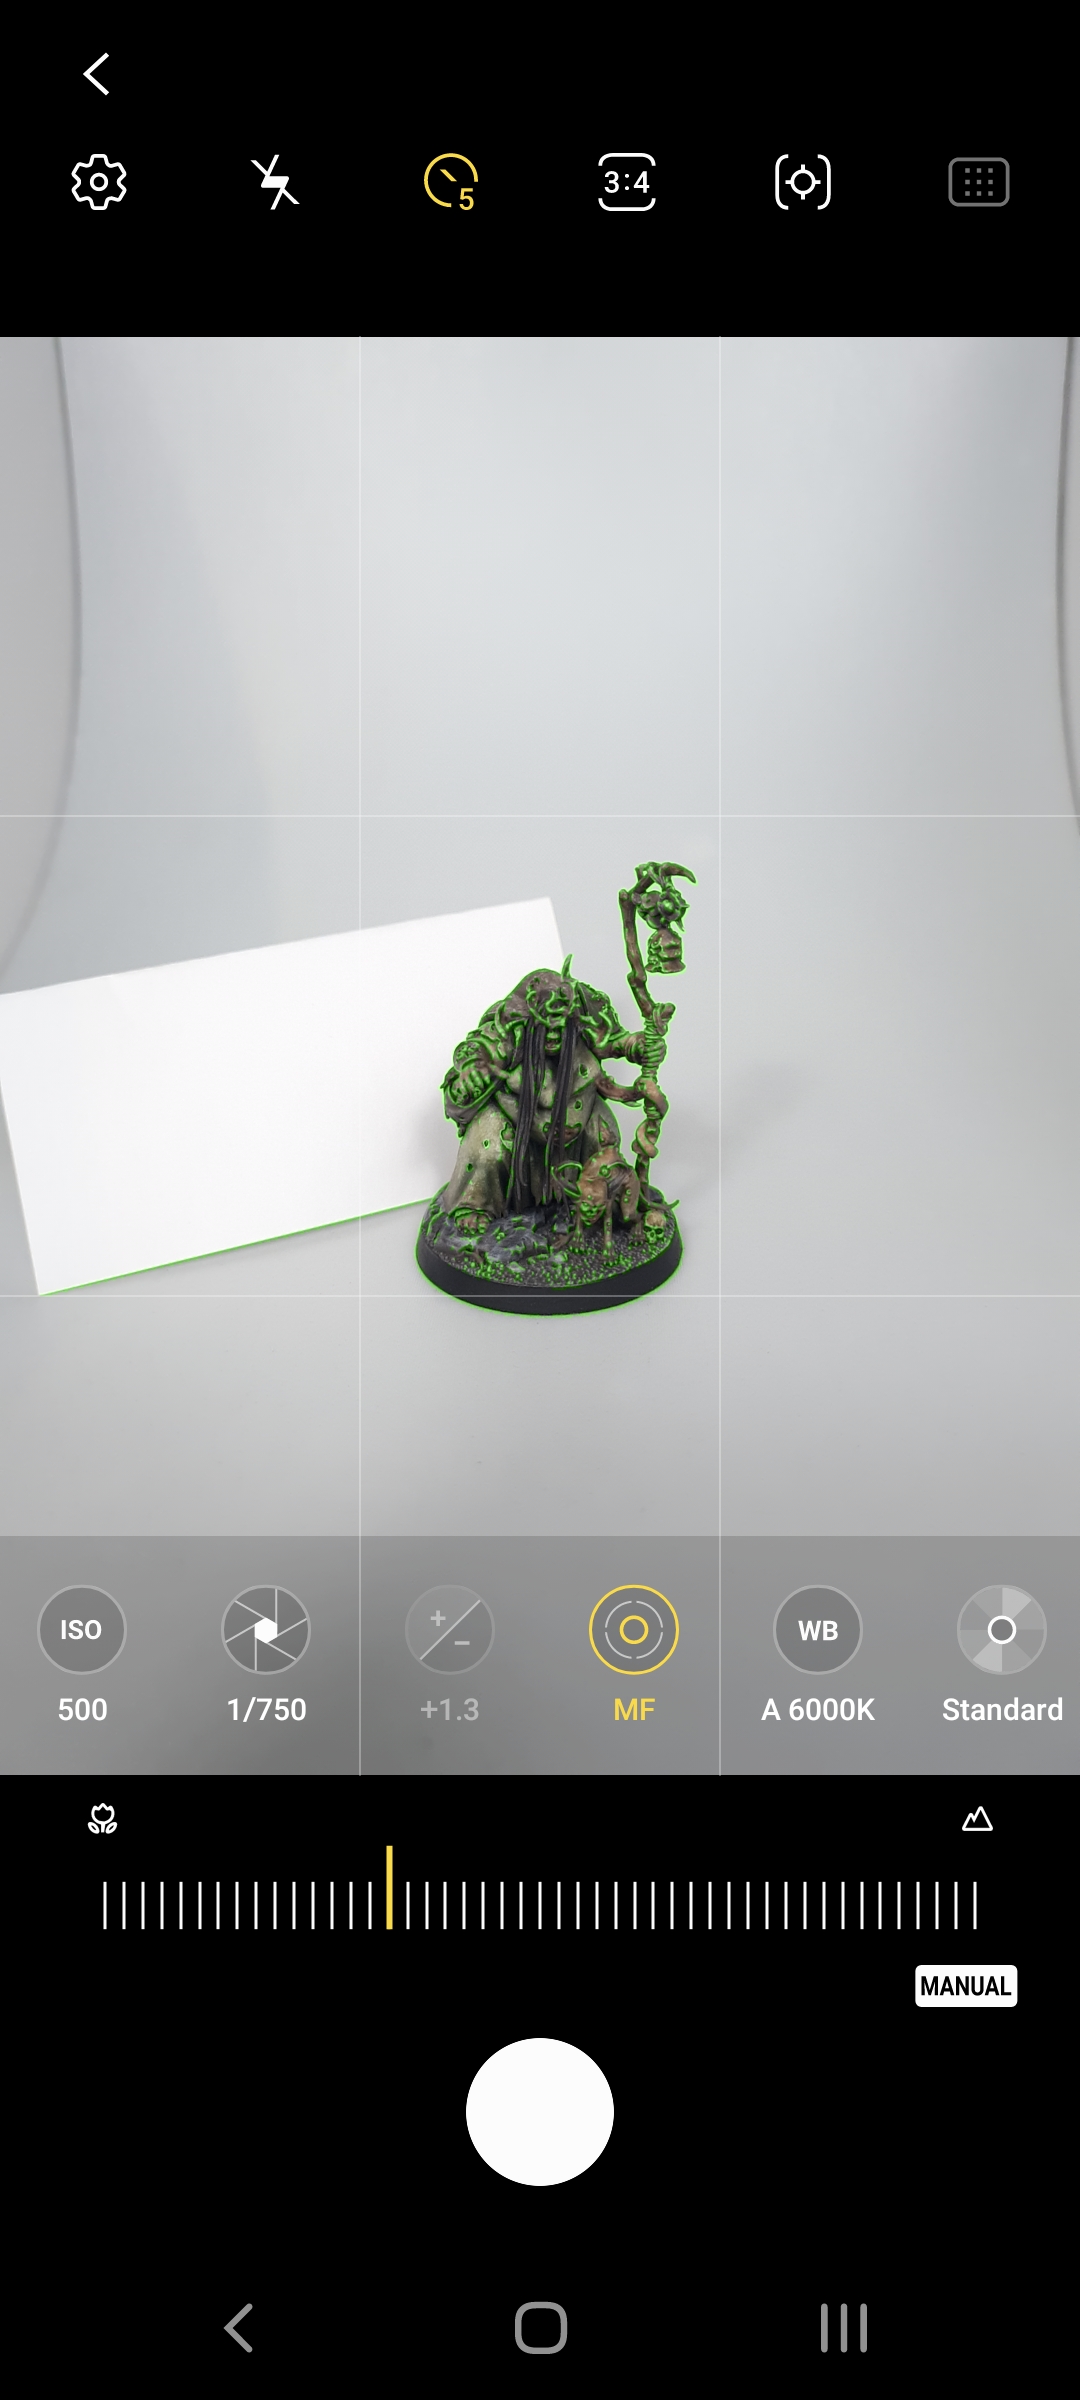
As an extra step, I used manual focus in PRO mode. My camera highlights areas in focus. So this step was fast and easy. I recommend zooming in when adjusting focus. It will make it easier to see that details are in focus.
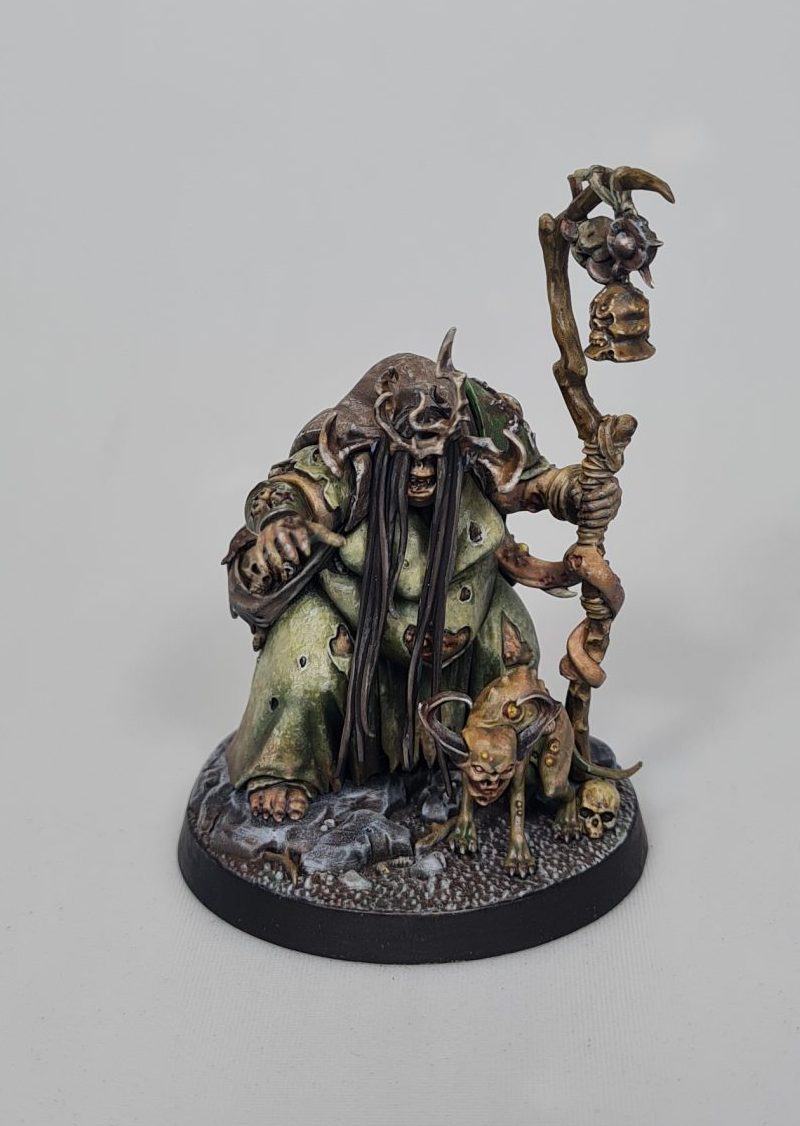
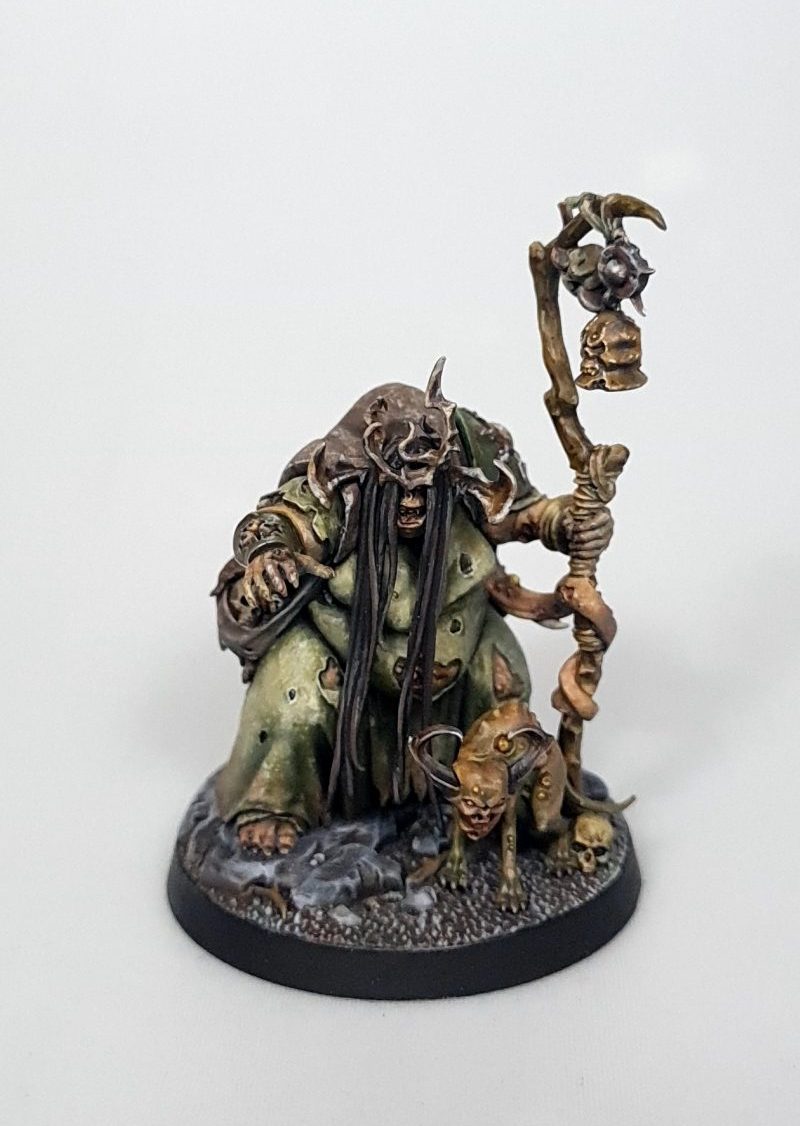
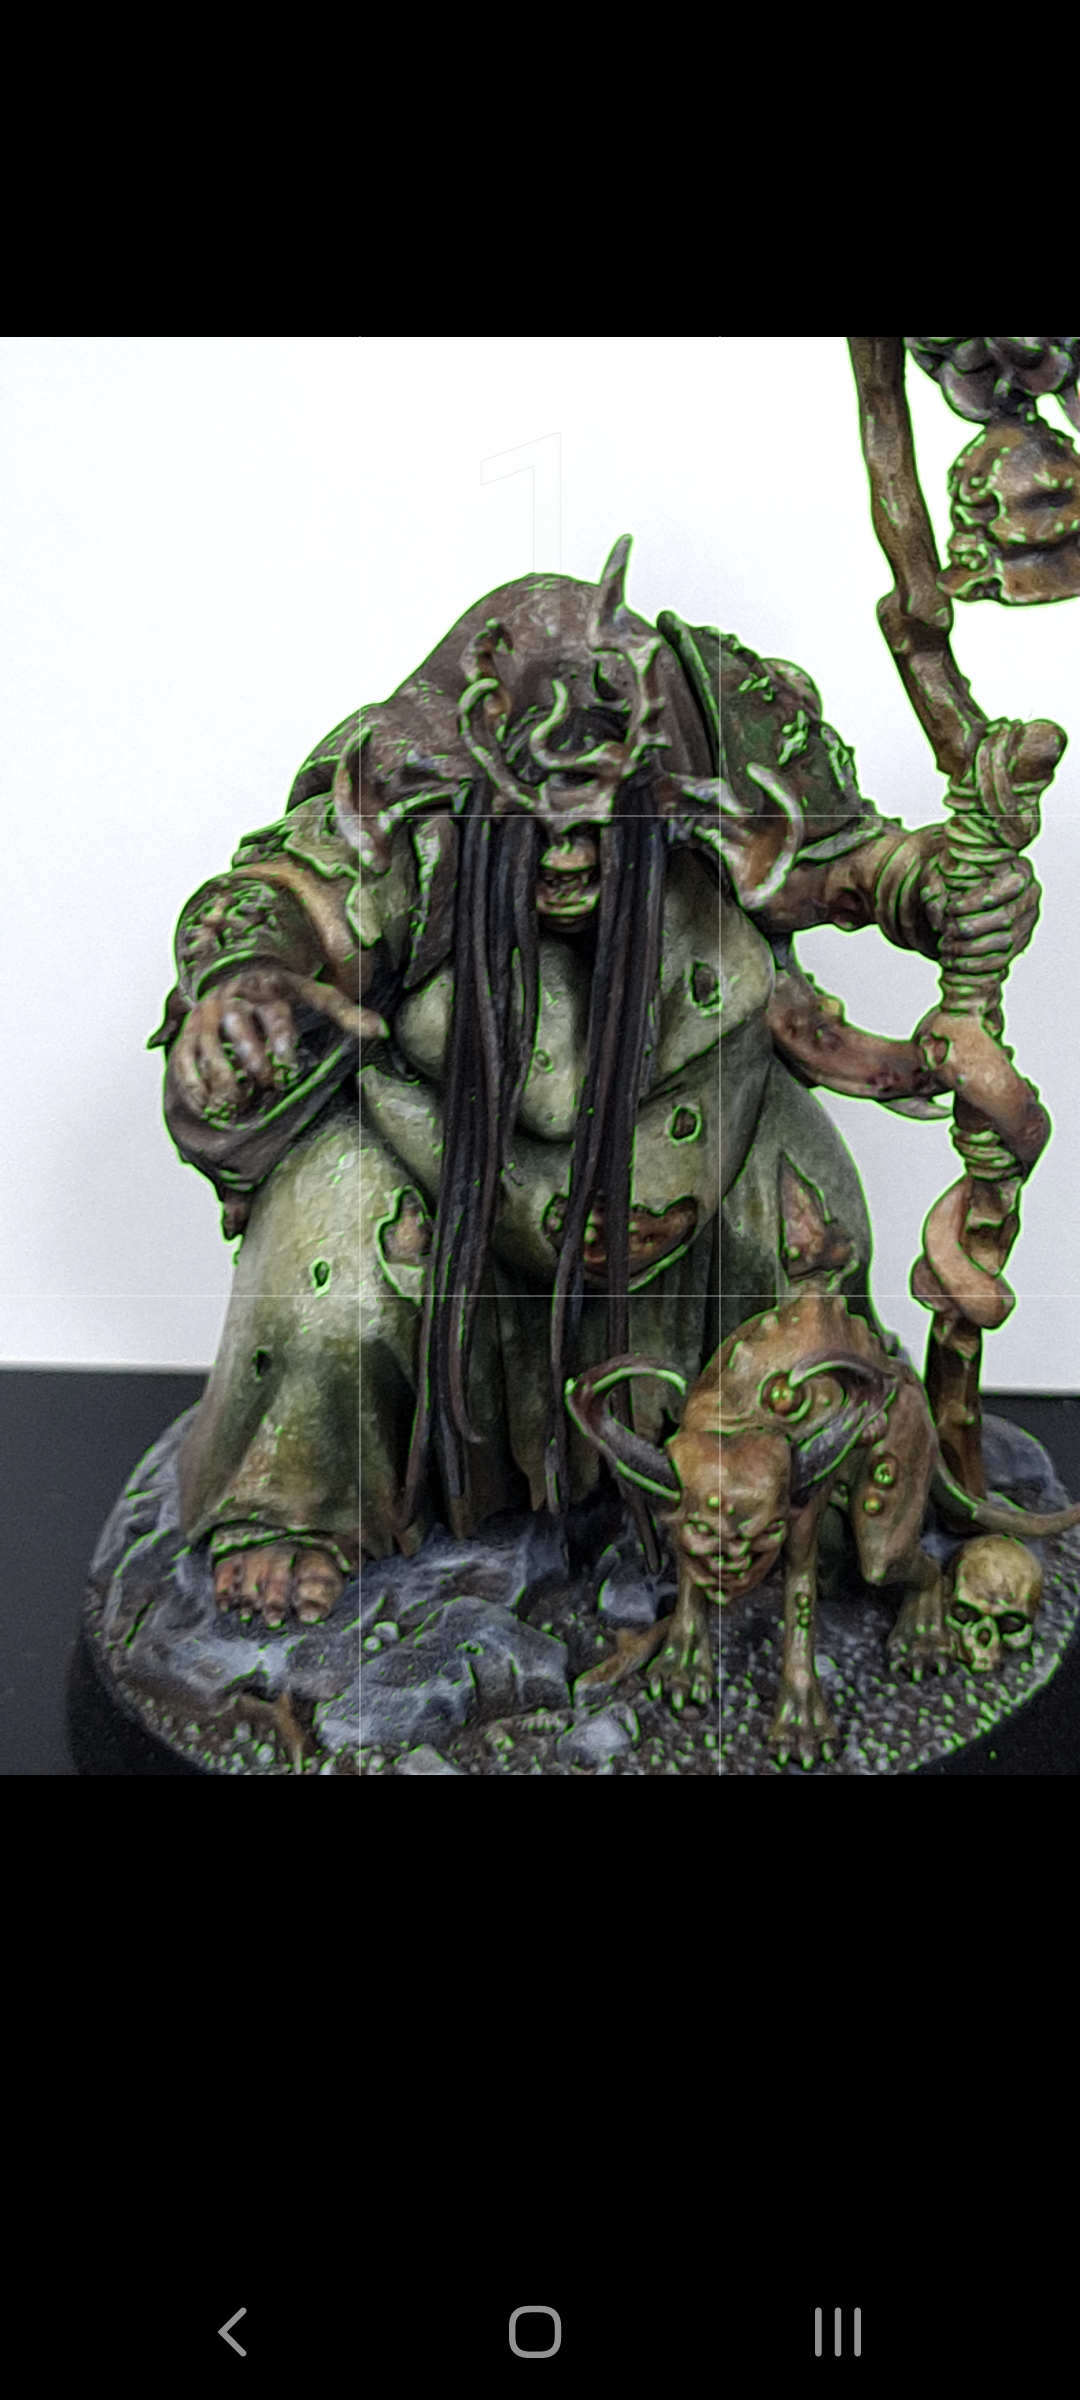
Pictures in auto and pro mode look very similar. However, default settings did a better job this time. If you look at the lower part of the model in pro mode, you can see that it’s slightly out of focus. The colors are bright. Both images can be adjusted in photoshop, but in the case of light background, default settings do a good enough job for miniature photography.
Testing With Another Phone

For our next test, we used a 2018 Samsung A8. This phone’s camera compares to a budget or mid-range device. The functionality is cut compared to a 2020 or 2021 device.
Auto Mode
Results for default settings are similar to our first test. Both phones did better when using a white background. Both phones had issues when using a dark background.
Pro Mode
Unlike a newer device, this phone does not have a shutter speed setting. This limits our option in terms of exposure control. Both images were adjusted using a piece of paper. When using a dark background I couldn’t adjust it exactly to my liking. Exposure was set to a minimum and that wasn’t enough. In hindsight dimming the lights would have improved dark background images.

Comparing two images we get similar results to our first test. PRO mode did better on a dark background. While having a less noticeable impact with a light background. The results are decent for a device we used.
However, I would adjust them further in photoshop.
Conclusions
In conclusion, around 50% of a good photo depends on having a proper setup. The other half depends on your camera and skill. Your background and subject have a great effect on the final results.
We were able to confirm the following:
- Proper setup is important
- Always use a piece of white paper to adjust your camera.
- Light background works better with phone cameras, even at default settings.
- Dark background works best with PRO mode.
- Older devices have a harder time working with dark backgrounds
- PRO mode results depend on your skills
- Practice your photos.
Miniature Photography is a skill. Just like with miniature painting, you can improve by practicing. I managed to greatly improve my photos just by taking time, practicing, and comparing results. I advise anyone who wants to improve to do the same. Take some images. Play around with the lights and setup. Change some settings to see if they work for you. Analyze your photos and see what can be improved.
This is the result of my journey into the world of miniature photography. The difference is quite obvious. By following simple rules and making observations, I managed to drastically improve my photos to a level when I’m satisfied. I hope these articles were as helpful to you as they were to me. In the next article, we will cover how I edit images in photoshop.