Photography
How to edit photos of miniatures
Nov
How to edit photos of miniatures
By Roman of Frontier Wargaming
Just like everything, making good photos takes practice and experience. Often photos don’t turn out the way want them to. In those cases, we can fix them with a little bit of photoshop magic. We already covered how to capture a good photo in our previous article. This time we will take those photos to photoshop and cover the basic steps anyone can do to take their photos to the next level.
Why edit photos?
The answer is simple. Not everyone can take a good photo straight away. Unwanted things can get into the frame, photos can be overexposed, colors can shift, the background can be messy, and so on. In the case of miniatures, we can narrow it down to 4 major steps.
- Cropping the image
- Fixing brightness/exposure
- Adjusting colors
- Fixing the background.
These are the steps I did on most images I worked with. These steps can be done in most image editing software (gimp, paint, windows/macOS inbuild image editors.)
How to crop an image?

1)Open your image and press the crop symbol.
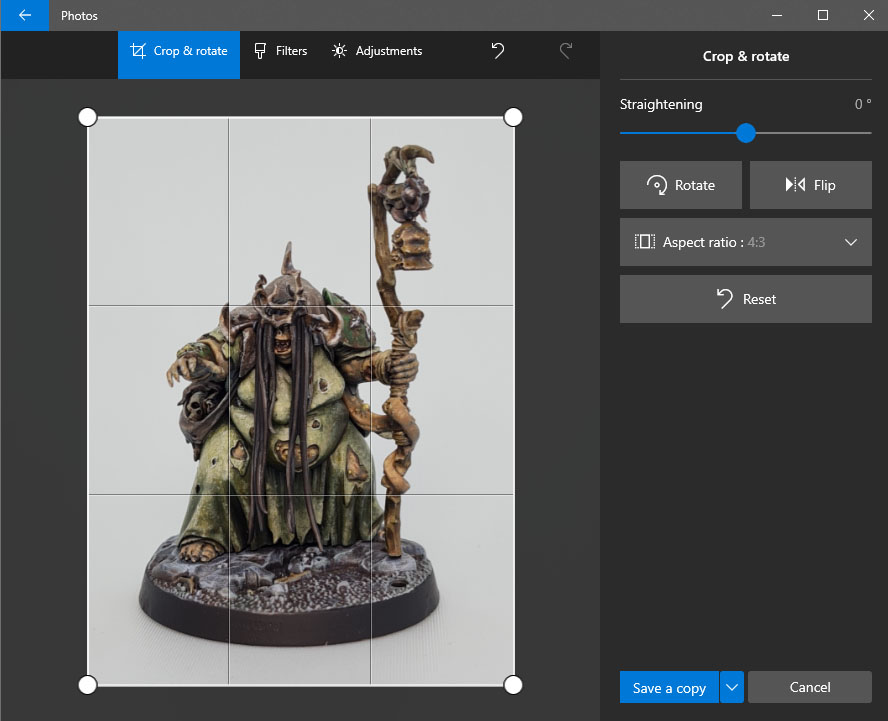
2) Adjust the crop area. Pay attention to the grid. Use the middle rectangle as a focal point.
3) Save and crop.
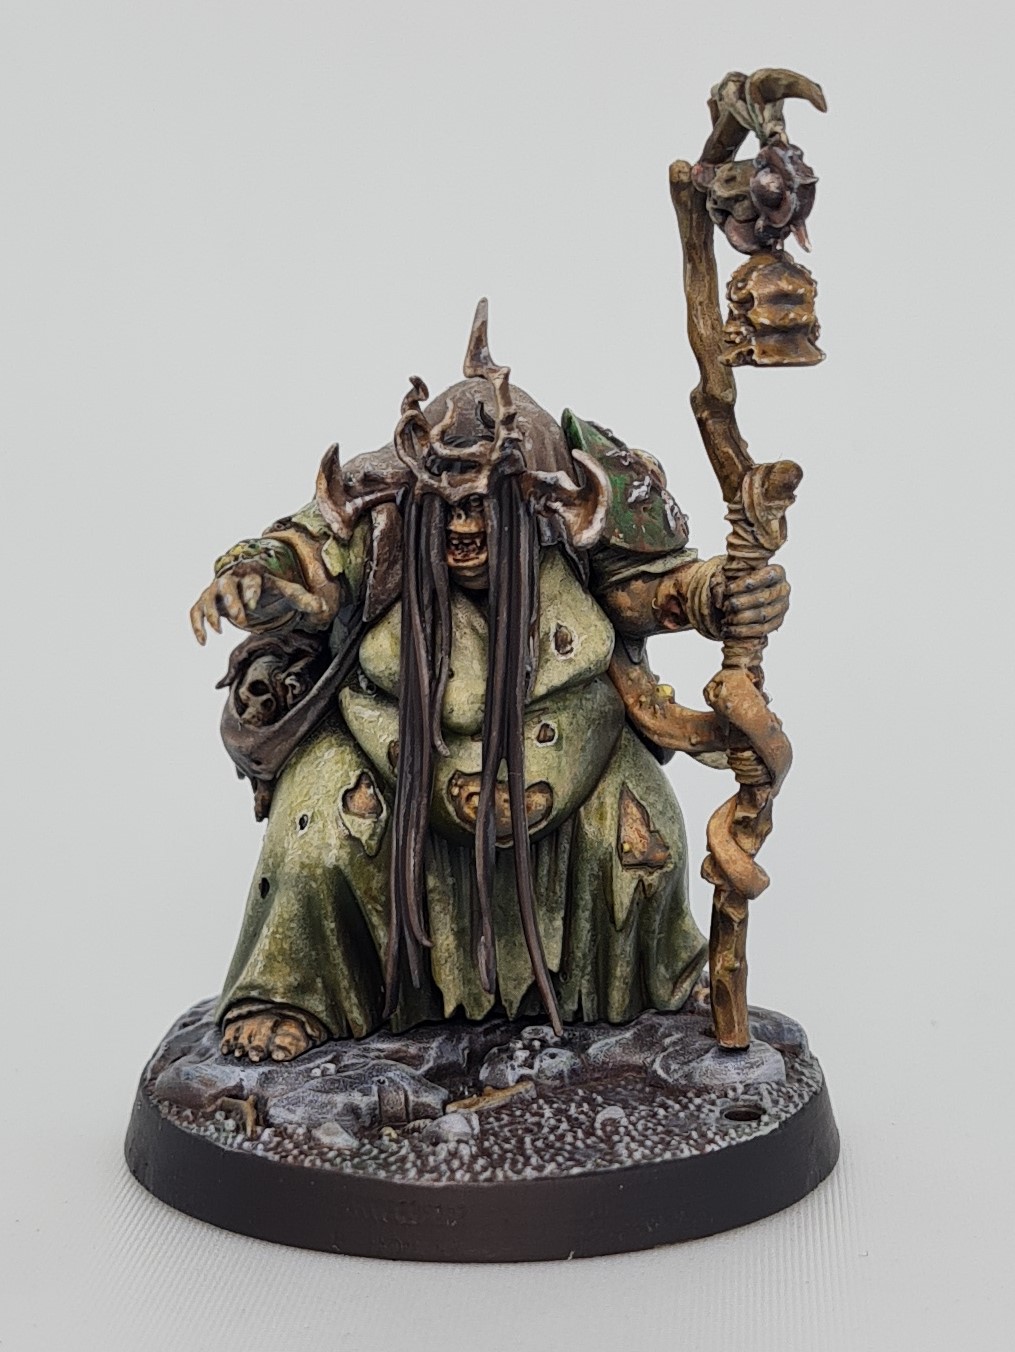
After cropping the model can be seen clearly. Now there’s no need to zoom in to view the paint job. This will be readable even as a small preview image.
Fixing brightness and contrast.
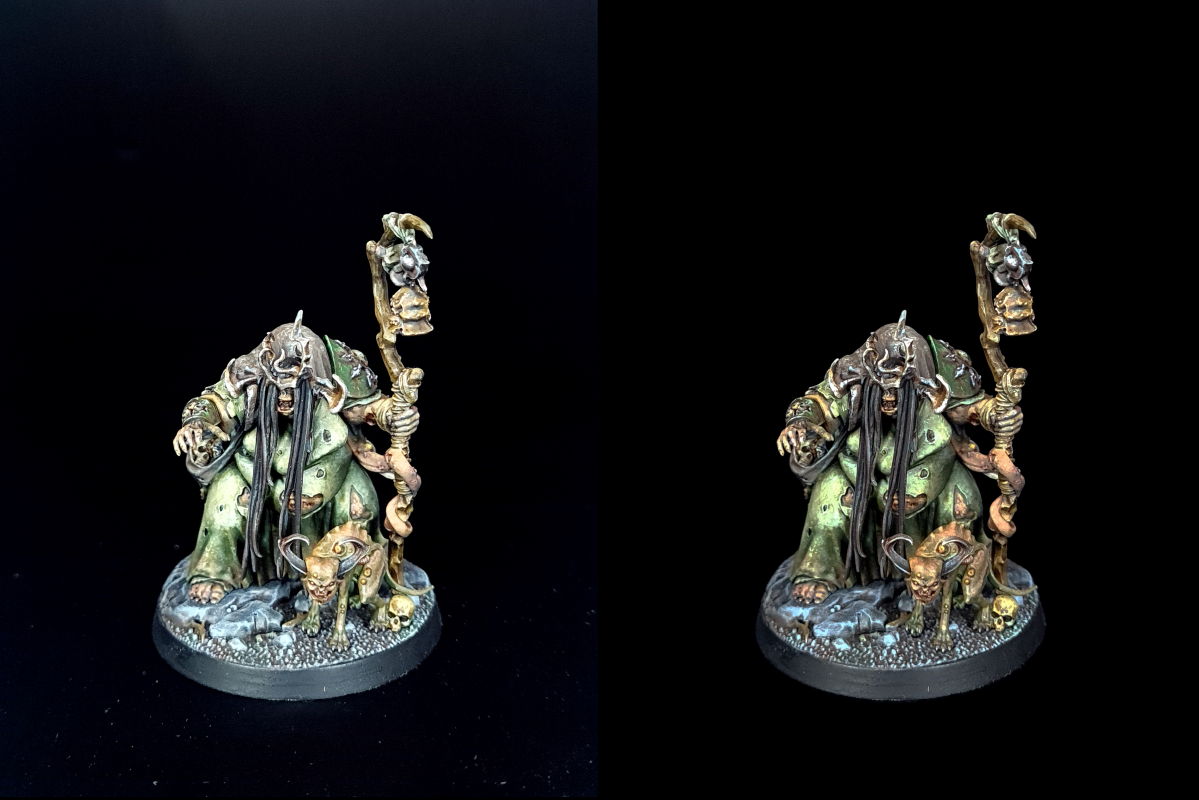
If your image is too bright (overexposed) or too dark (underexposed) this step can fix it. You can tell that the image is overexposed if the colors look too light. For our example, we will use an overexposed image.
1) Load your image into your software of choice.

2) Open brightness and contrast settings.
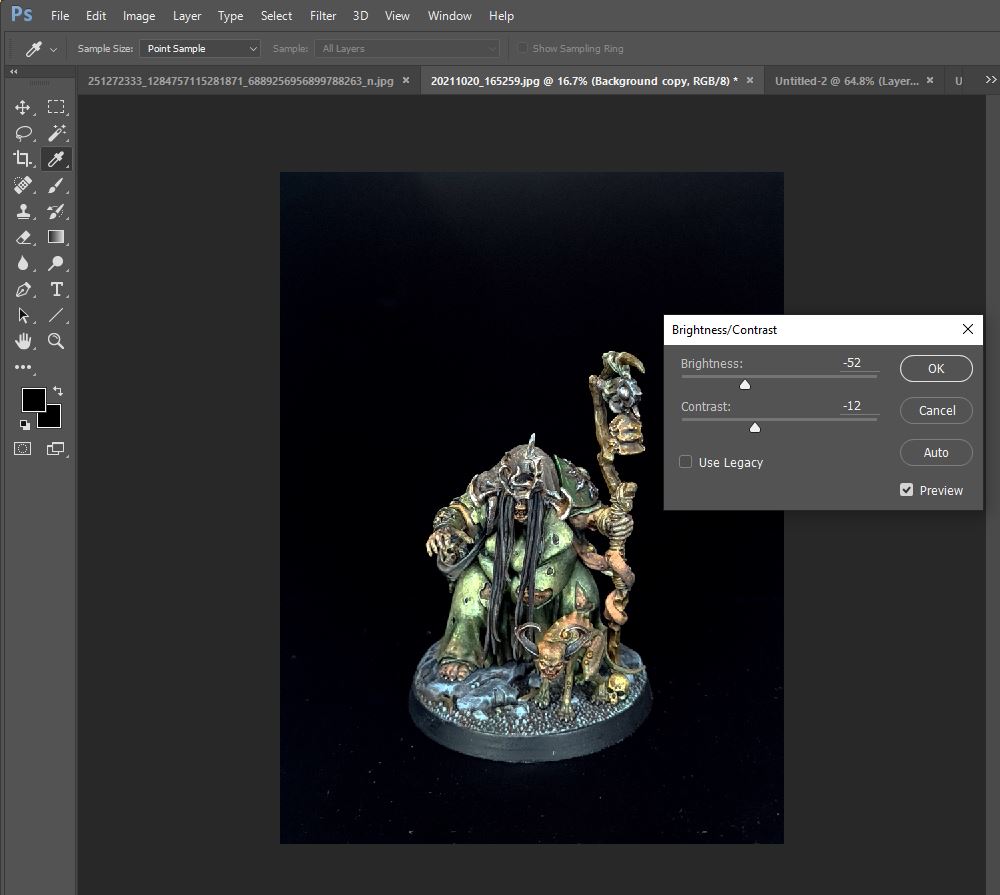
3) First adjust the brightness slider. second, adjust the contrast so the image isn’t as sharp on the eyes. In our case, we lowered both. If the image was too dark we would do the opposite.

4) As you can see the image doesn’t appear to be that bright anymore. The colors are much closer to real life.
Fixing The Colors
Images can have shifted colors due to incorrect camera settings and lighting. In most cases, colors shift into yellow or blue territory due to the lights used. When fixing color moderation is key. If you overdo just one slider your image can shift into purple, green, or even blue tone. If you don’t see any color issues on your image this step can be skipped. The example we use has a bluer color hue. It’s especially noticeable on the black background. Since our photo is shifted to a cold, blue color we can fix it by adding more warm tones like yellow or red.

1) Open the color balance tab.

2) Adjust the color sliders. It’s best to be subtle with this step, don’t add more than a couple of percent at a time.

3) After colors were corrected the right image is now a warmer tone. The colors are much more vibrant and closer to the actual colors on the model.
FIxing the background
If your background is messy, uneven, or has unwanted shade it can distract the viewer from the model. This is why tidying up the background will help leave a more positive impression. In our example dust is clearly visible and the backdrop is unevenly lit. We want to achieve a solid black background.
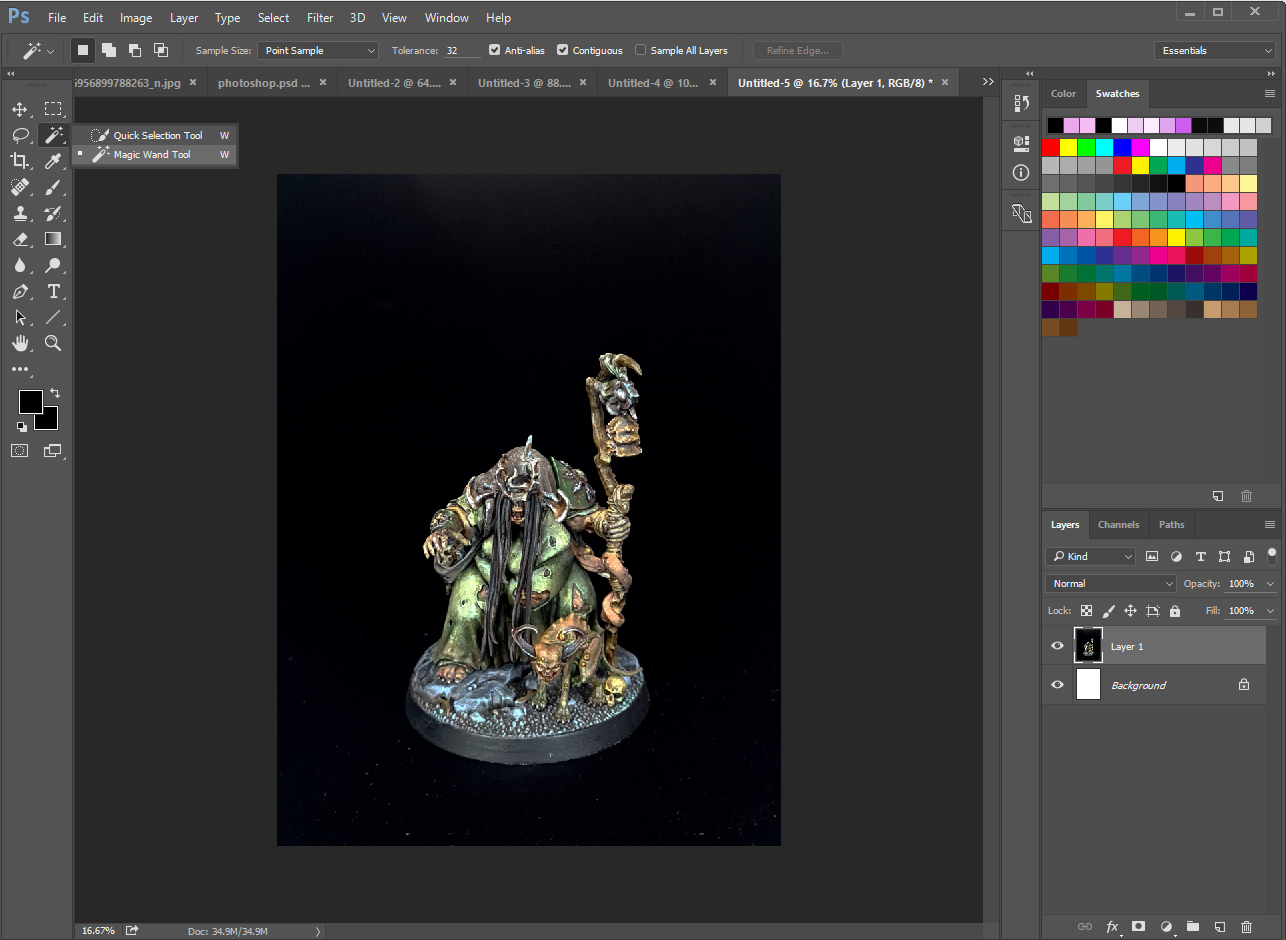
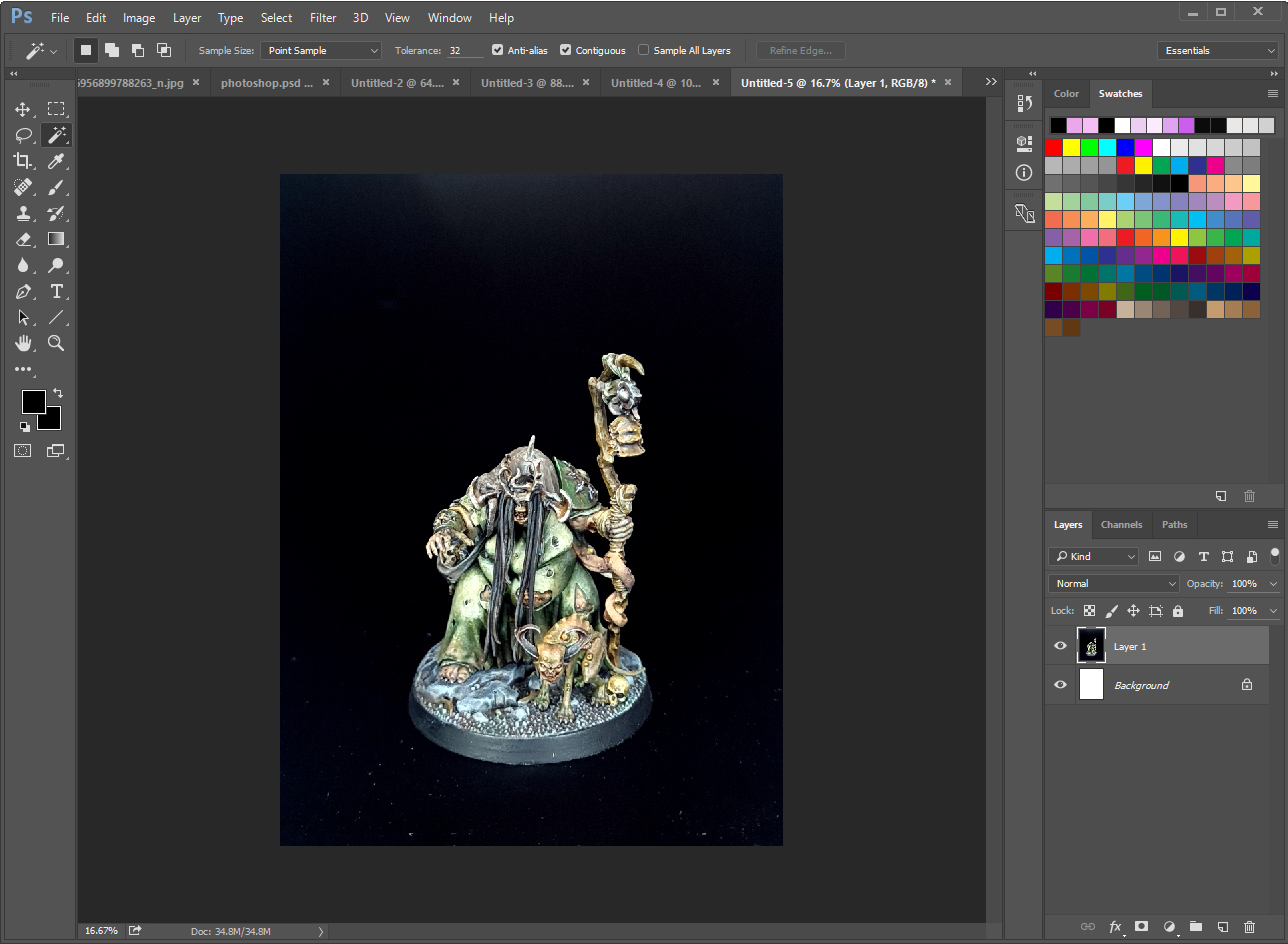
1) Pick the auto-selection tool to quickly select the background
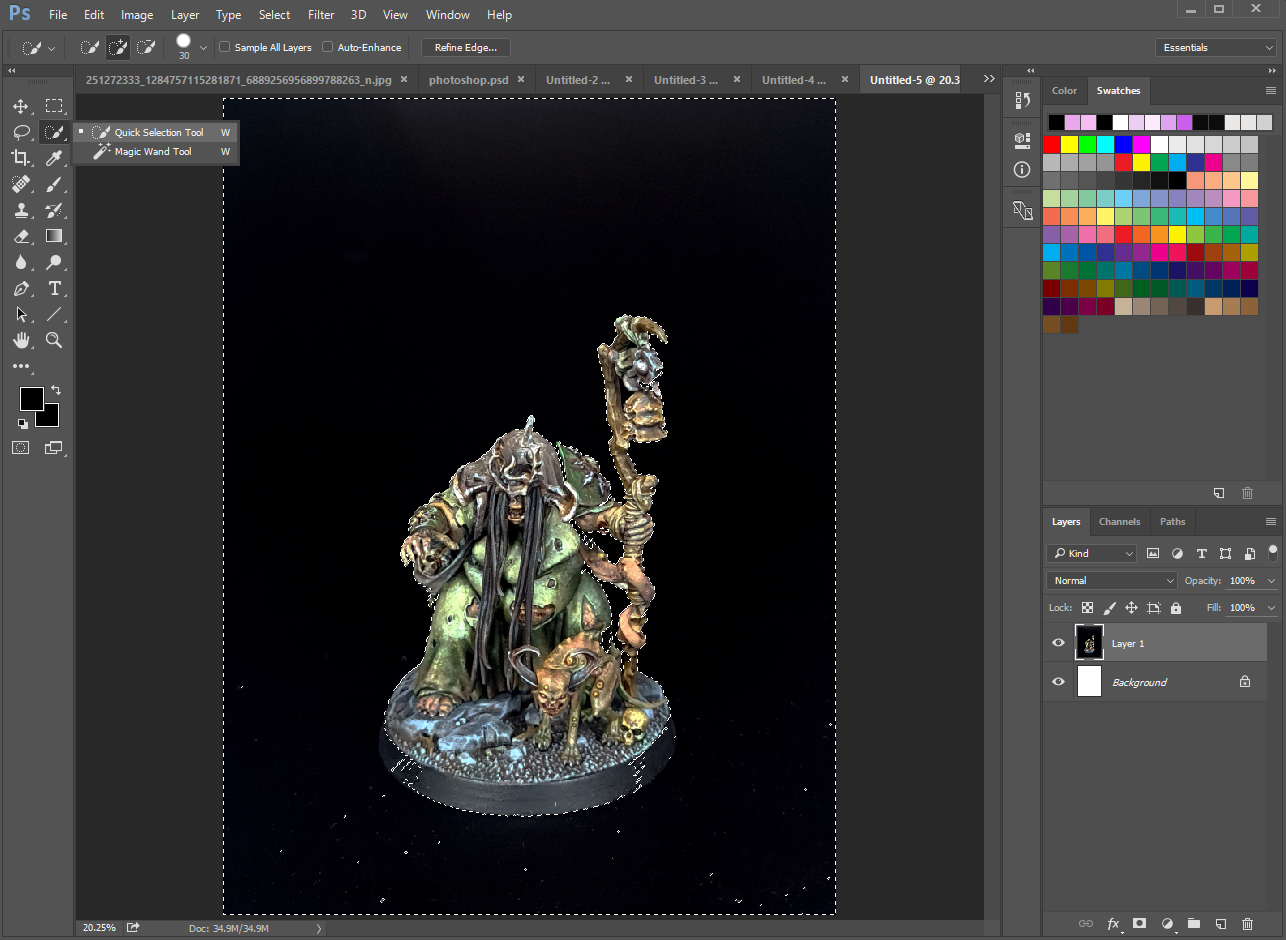
2) Correct the selected areas. Auto-select did a good job in selecting what we want. However, some parts of the model also got selected. This is why It’s important to go over the selected area and fix any errors that might occur.

3) Choose a large airbrush and color the selected area.

4) Now there’s nothing distracting the viewer from the model. This photo can be used for social media, personal galleries, or blogs.

5) As a bonus alternative you can replace the background during this step. That is the reason why we focused most of our efforts on area selection. While not necessary, this step can add a lot to your model. For example, you can add a battlefield background to a space marine. Or add a thematic forest background to your forest elf. Or in our case, take a pestilent witch to bikini bottom.
Conclusions

We went over the most common issues encountered in miniature photography and how to fix them. Images tend to have issues with brightness and contrast, That is why cropping images and adjusting brightness/contrast will be enough in most cases. Those skills don’t require years of practice to acquire. In fact, I learned everything I wrote and showed here in a span of a month and a half with just a phone and a laptop. My biggest advice for you would be to practice and ask for feedback. So, go out there, take some photos, and show your models to the world in all of their glory.