Miniature Painting Challenge, MPC #007
Creating a Diorama Pt. 2 – 5 steps to Marble Effect

Feb
Welcome to the second installment of our “Creating a Diorama” series. In this entry, we will be sharing how we were able to achieve a marble effect on the gates of our diorama. It also works exceptionally well on large models like the imperial knight, Baneblade, or even a simple tile base. The best part is that it’s relatively easy to achieve.
Reference
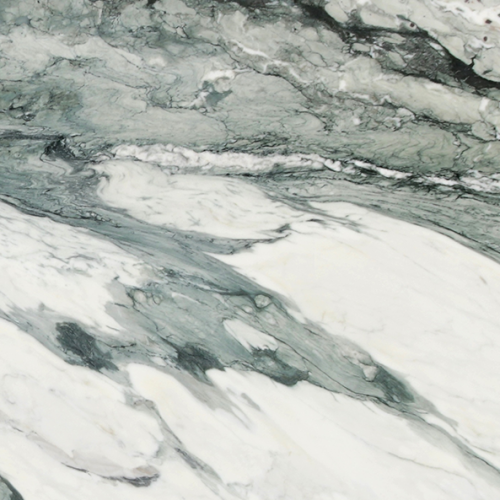
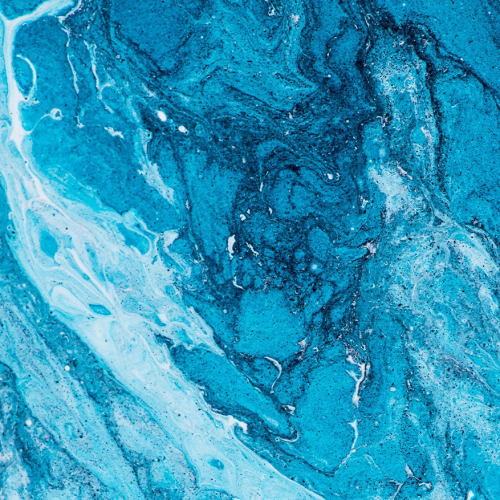

The best thing about marble is that it comes in a wide range of patterns and color combinations, including green, blue, red, and even turquoise with a hint of gold. You can almost certainly find a match for any model you’re painting. If you’re looking for something with more texture, consider granite It’s a different type of stone, but you can achieve it using the steps below. It’s best to gather several reference images that match your vision and try to replicate them. You don’t have to copy your reference exactly, but if someone can look at your work and say, “Yes, that’s marble,” then you’ve done a great job.
Tools, Materials, and Paints
To achieve our desired effect, we utilized an airbrush, wet wipes, and a sponge. If you’re aiming to turn your marble into granite, you may also need an old brush for stippling.
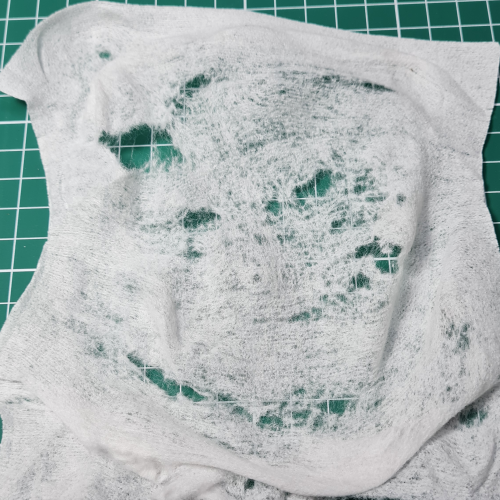
Wet wipes are crucial for creating the distinctive patterns that marble is known for. To prepare them, you’ll need to dry them out first. Once dry, take the wipe and begin pulling and stretching it on its side. This will create a random hole pattern that we’ll use for airbrushing later. Be careful not to rip the wipe completely. If you notice dust and lint shedding from the towel, moisten it slightly before use.
Since marble and granite come in various colors, you can use any color combinations you desire. It’s best to use ranges such as Citadel Contrast paints, Vallejo Xpress Color, or Army Painter speed paints for your primary color. These types of paint allow you to create a smooth gradient with a variation. For our particular project, we used a white primer, Black ink by Liquitex, Vallejo Dead White, and Army Painter Plasmatic bolt. Only 4 colors
Steps
Now that we’ve finished our preparations and covered the necessary theory, it’s time to begin painting. This can be accomplished quickly in just five steps. For example, we’ll use a single tile, but it’s possible to work on multiple tiles simultaneously.
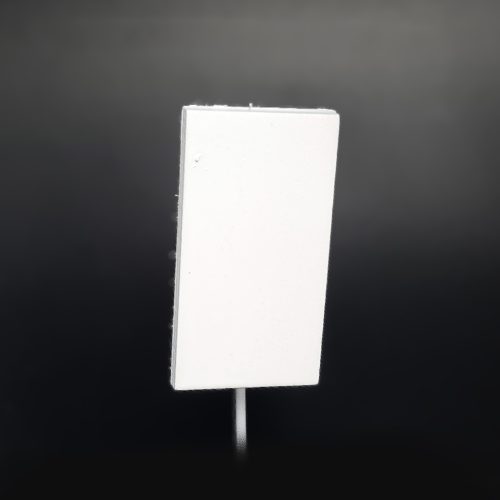
- Prime it white

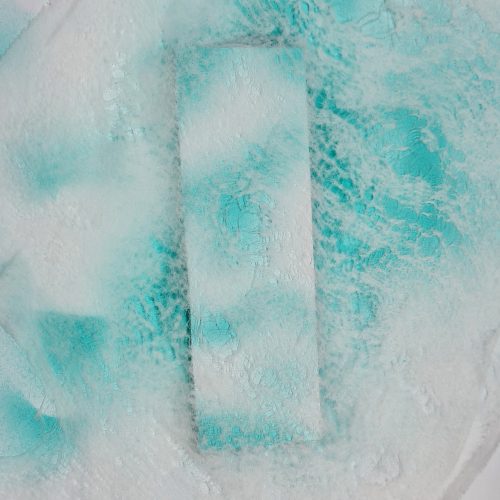
- Spray Army Painter Plasmatic Bolt in a random pattern. Wait for it to dry.
- Cover your piece with a wet wipe prepared earlier.
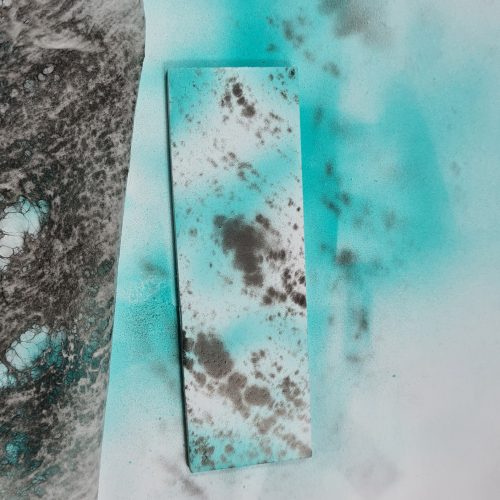
- Spray black ink through it. Don’t cover your piece completely, we still want a transition.
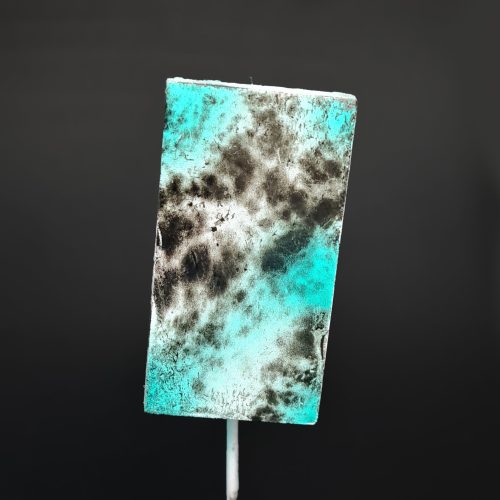
another example piece
original example piece - Lightly stipple Vallejo Dead White with a sponge.

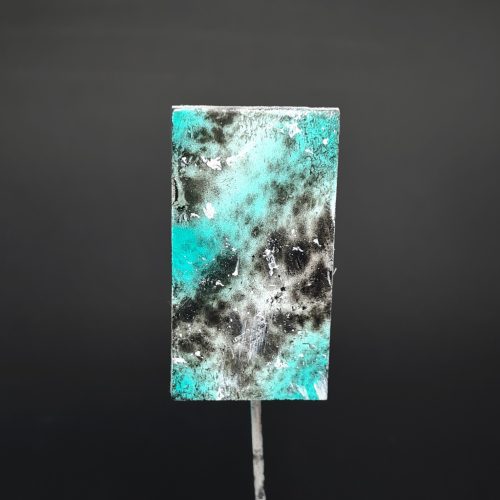
With this, our basic marble effect is done. At this point, we can add weathering to help it blend in with the environment or incorporate additional details with a brush. The same principles can be applied to paint granite. The only difference is that you’ll need to stipple the color of your choice between the steps mentioned previously. This is an excellent effect to experiment with, offering plenty of room for creativity. By following the same steps, you can create entire tile sets with convincing effects, even if they become obscured by weathering and other diorama elements.
With the backdrop for our diorama mostly finished, we can move on to painting the actual models. Join us next time as we paint a lovestruck Tech-Priest.